I did this thread several years ago at the request of some folks on the NFA forum that wanted to know what to look for when shopping for an M1. It is actually a composite of a couple of threads that I'll combine here and edit out the things that are not pertinent to the topic. If it doesn't quite flow start to finish like a magazine article and skips around a bit, that's why. Lots of info though for present and future M1 owners. Prices quoted are from about 12 years ago, so ignore them.
I also have the M1 trigger job thread and a "how to" on making the M1 shoot better than issue if peeps want to see them.
In this thread, I dug a CMP M1 out of the back of the safe that hasn't had anything done to it. We'll use it as the model of what to look for, how to correct any minor deficiencies, and even how to clean it properly. I'm going to C&P pics from the previous threads where applicable, so if you see a recycled photo, that's why.
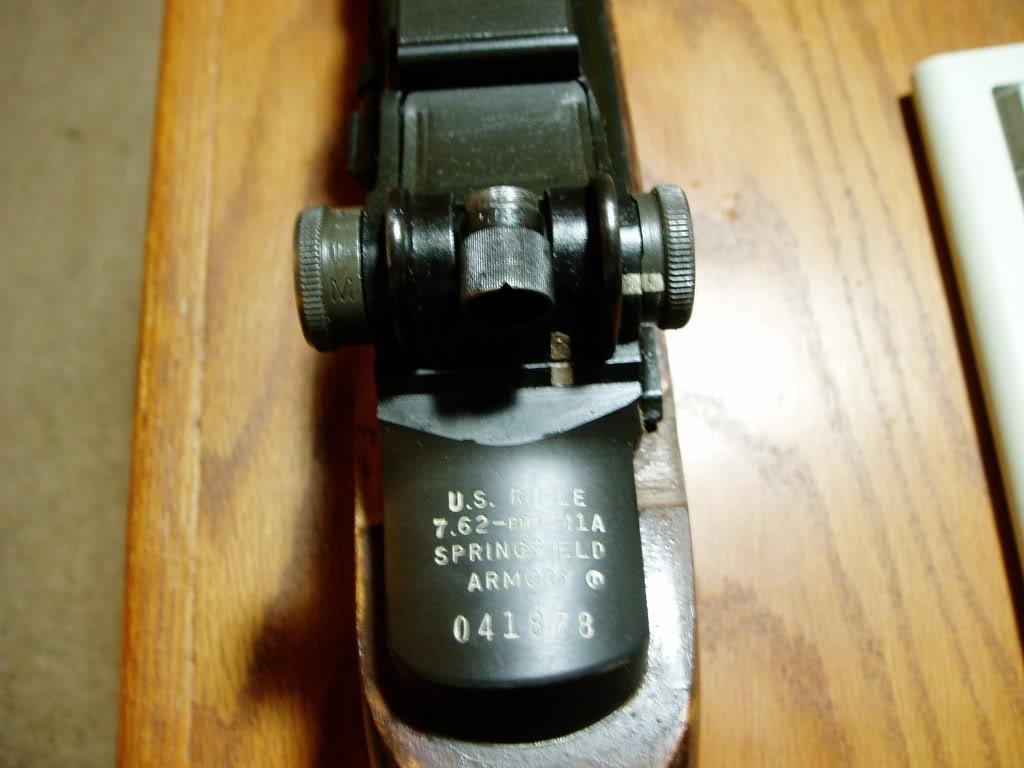
I bought this rifle from CMP back in 1999. Serial number indicates July 1943 manufacture. At this point, CMP still had rifles passed on to them by the US Army when the DCM was dissolved. (This was before the current batches that are US Foreign Aid returns from Greece, Turkey, The Philippines, and elsewhere.)
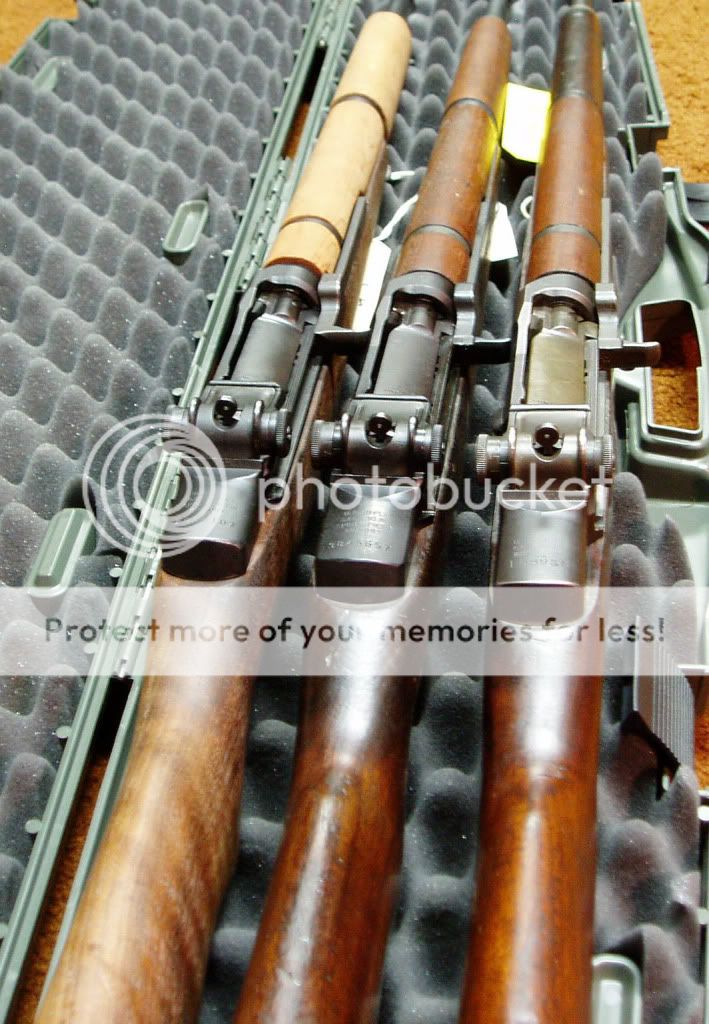
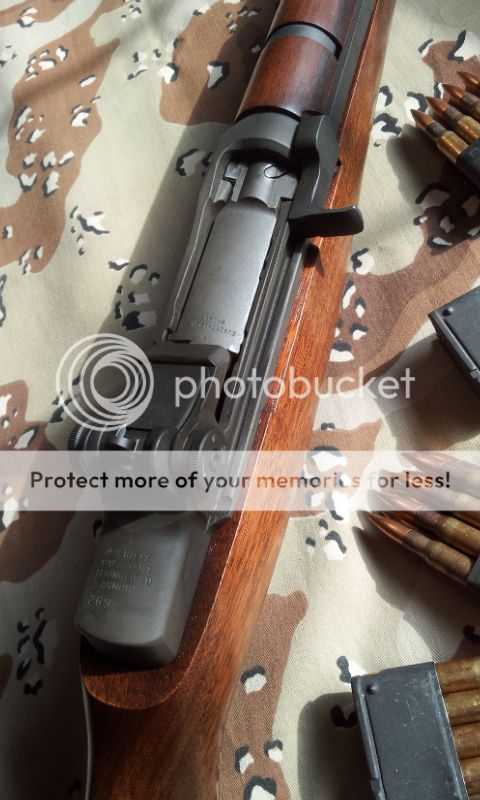
The first thing that strikes you about the rifle is the heel of the receiver is much darker than the rest of the receiver.
In 1943, Springfield Armory had some heat treat issues resulting in the heel of the receiver cracking when struck by the bolt during recoil. Until they figured out what to tweak, the temporary fix was to dunk the heel in a pot of molten lead to draw out some of the hardness. Parkerizing comes out different shades depending on the hardness. Thus, we have a two tone receiver.
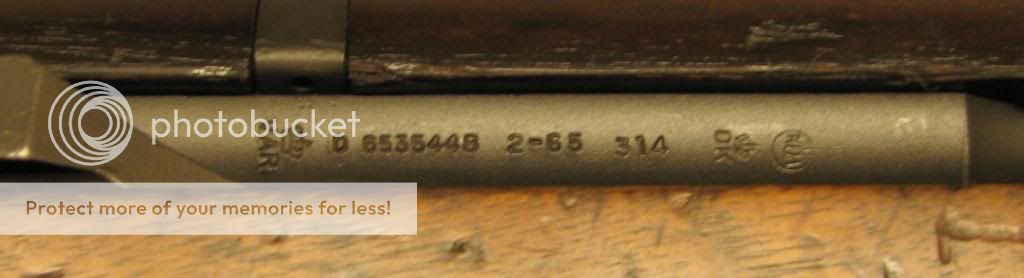
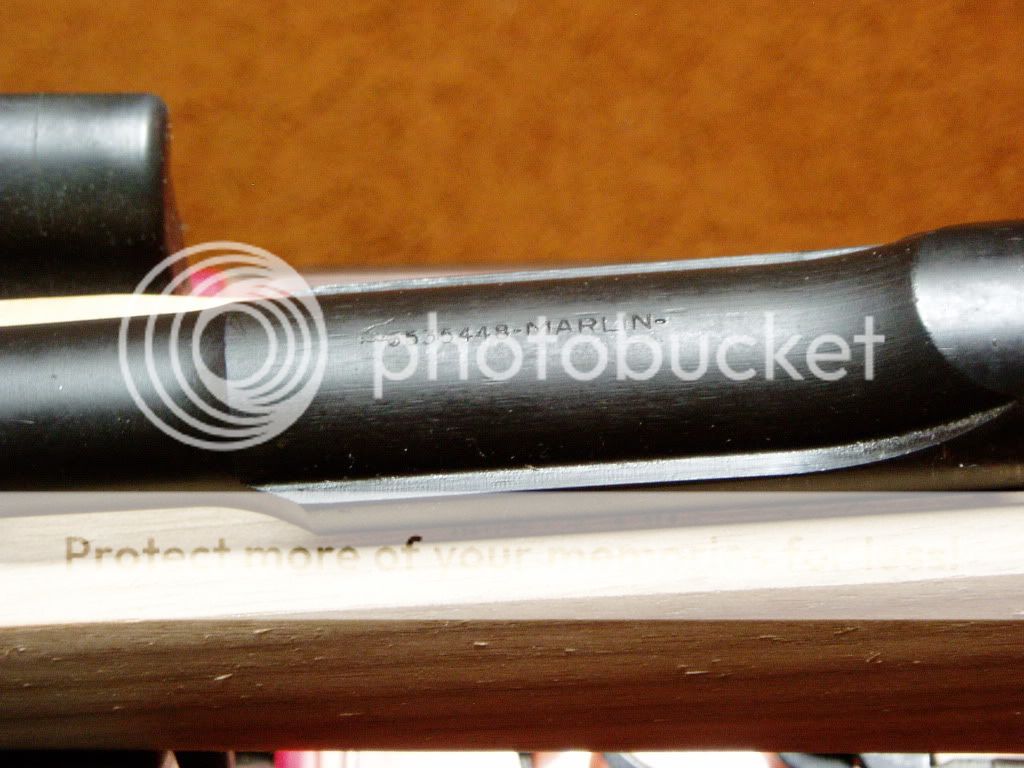
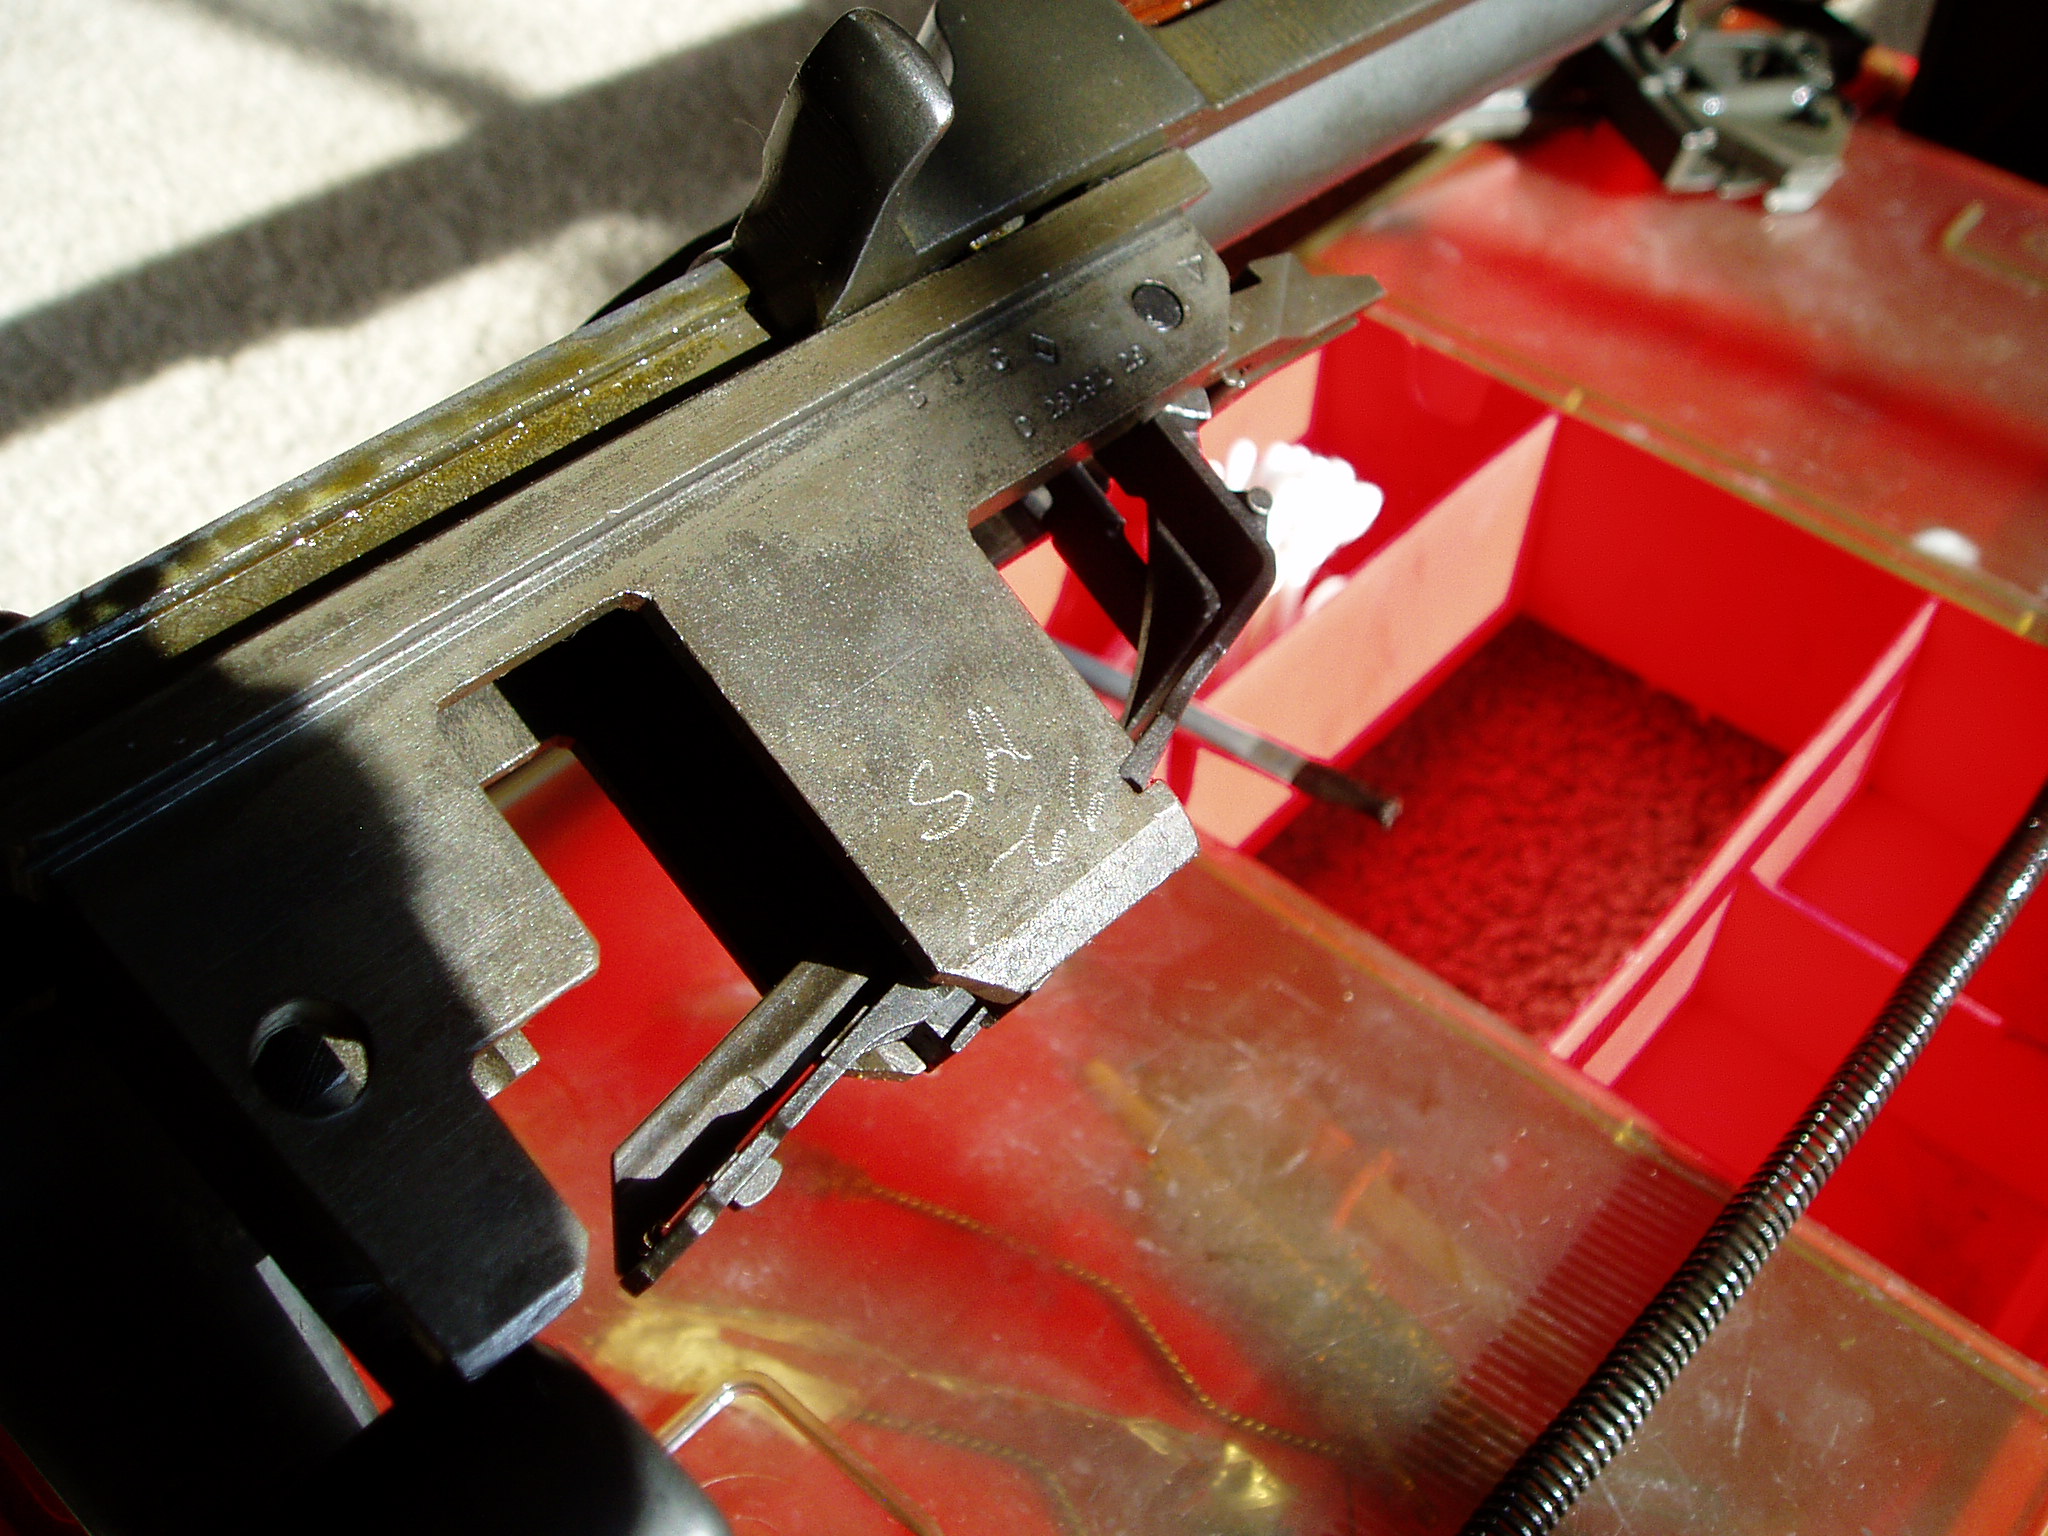
You will also notice that the DoD acceptance stamp on the stock indicates it is of post war manufacture and was likely installed during a rebuild in January 1966 as evidenced by a barrel with a November 1965 date, and the right receiver leg is electro-penciled "SA 1-66". So we know this rifle got an overhaul at that time. TE is a 3, so the rifle saw about 3000 rounds of use between then and when CMP got it. There is no pitting under the wood, so it is unlikely it went to Vietnam. Probably saw use in a Reserve or NG unit as they were still issued M1's in the mid 60's.
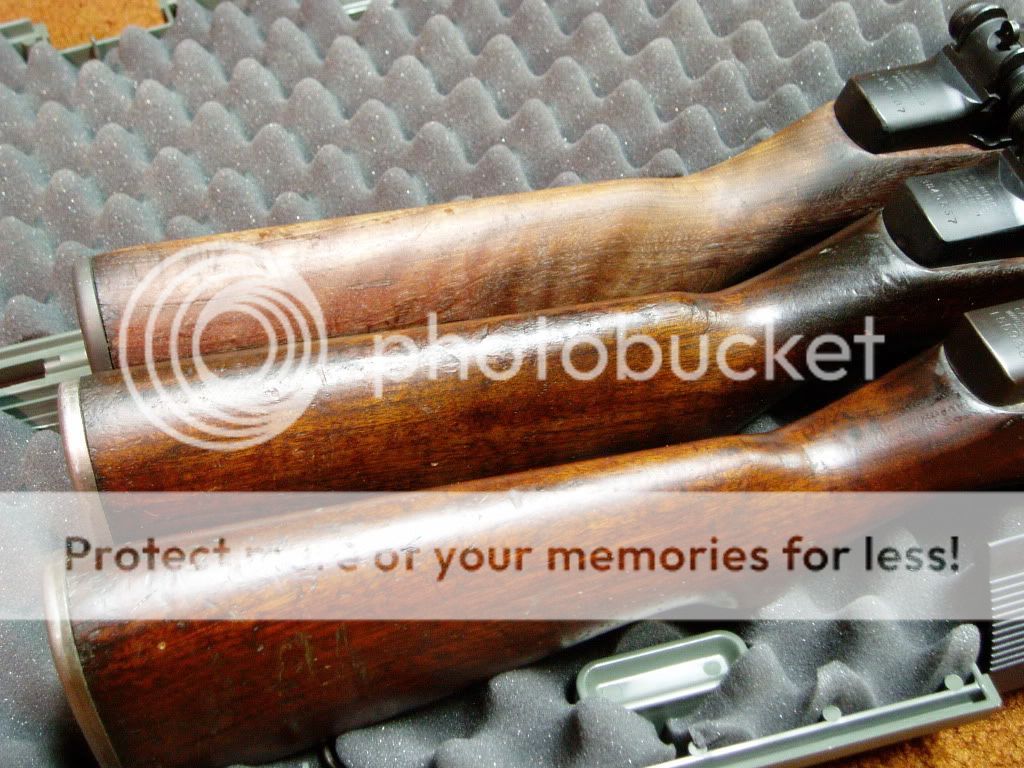
The stock.
This stock was originally on another rifle. The above mentioned DoD stamp and the P in a circle proof stamp were applied only to complete rifles. They were not affixed to replacement stocks. So during the course of the rebuild process, it got this stock.
The stock is solid with no cracks and no sponginess due to oil or solvent soaking.
You want to examine the mag well area closely, especially the area around the clip latch release relief cut where the wood is the thinnest. These are the areas subject to cracking. An M1 will not shoot well with a cracked stock. On post war stocks, this area and the pistol grip was made beefier to stand up to grenade launching better.
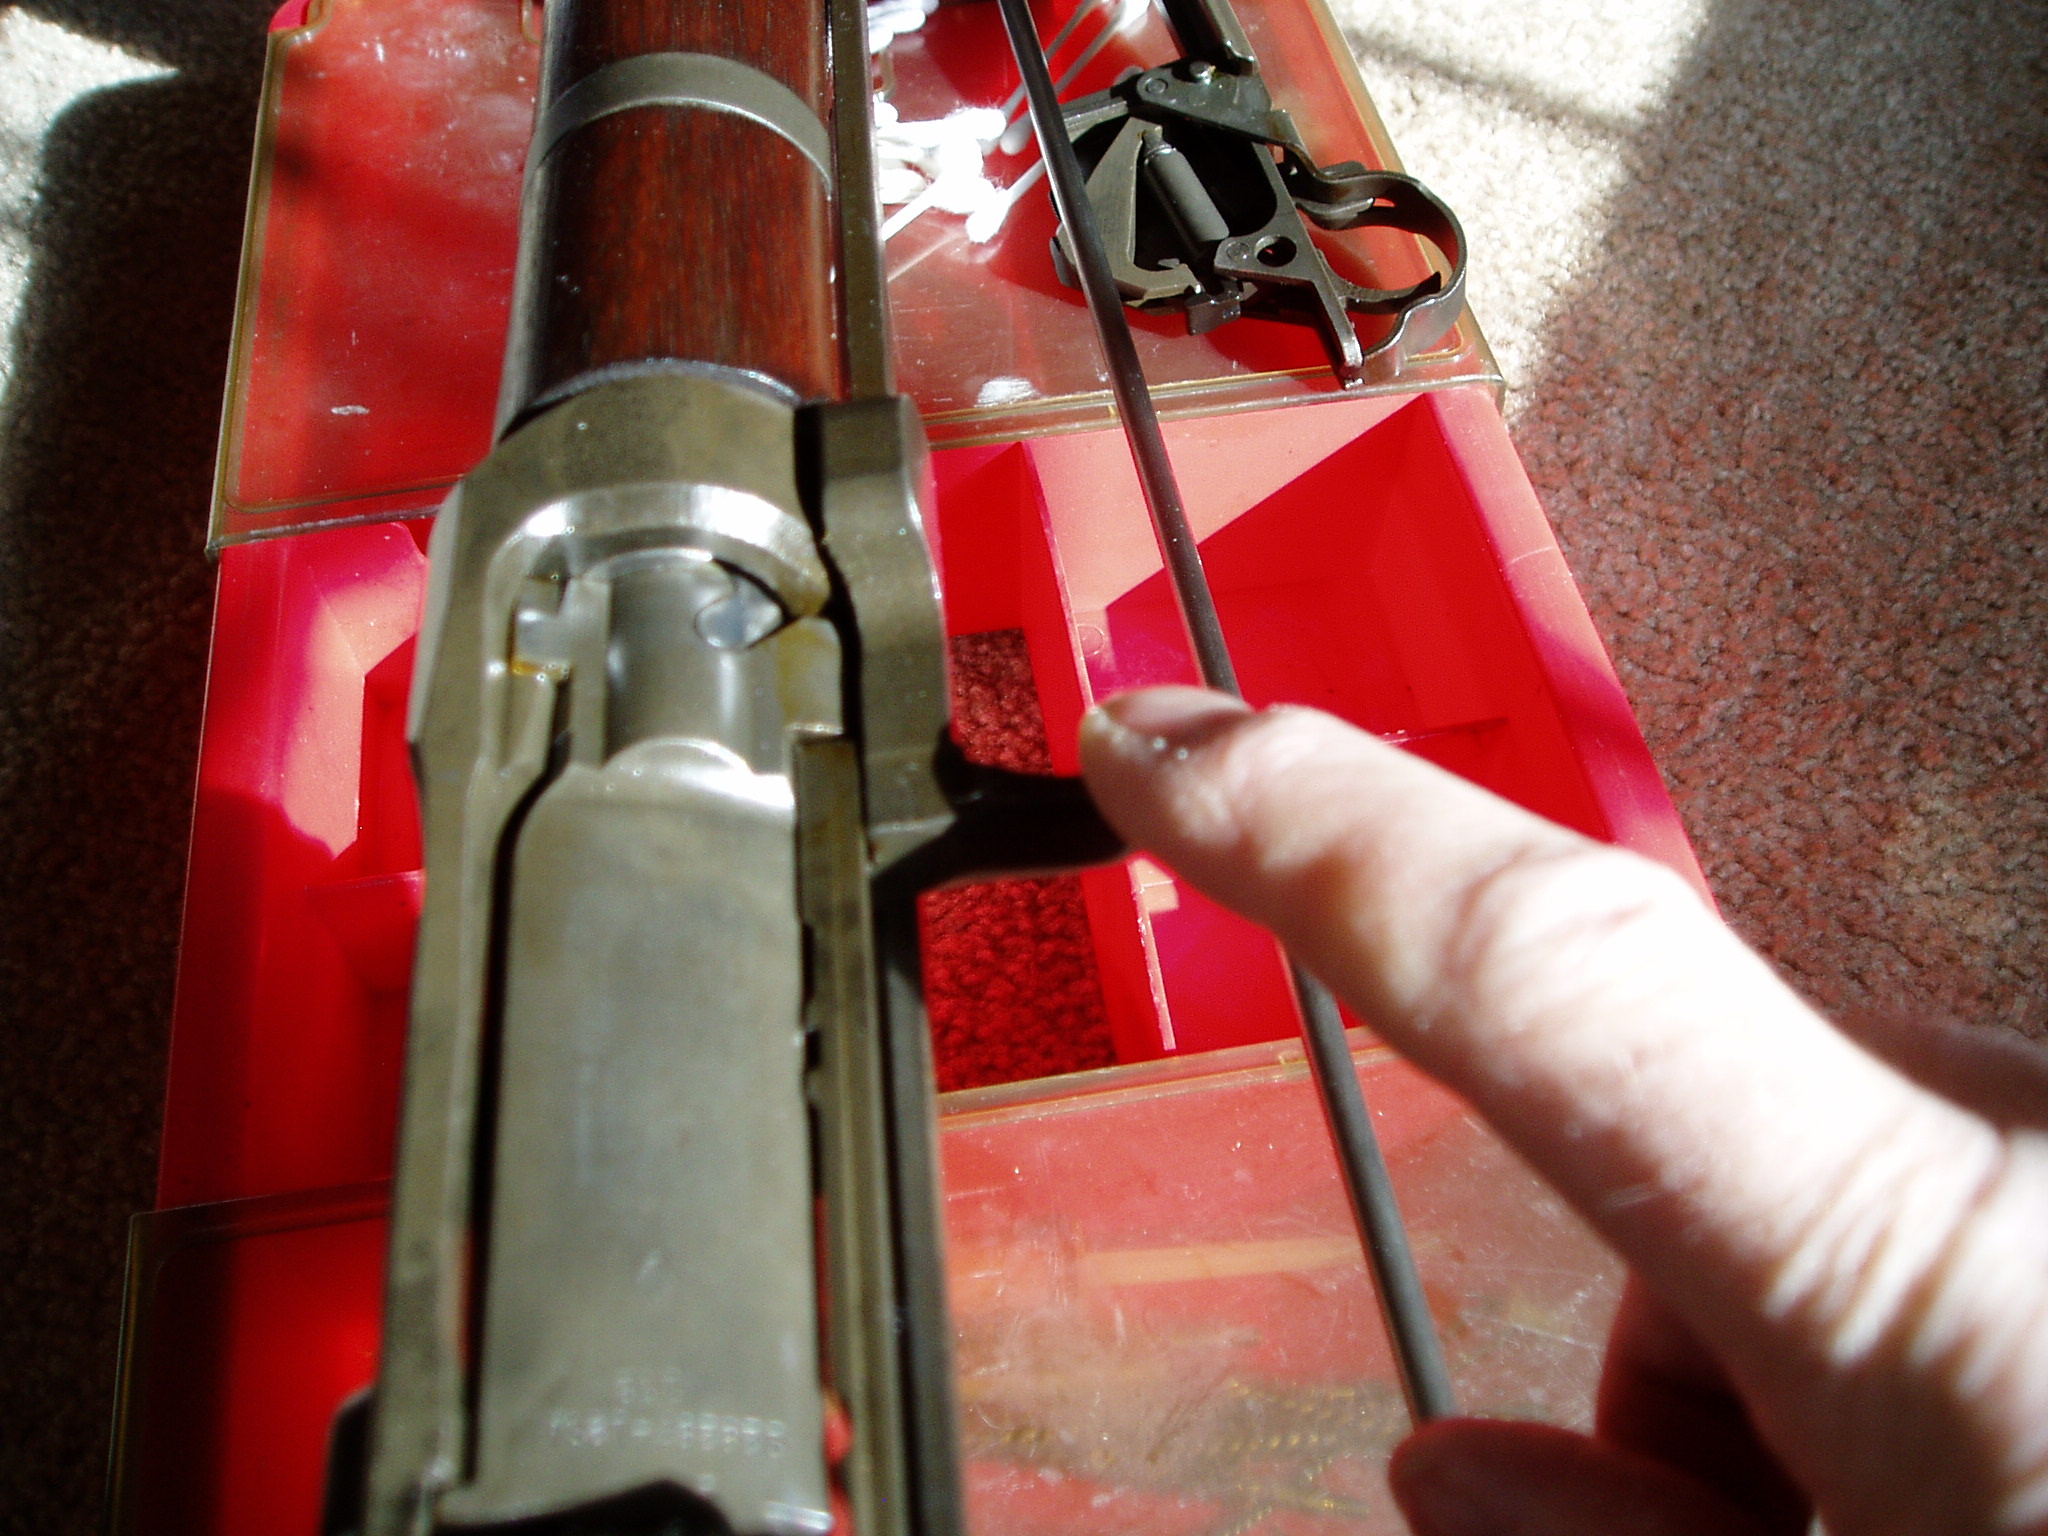
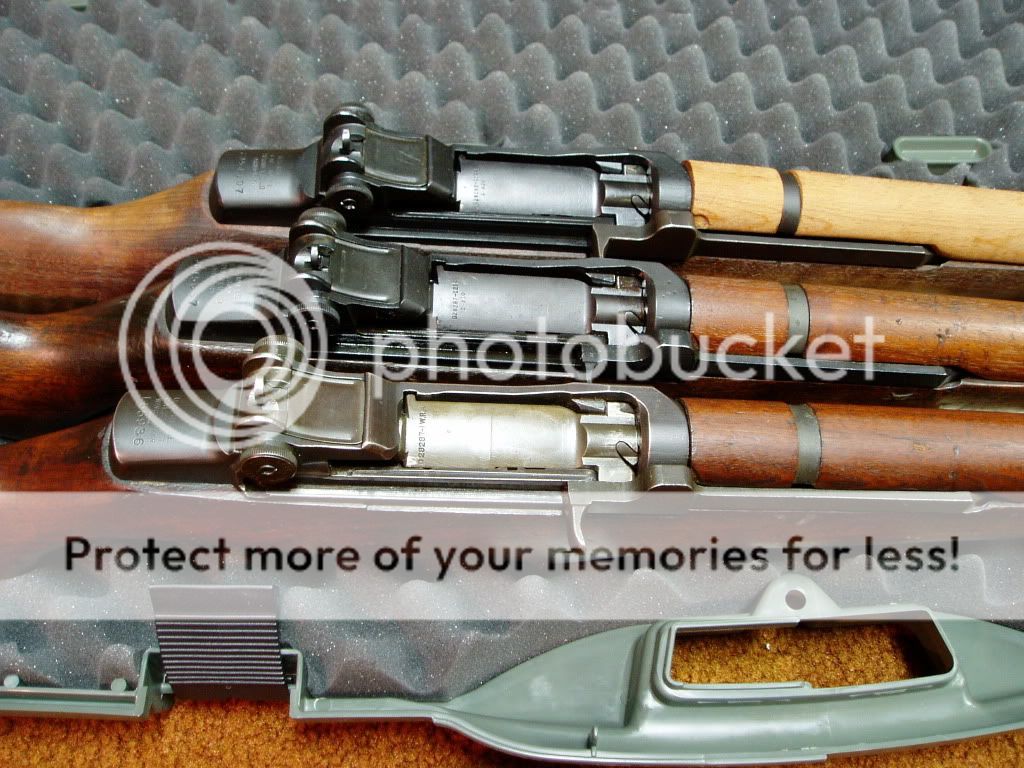
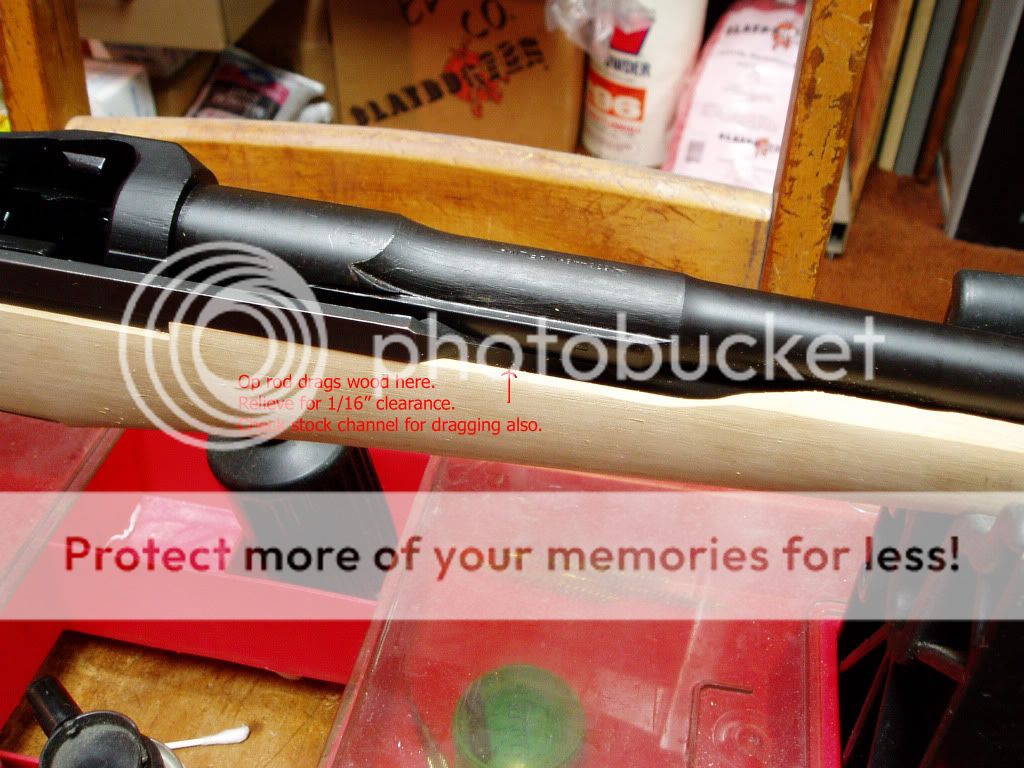
In this pic, we can see where the op rod is rubbing just a little bit. For an issue rifle, this alone is not something that will make a big difference, but if the op rod is dragging elsewhere as well, the total effect can be detrimental to accuracy. Ideally, the op rod should not drag at all.
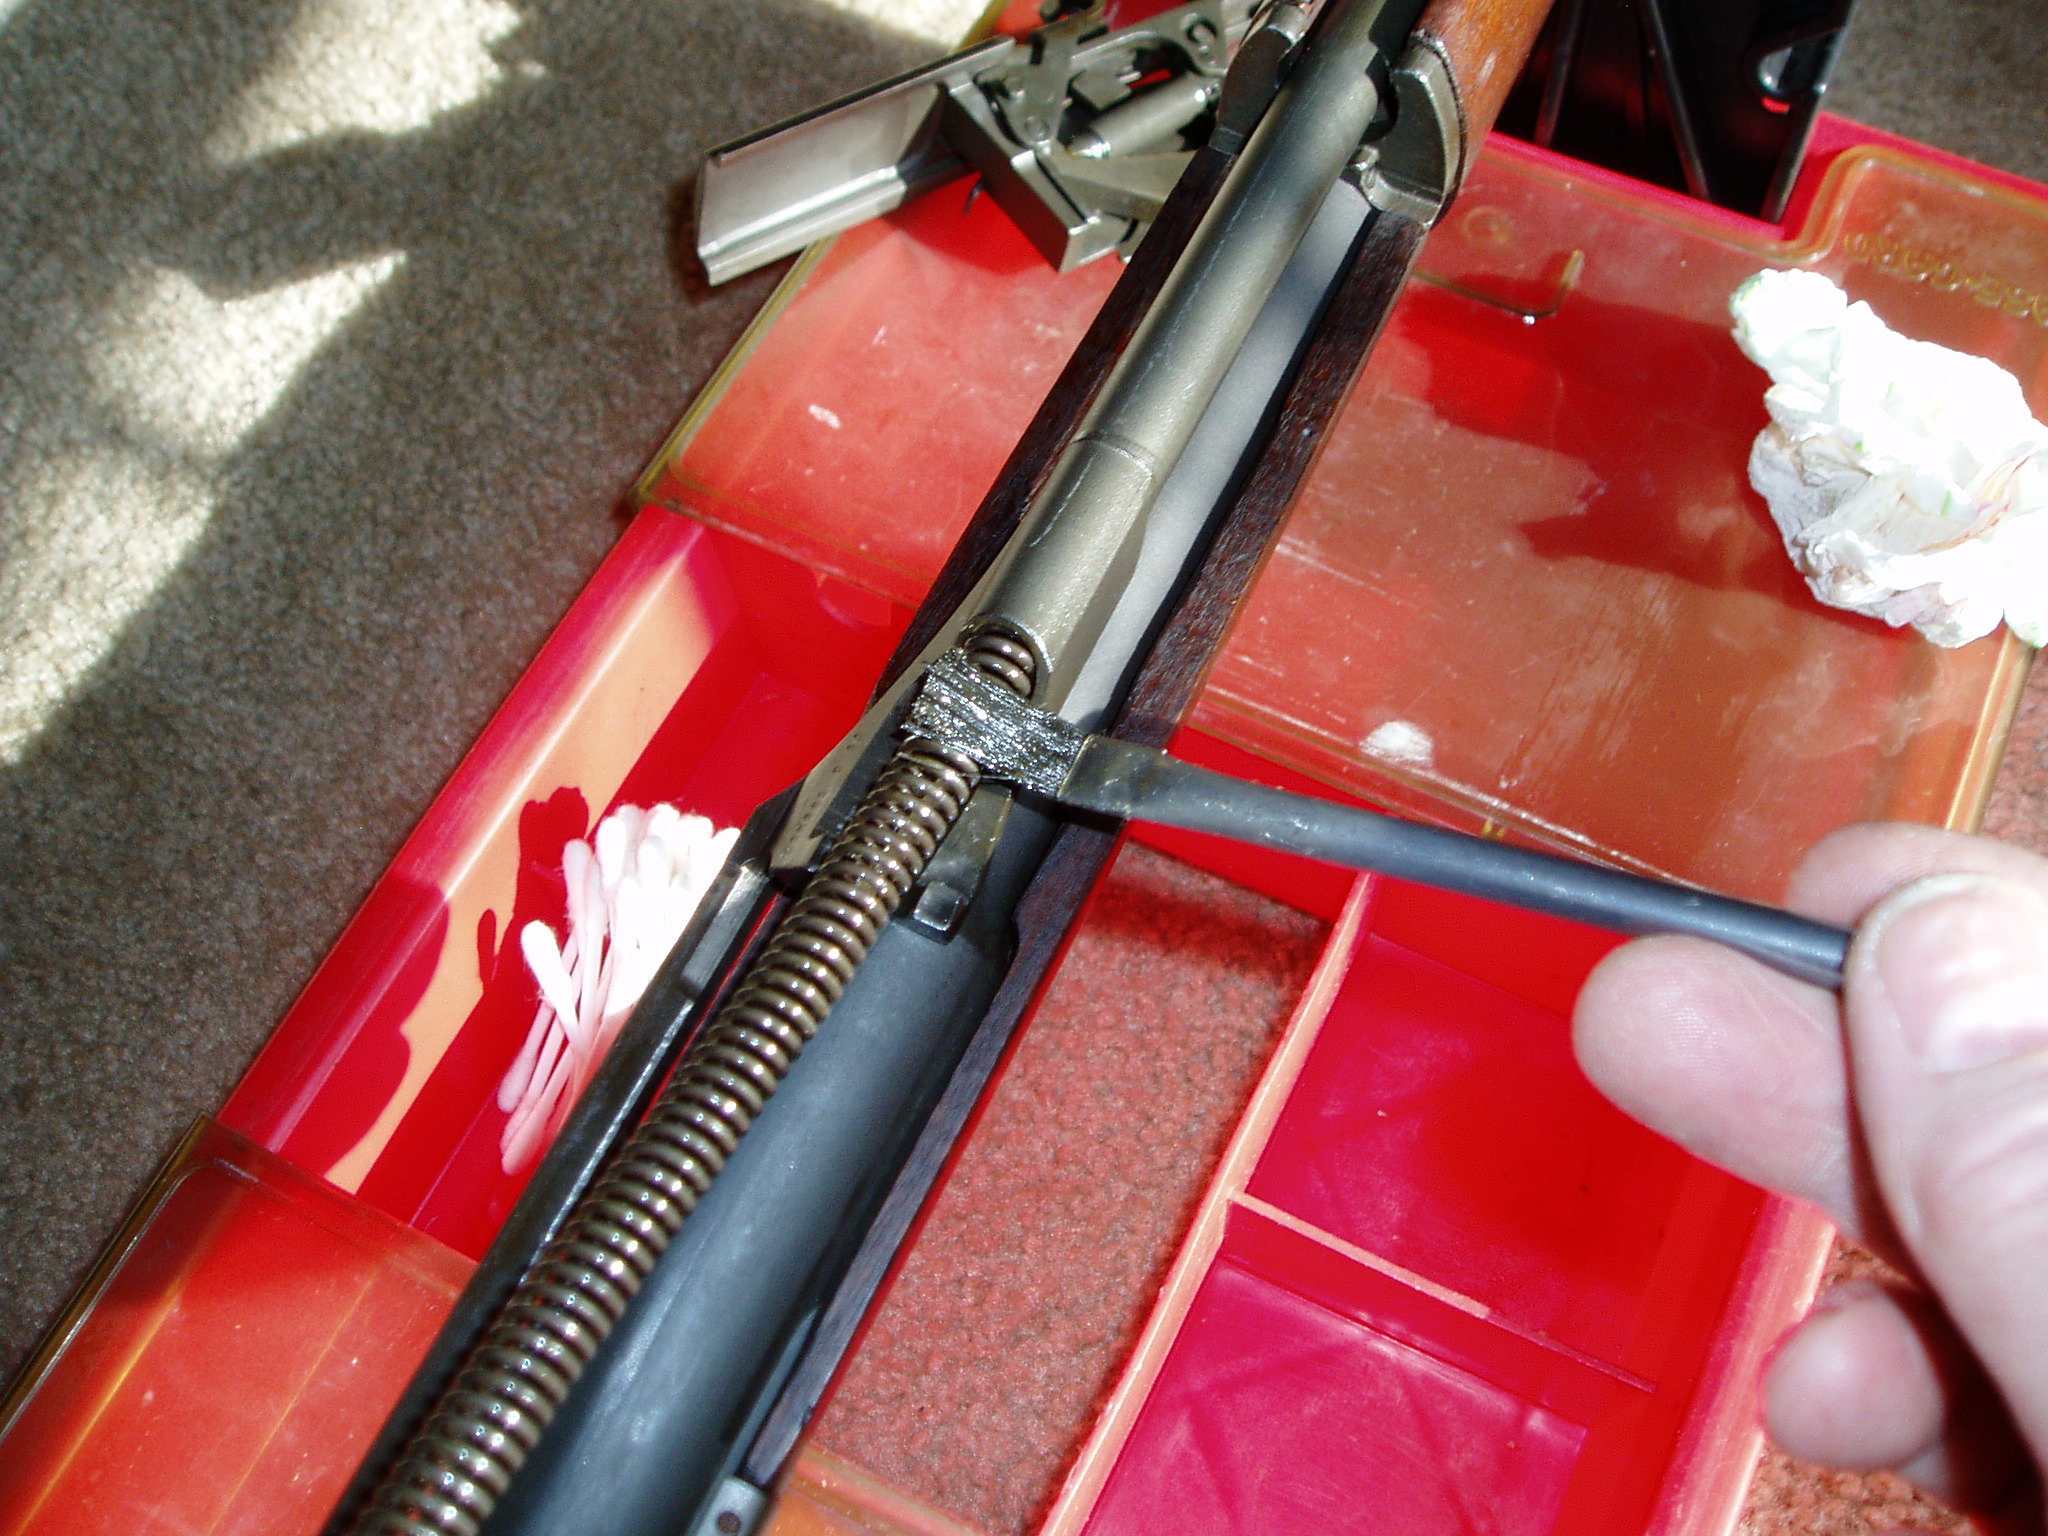
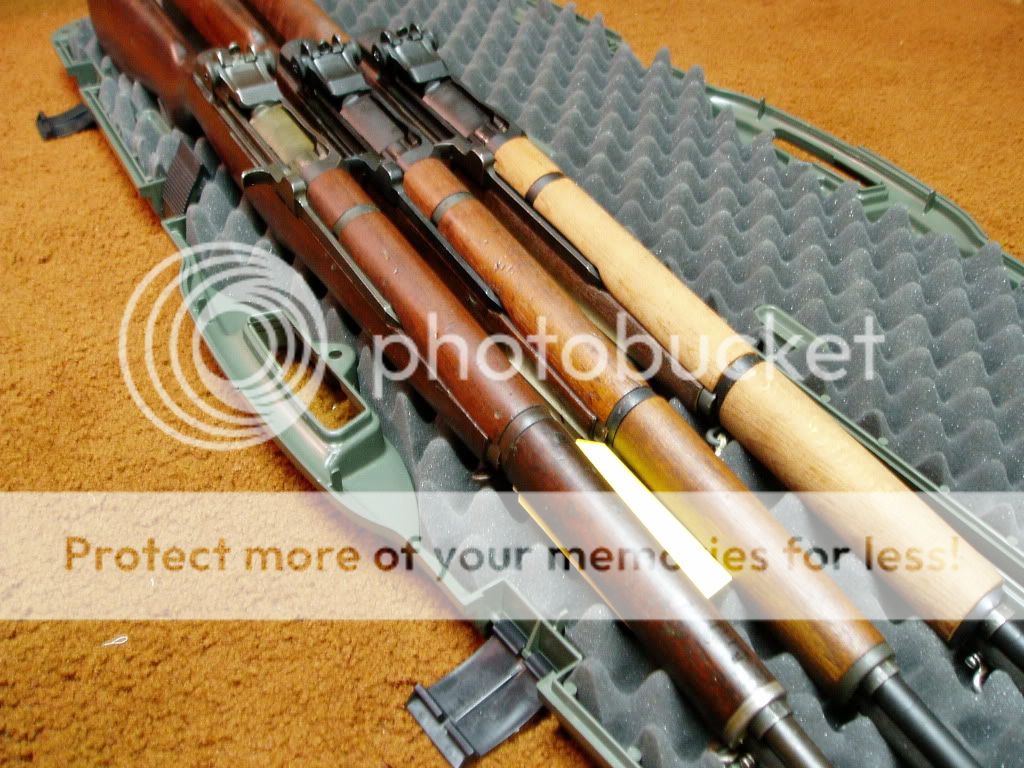
The stock ferrule shows rub marks. Here again, the contact is light, but none is better. A Dremel with the appropriate size grinding stone makes short work of this.
To determine if an op rod is dragging, remove the op rod spring and engage the safety so the hammer is cammed down out of bolts path and reassemble the rifle. Now tilt the muzzle up about 30-35 degrees. The op rod and bolt should slide to the rear of their own weight. Depress the muzzle, and they should go all the way to battery. It is possible to pass this test and still have light contact marks as we see here. The op rod is hollow and flexes under load.
Dents and dings in the stock can be steamed up if the wood fibers are not cut. Dents like this will steam up and refinish nicely.

To steam up dents, set a clothes iron to the hottest setting and pre heat. Take an old wash cloth or other cotton rag and soak with water. Wring out so it doesn't drip. Place the wet rag over the dent and press the iron onto the spot. It may take more than one application to raise larger dents.
Damage like this where the wood fibers are crushed won't steam up.
The hand guards.
Both hand guards are solid with no evidence of cracks.
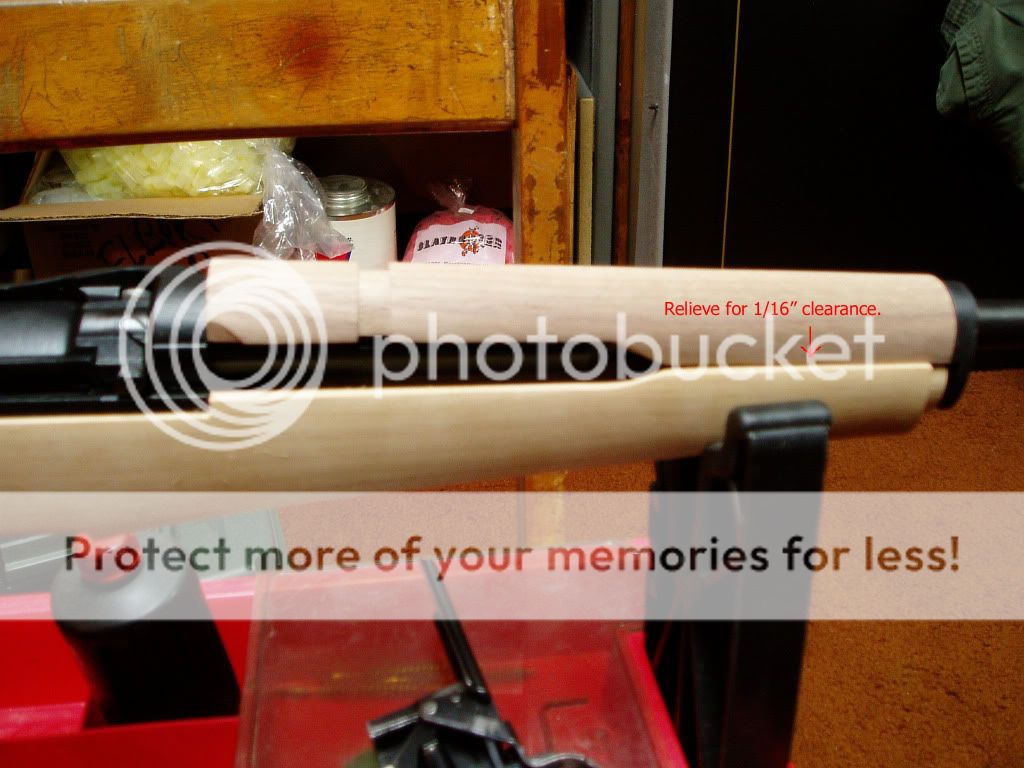
The rear hand guard fits as most of them do and is a bit too long. You want a little clearance between the receiver and the hand guard.
It also contacts the stock on both sides. Here again you want a small gap in this area for best results.
The front hand guard has no fore and aft play. This is caused by someone who cranked down too hard on the gas cylinder lock and caused the gas cylinder to be pressed into contact with the hand guard. The fix here is to unscrew the gas cylinder lock one revolution and reinstall the gas plug. If the gas cylinder is tight on the splines, it may have to be tapped forward.

Draw tension.
I was quite surprised upon receipt of this rifle that the draw tension was ideal. Examination revealed nice round trunnions on the trigger guard.
You normally only see that on rifles with new stocks, or that have been glass bedded. Over time, the wood fibers compress from leaving the rifle assembled and all the parts under tension. After 50-70 years, the tension is all but gone. You can try the steaming trick here as well, and if the stock is not too bad, you may be able to get some draw tension back.
In the case of this rifle, Springfield Armory did something I have not seen before on an issue rifle. They glass bedded the trigger group to get the tension back. Even though done by the military and received from CMP this way, this is a DQ for JCG matches.
This is old school fiber glass resin bedding as used at the time. Today, you would use a product specifically made for bedding with either aluminum or steel powder in it for more strength than plain resin.

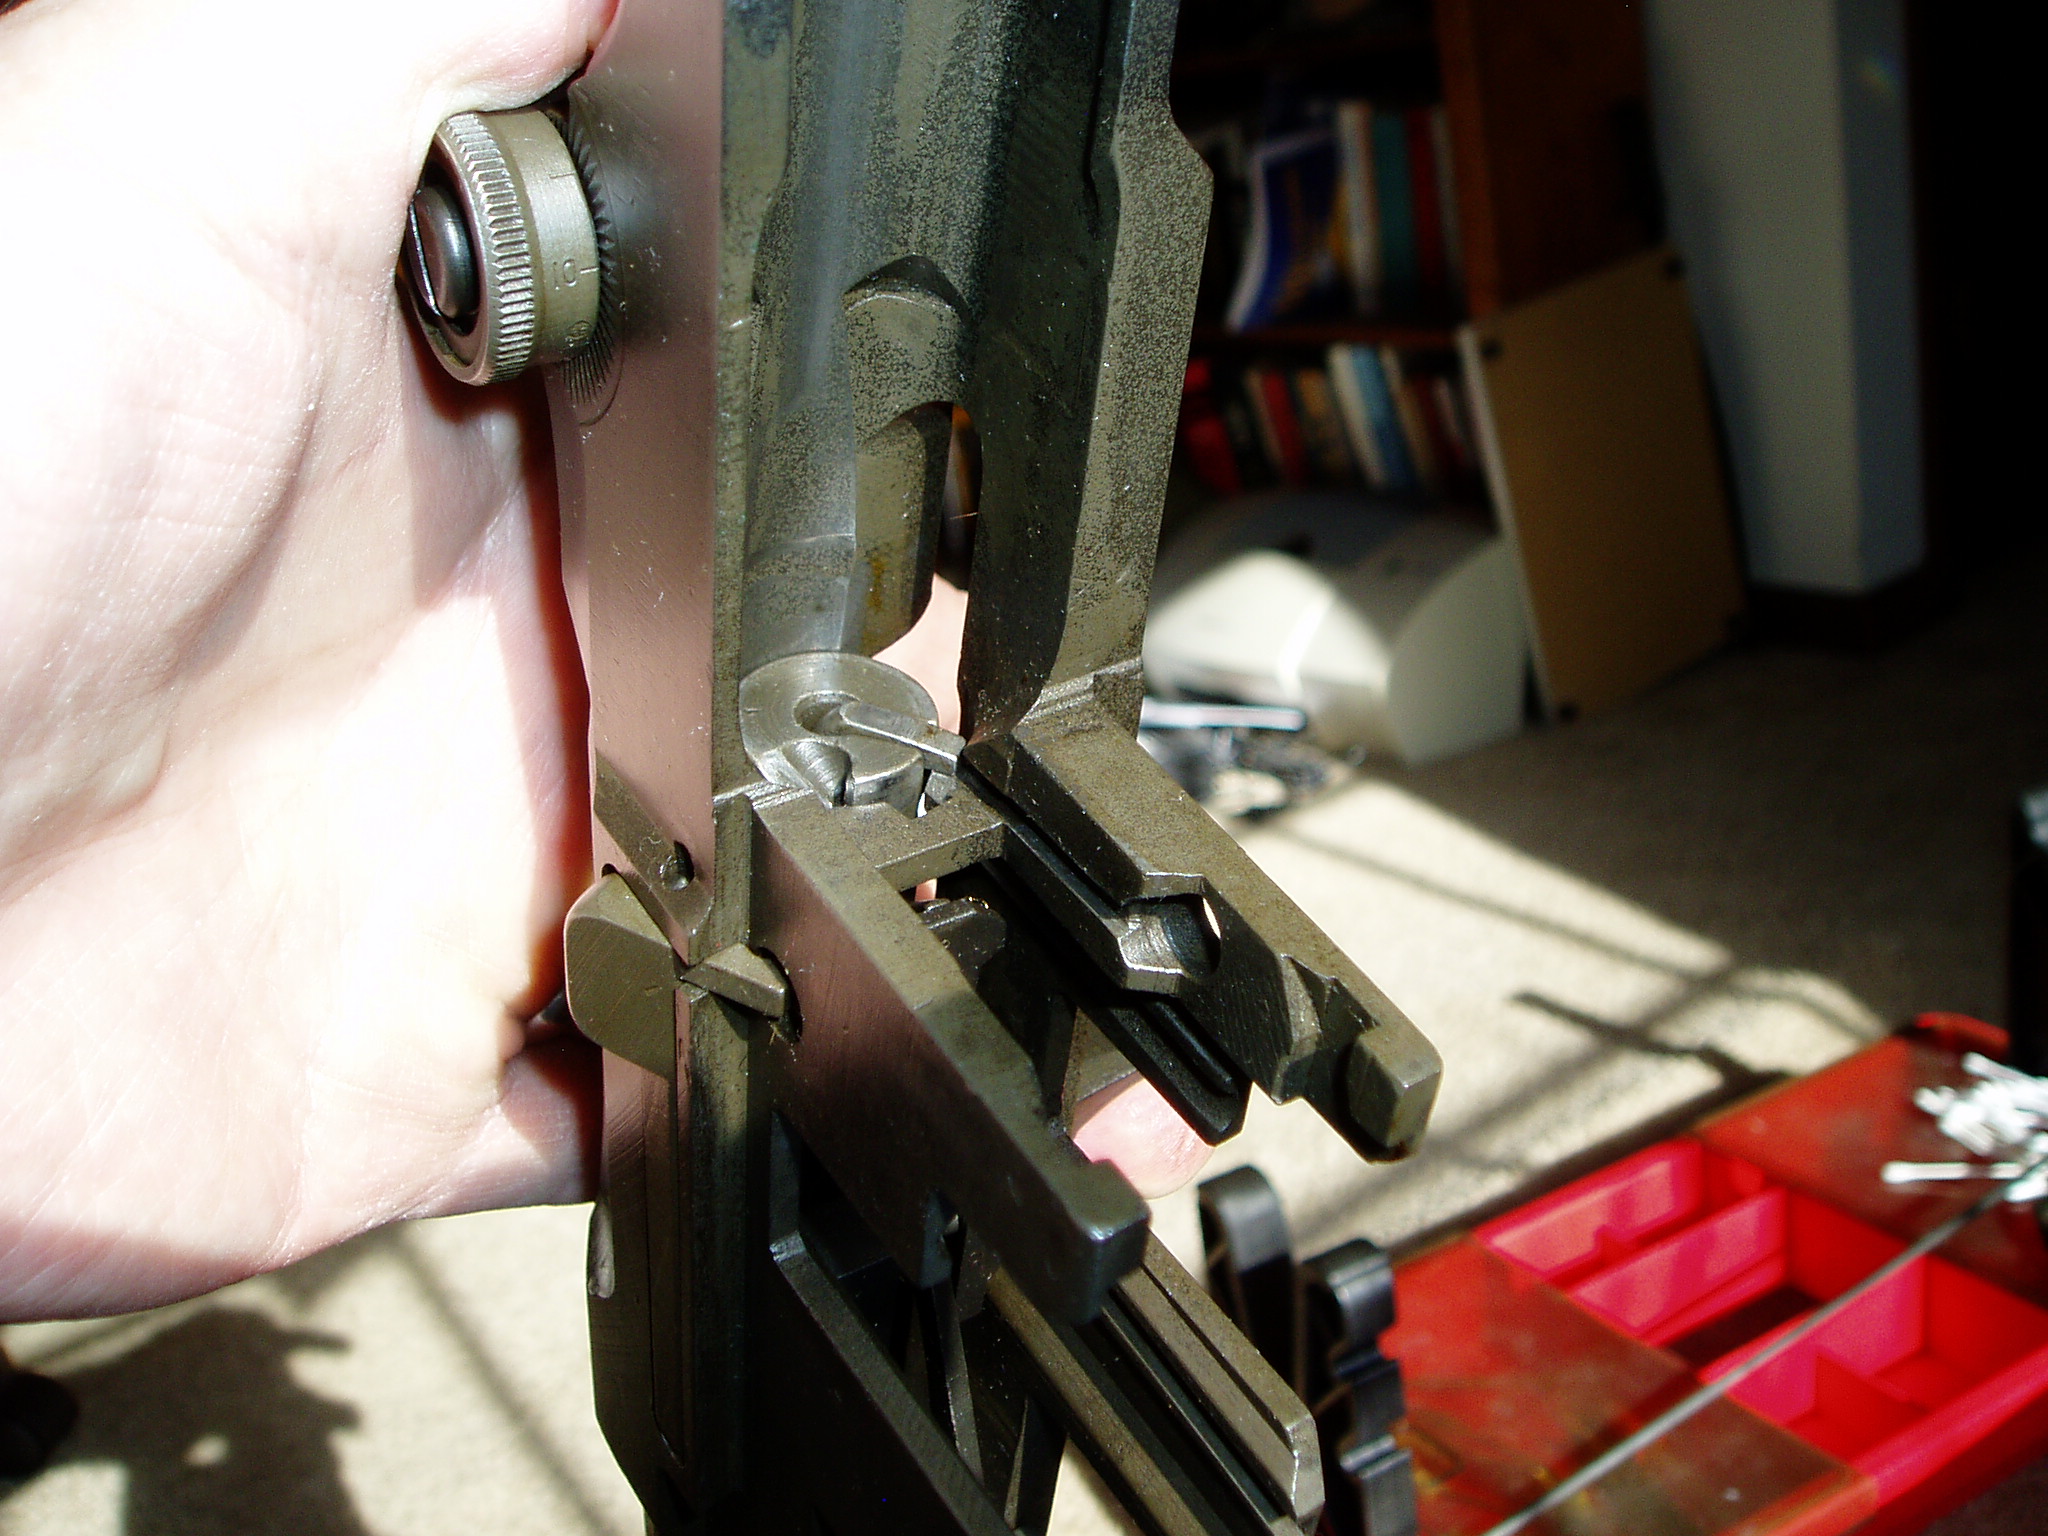
This is what ideal draw tension looks like. The trigger guard closes easily up to this point, where resistance is encountered. To close and latch the trigger guard from here takes a good amount of hand pressure using the palm of the hand. If you can close the trigger guard with finger pressure, draw tension will be too low.
The metal.
The first thing to look for is the condition of the rifling and crown. A three piece GI cleaning rod, applied with all the enthusiasm a 18 year old GI can muster can destroy a barrel. If you've never seen the result, here's a barrel that was taken off my first M1. The rifle couldn't keep it shots on a paper plate at 100 yds. There is no rifling for 3/8".

Fortunately, our subject rifle has a good muzzle. Under magnification, the rifling should be sharp all the way to the crown. Sticking a Q-Tip in the bore to reflect light helps to see better.
Next, grab the gas cylinder at the front sight and try to rotate it. If you feel any movement, the splines on the barrel need to be peened to tighten things up. Use a small hammer and lightly tap the rear 1/3 of the spline on either side of the groove. It doesn't take much tapping, so don't overdo it. You want the gas cylinder to be a drive on fit to the barrel. It should take a standard ball peen hammer and a block of wood using light taps to drive the gas cylinder on. Invert the gun and look for the gas port to center up in the opening.

Install the gas cylinder lock. You want it to stop at this point and require a little force to turn into final alignment with the gas cylinder. If it goes past lining up before stopping, either tap the gas cylinder slightly forward if less than a half turn past, or turn the lock the remaining amount clockwise to achieve alignment and being tight at the same time.
(This is the bad barrel with no rifling in the end. I used it for the pic because it was handy)
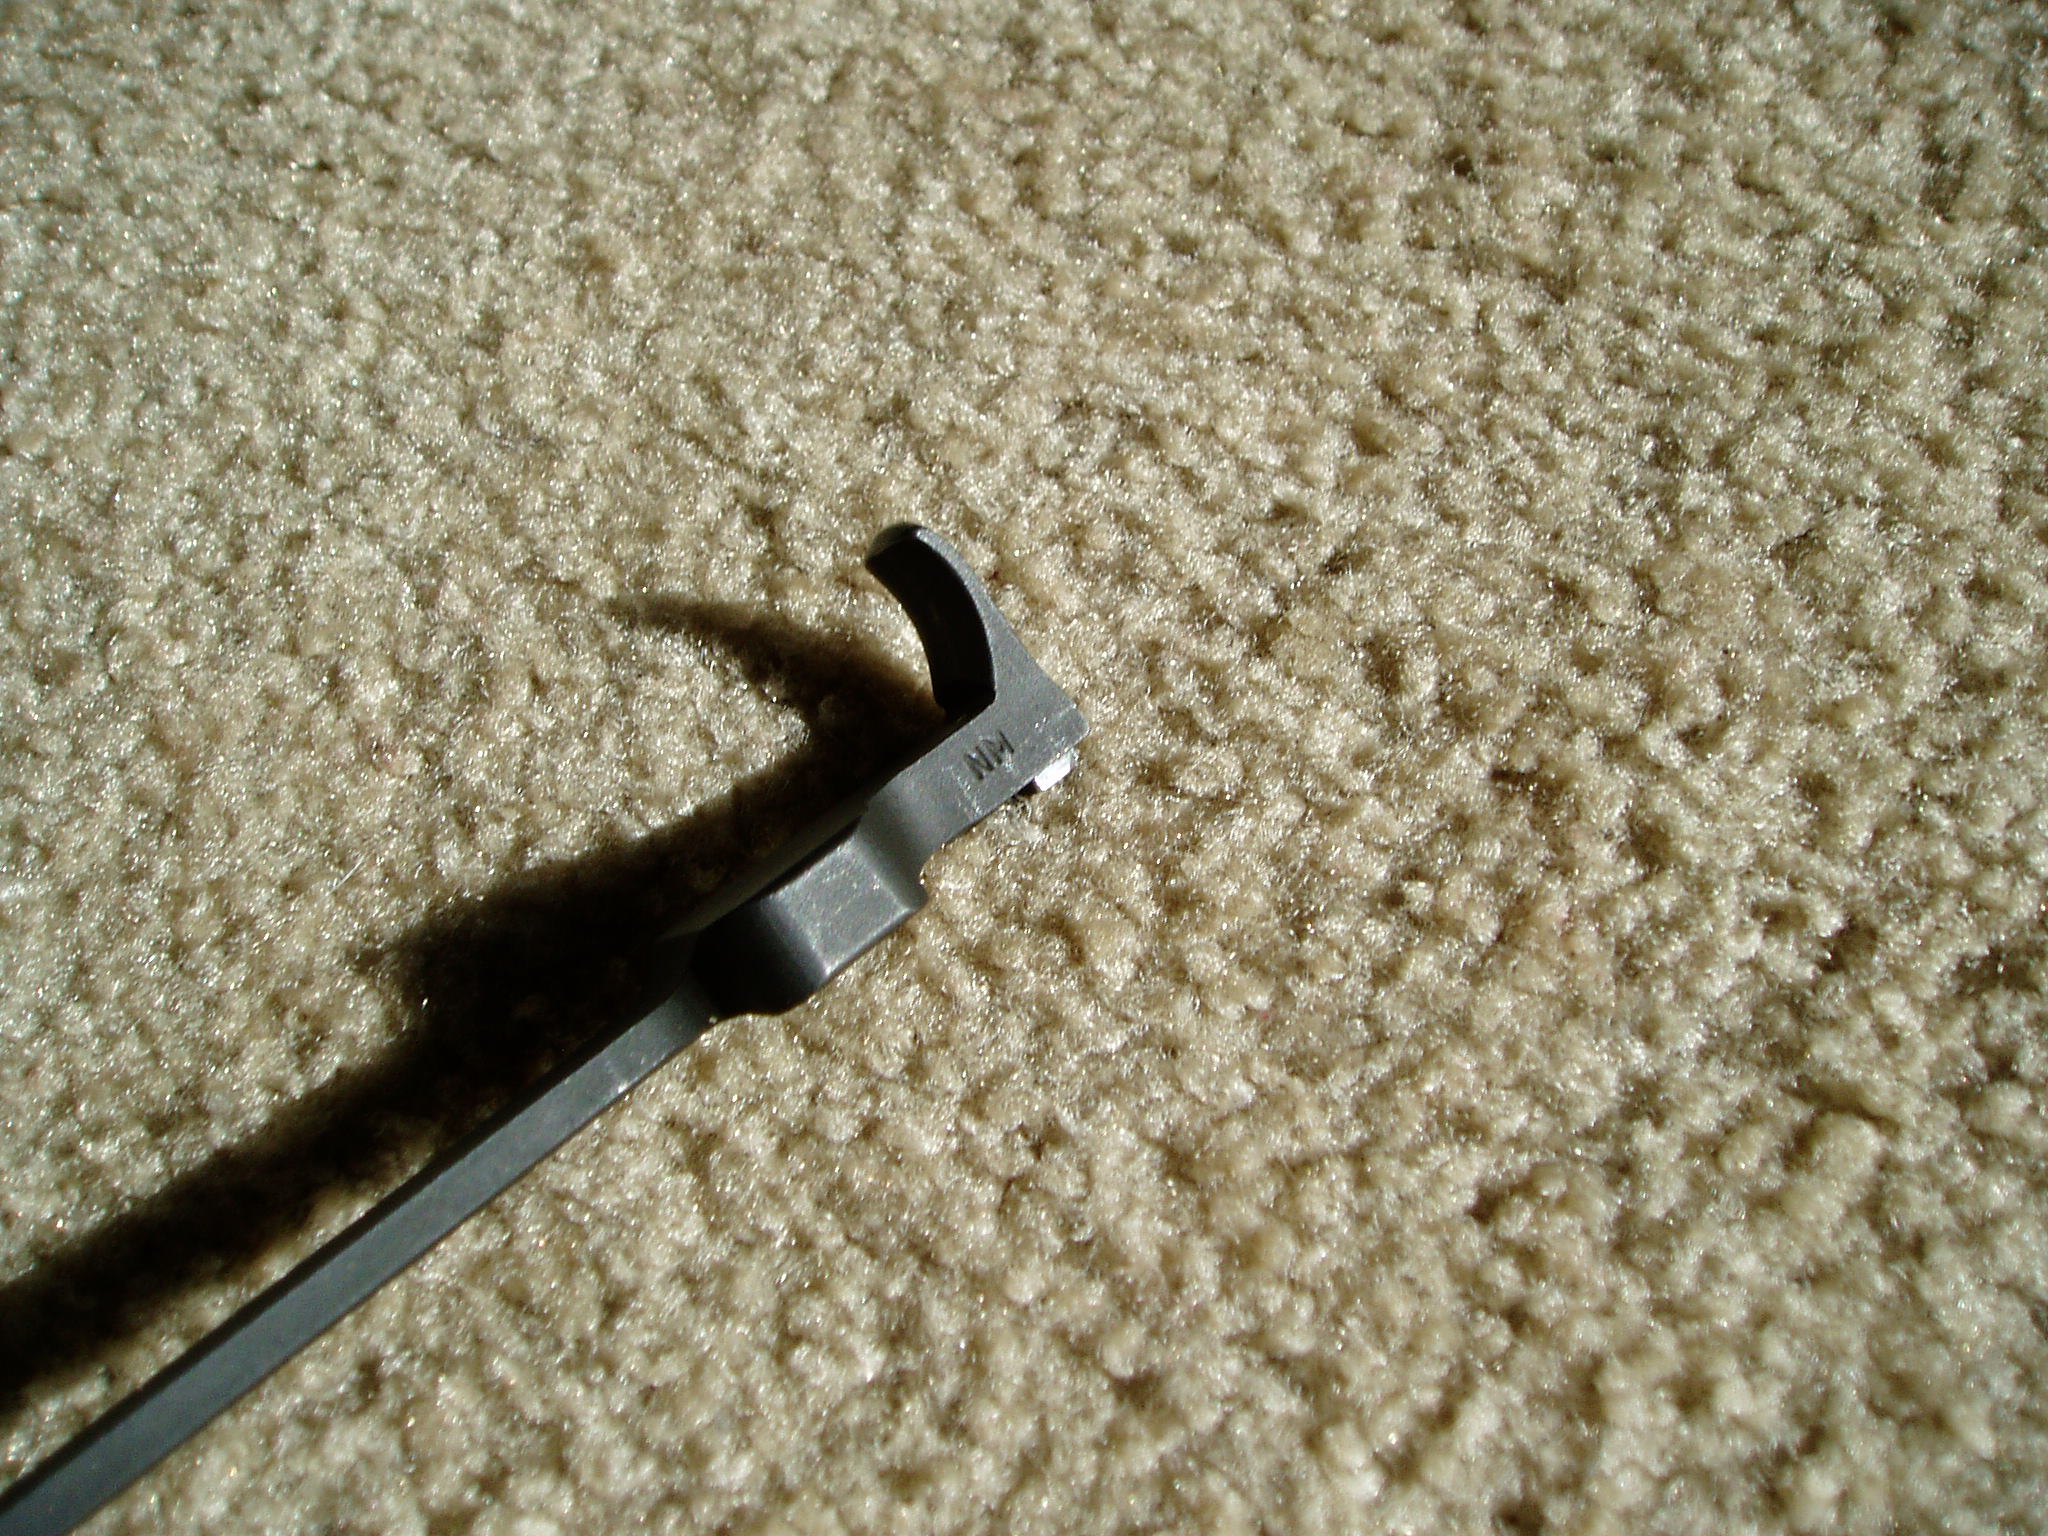
Op rod.
The op rod consists of a forged steel handle welded to a drawn steel tube with a stainless piston on the end. The op rod is the weak link as it were in the M1's design. It works fine when using USGI ammo or equivalent, but can be bent by commercial ammo using powders outside the M1's tolerance.
When viewed from above, the op rod tube should appear straight with no left or right bend. From the side, it has two bends necessary for barrel clearance.
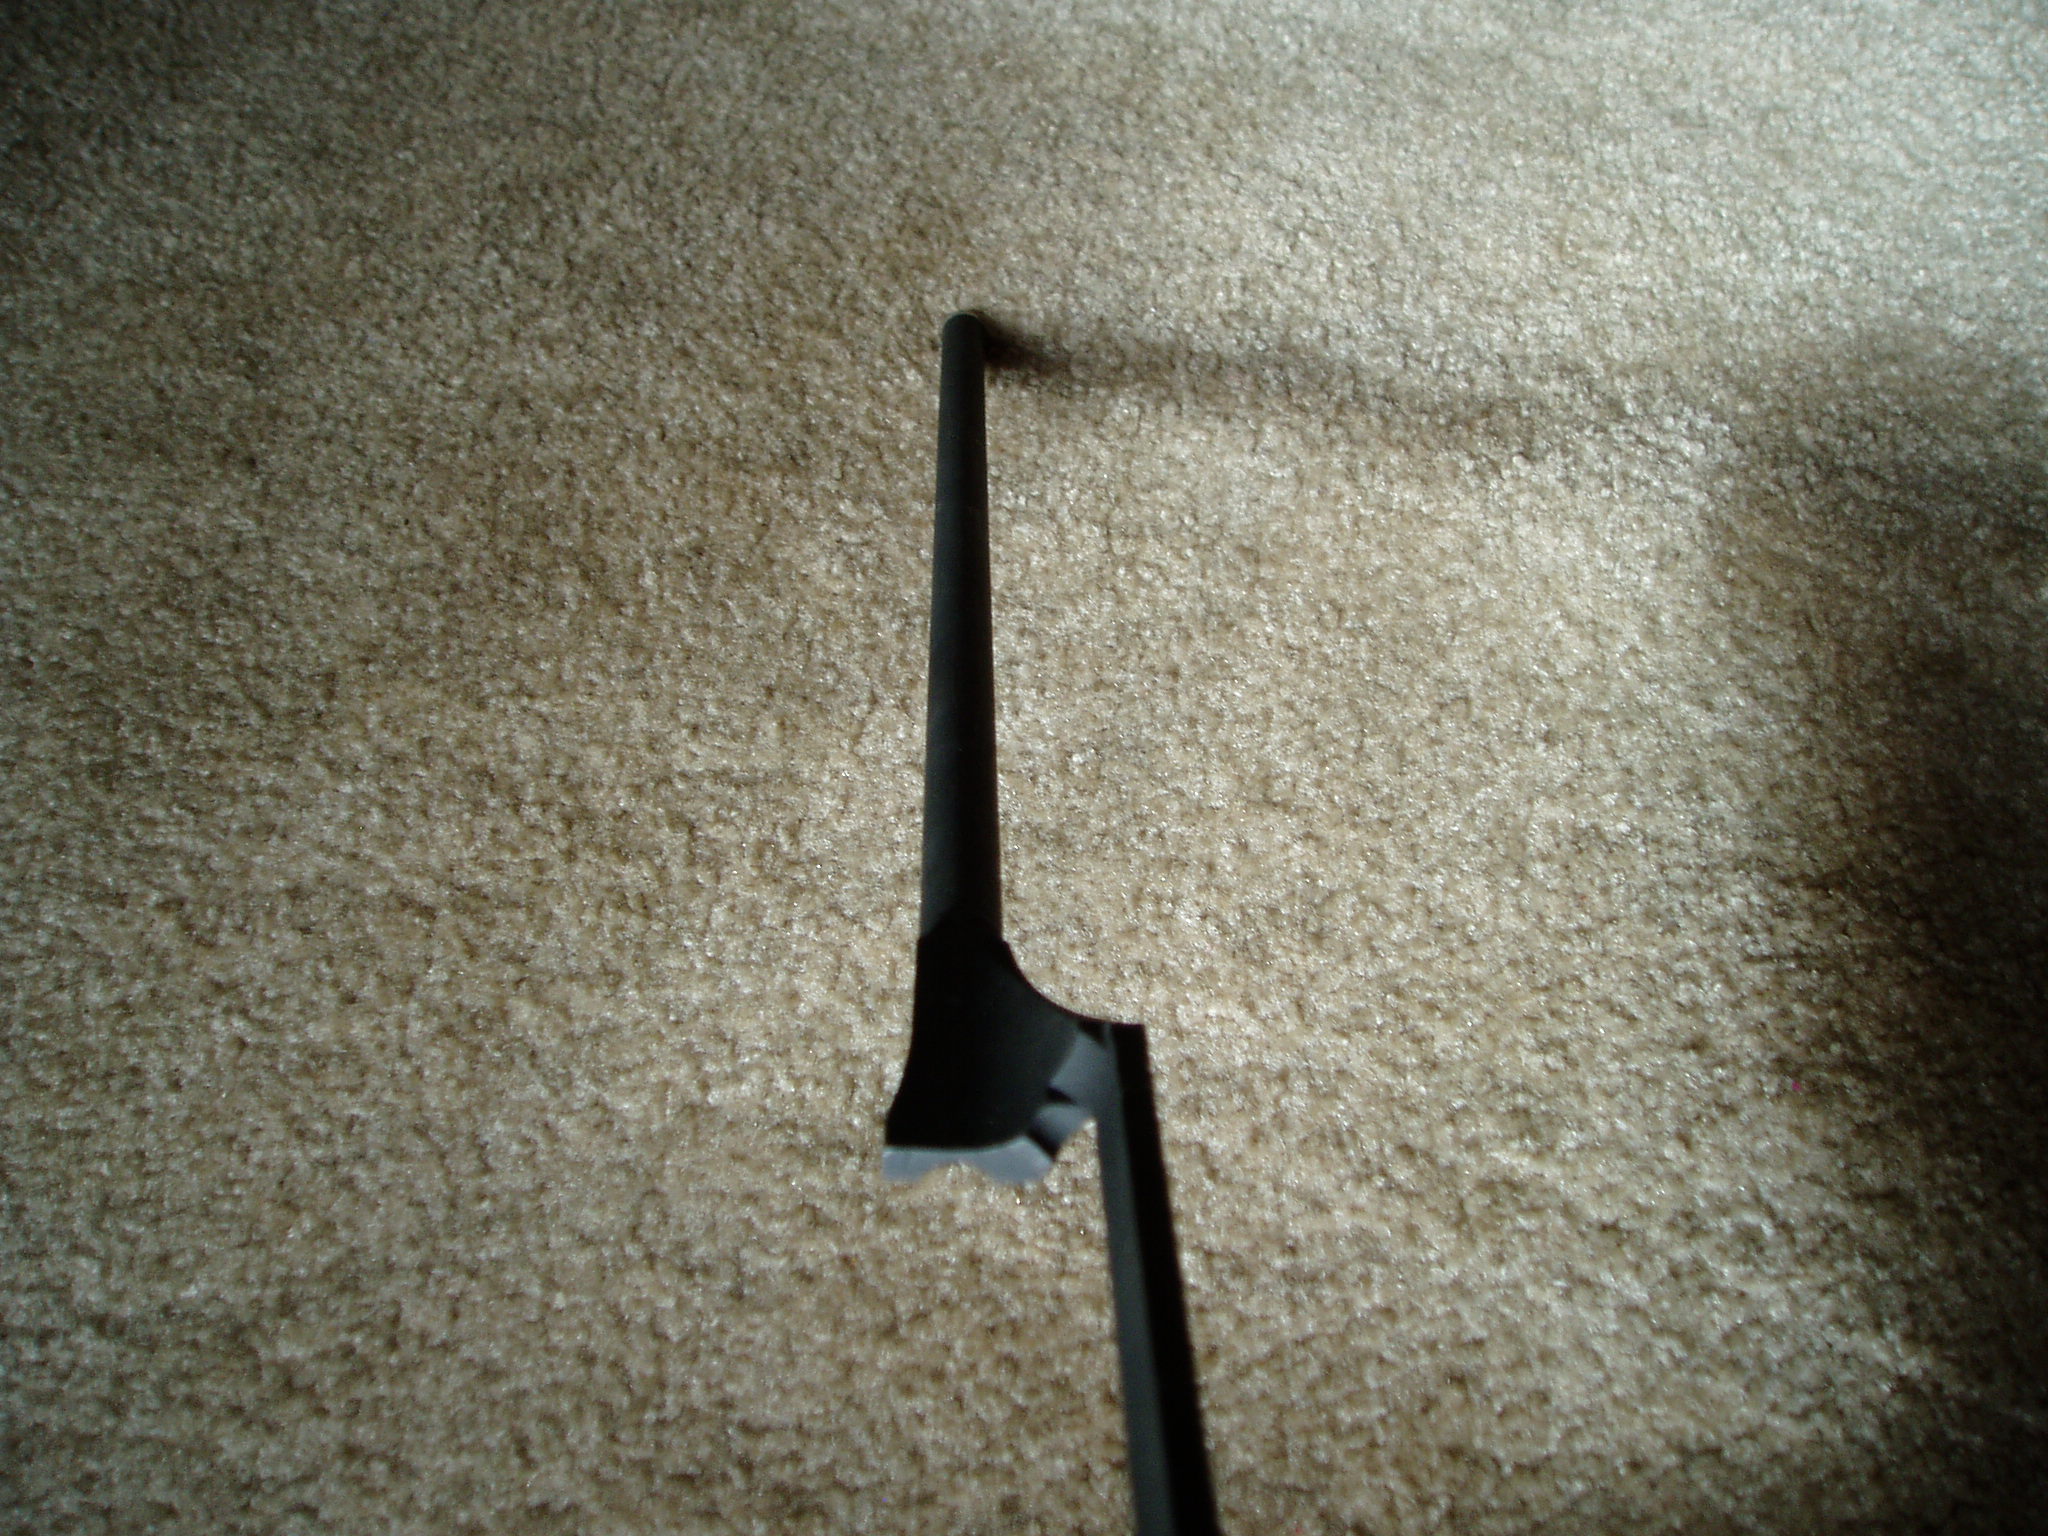
Image limit reached. To be continued next post.
I also have the M1 trigger job thread and a "how to" on making the M1 shoot better than issue if peeps want to see them.
In this thread, I dug a CMP M1 out of the back of the safe that hasn't had anything done to it. We'll use it as the model of what to look for, how to correct any minor deficiencies, and even how to clean it properly. I'm going to C&P pics from the previous threads where applicable, so if you see a recycled photo, that's why.
I bought this rifle from CMP back in 1999. Serial number indicates July 1943 manufacture. At this point, CMP still had rifles passed on to them by the US Army when the DCM was dissolved. (This was before the current batches that are US Foreign Aid returns from Greece, Turkey, The Philippines, and elsewhere.)
The first thing that strikes you about the rifle is the heel of the receiver is much darker than the rest of the receiver.

| This image has been resized. Click this bar to view the full image. The original image is sized 2048x1536. |
In 1943, Springfield Armory had some heat treat issues resulting in the heel of the receiver cracking when struck by the bolt during recoil. Until they figured out what to tweak, the temporary fix was to dunk the heel in a pot of molten lead to draw out some of the hardness. Parkerizing comes out different shades depending on the hardness. Thus, we have a two tone receiver.
You will also notice that the DoD acceptance stamp on the stock indicates it is of post war manufacture and was likely installed during a rebuild in January 1966 as evidenced by a barrel with a November 1965 date, and the right receiver leg is electro-penciled "SA 1-66". So we know this rifle got an overhaul at that time. TE is a 3, so the rifle saw about 3000 rounds of use between then and when CMP got it. There is no pitting under the wood, so it is unlikely it went to Vietnam. Probably saw use in a Reserve or NG unit as they were still issued M1's in the mid 60's.
|
| This image has been resized. Click this bar to view the full image. The original image is sized 2048x1536. |
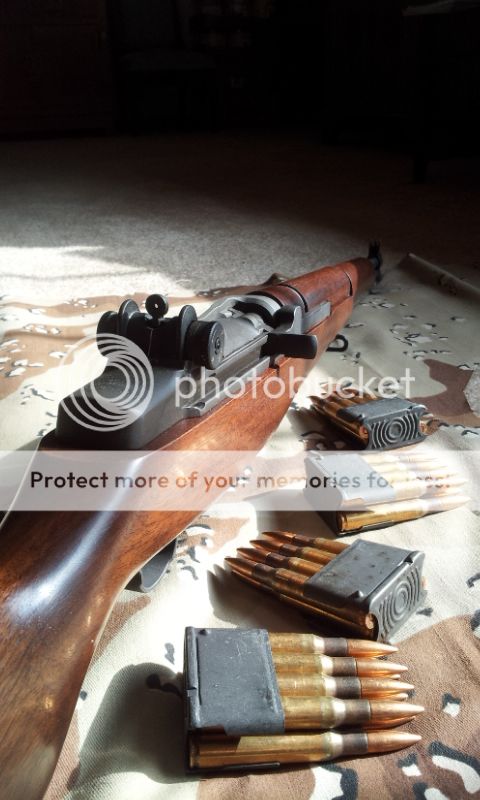
The stock.
This stock was originally on another rifle. The above mentioned DoD stamp and the P in a circle proof stamp were applied only to complete rifles. They were not affixed to replacement stocks. So during the course of the rebuild process, it got this stock.
The stock is solid with no cracks and no sponginess due to oil or solvent soaking.
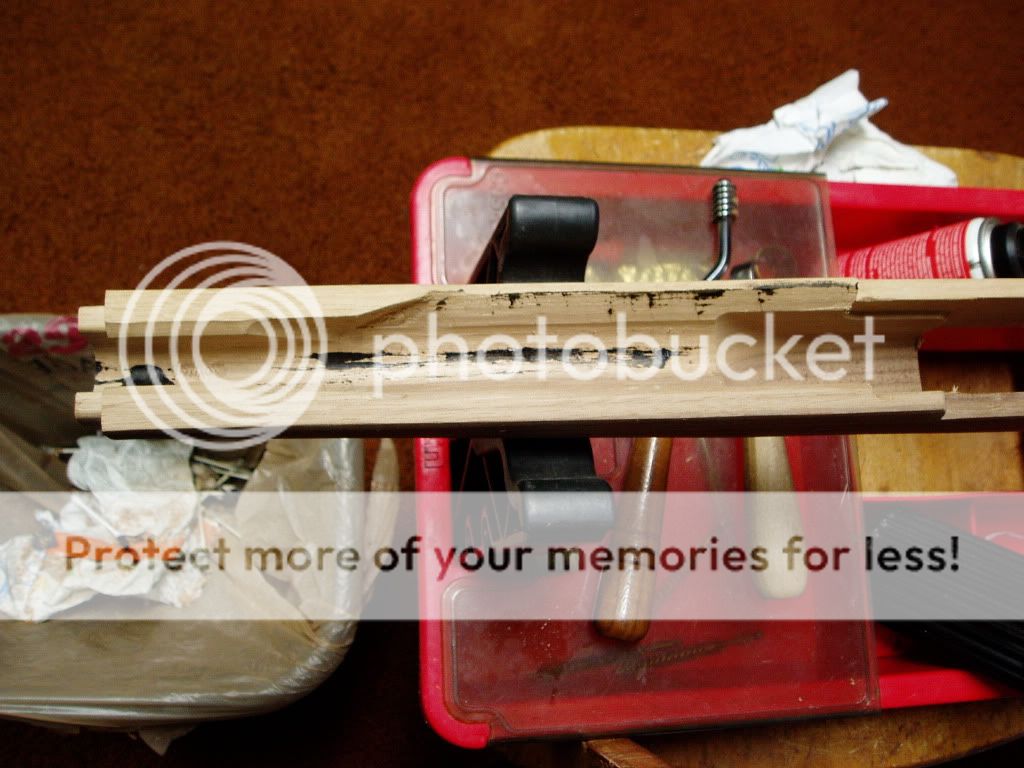
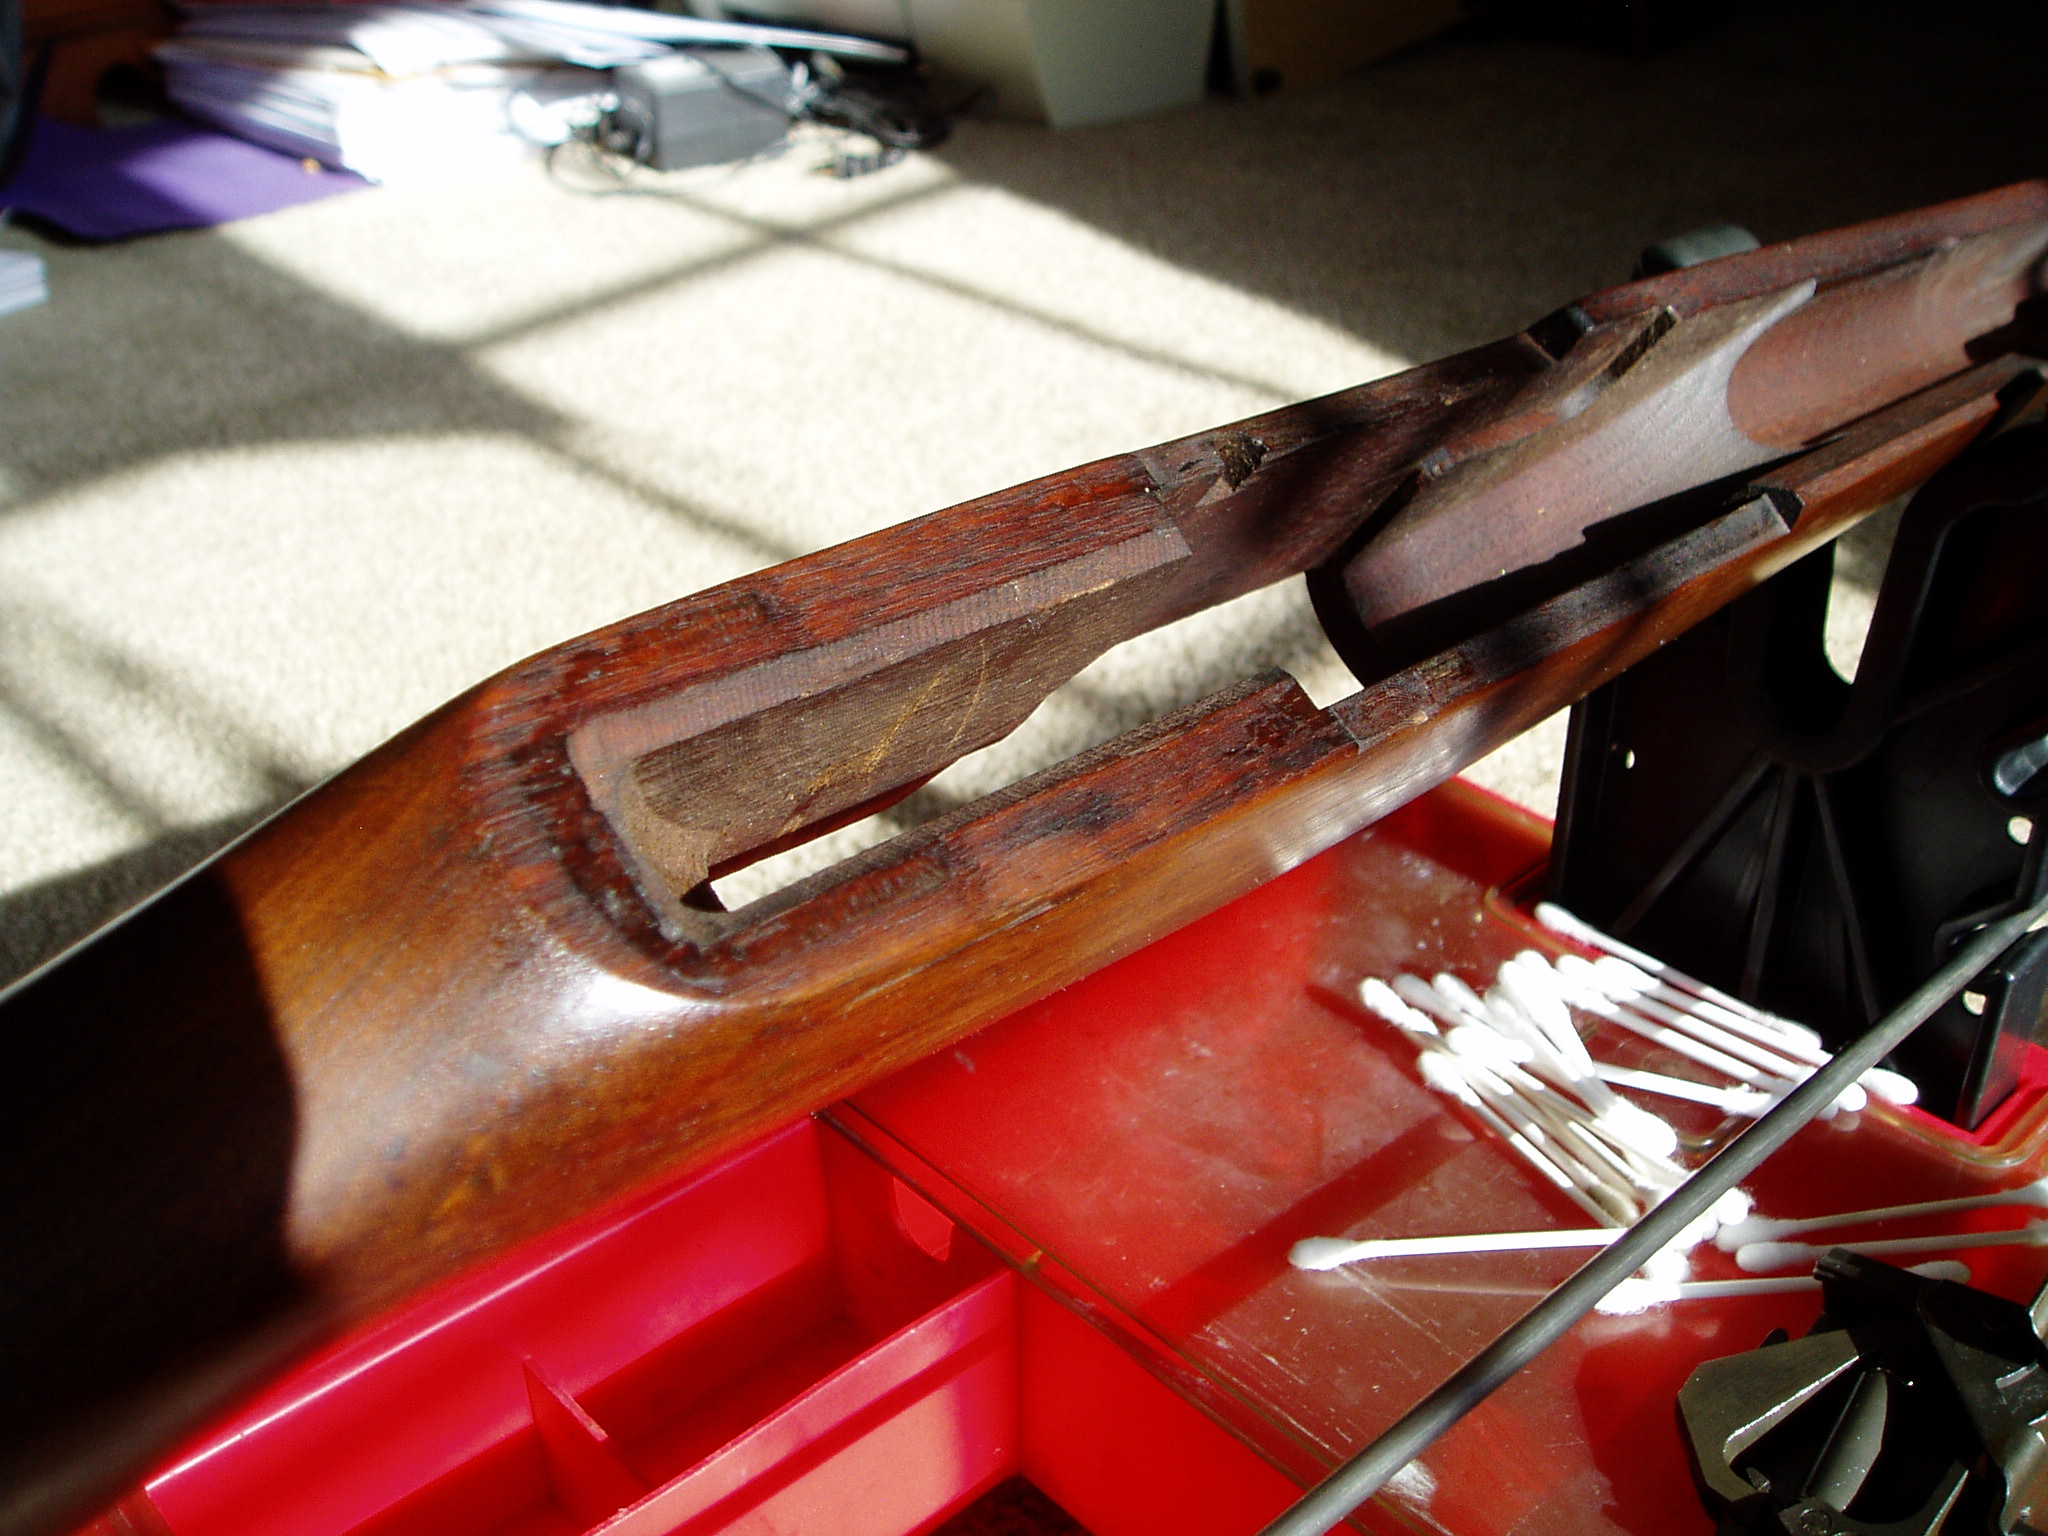
You want to examine the mag well area closely, especially the area around the clip latch release relief cut where the wood is the thinnest. These are the areas subject to cracking. An M1 will not shoot well with a cracked stock. On post war stocks, this area and the pistol grip was made beefier to stand up to grenade launching better.
|
| This image has been resized. Click this bar to view the full image. The original image is sized 2048x1536. |
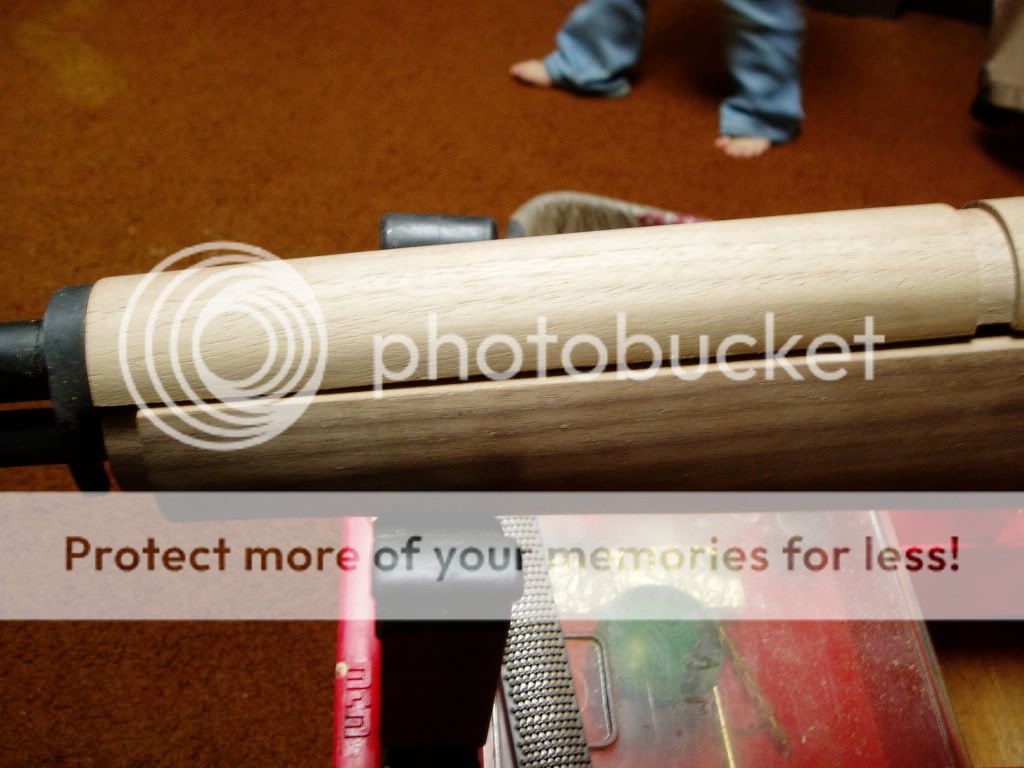
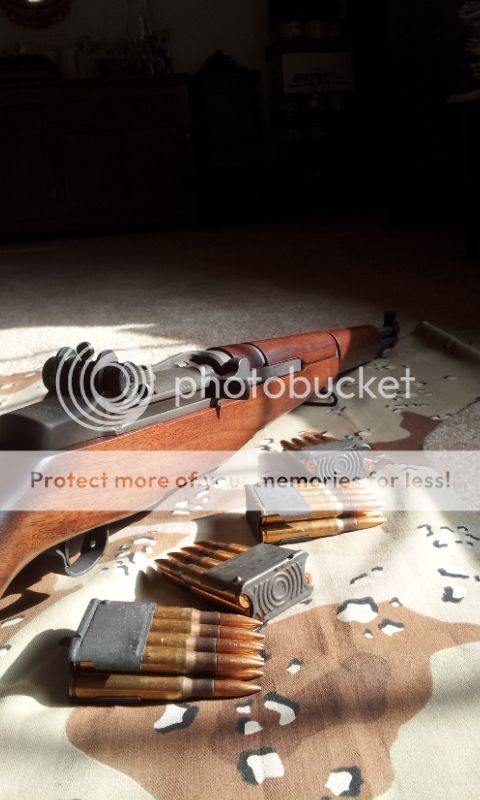
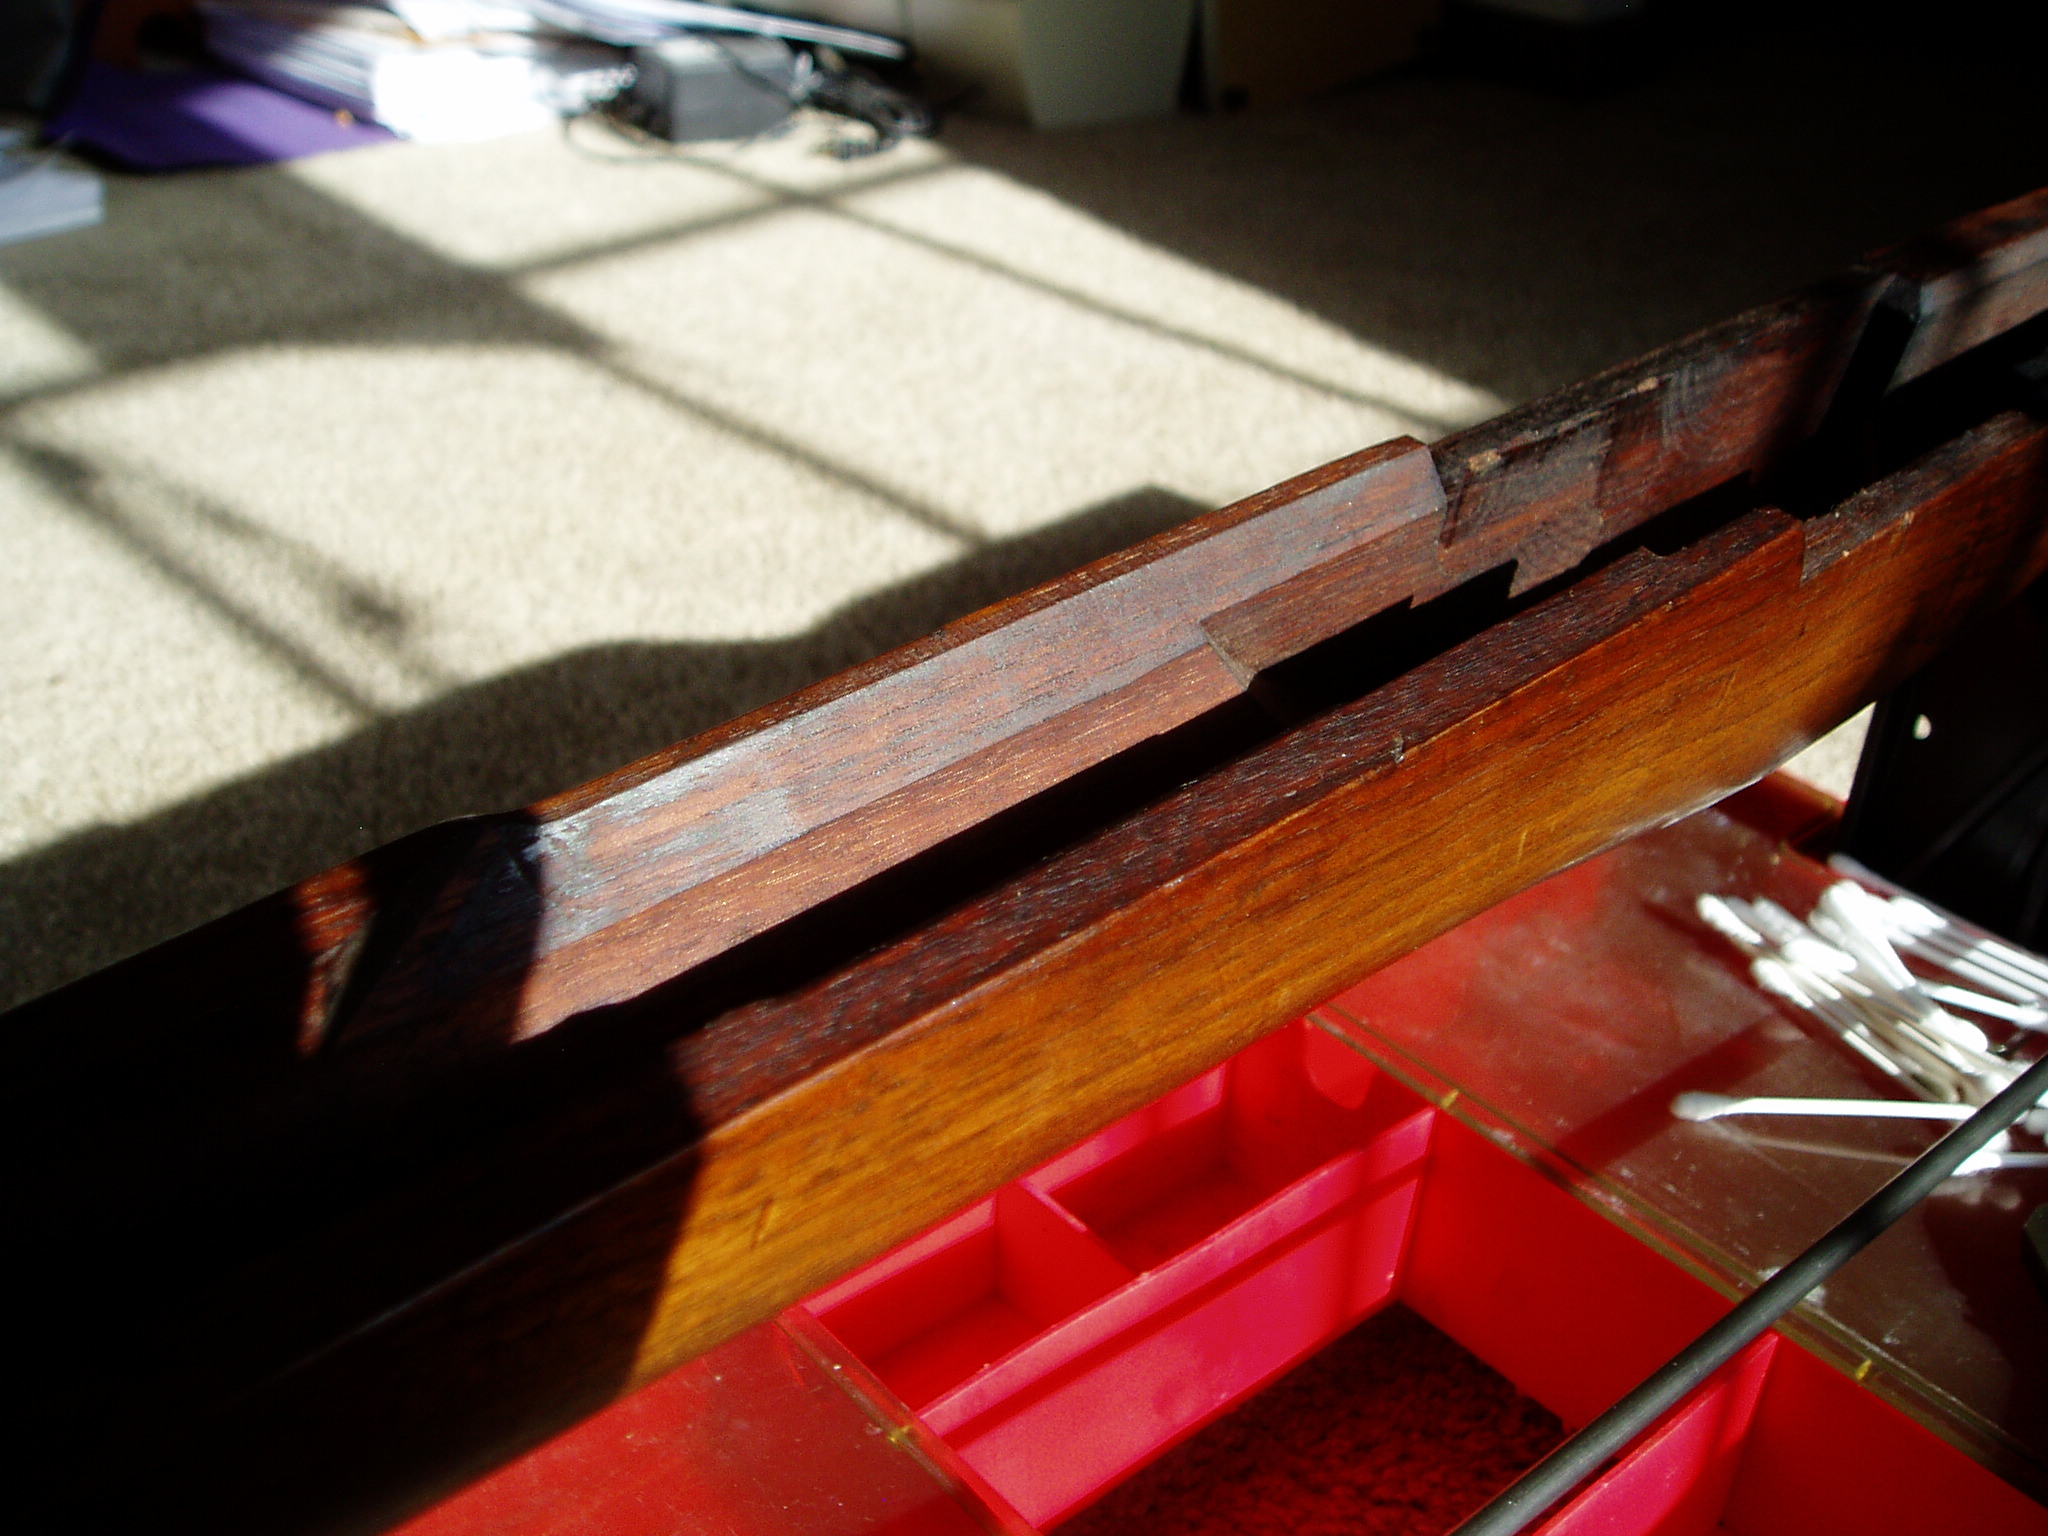
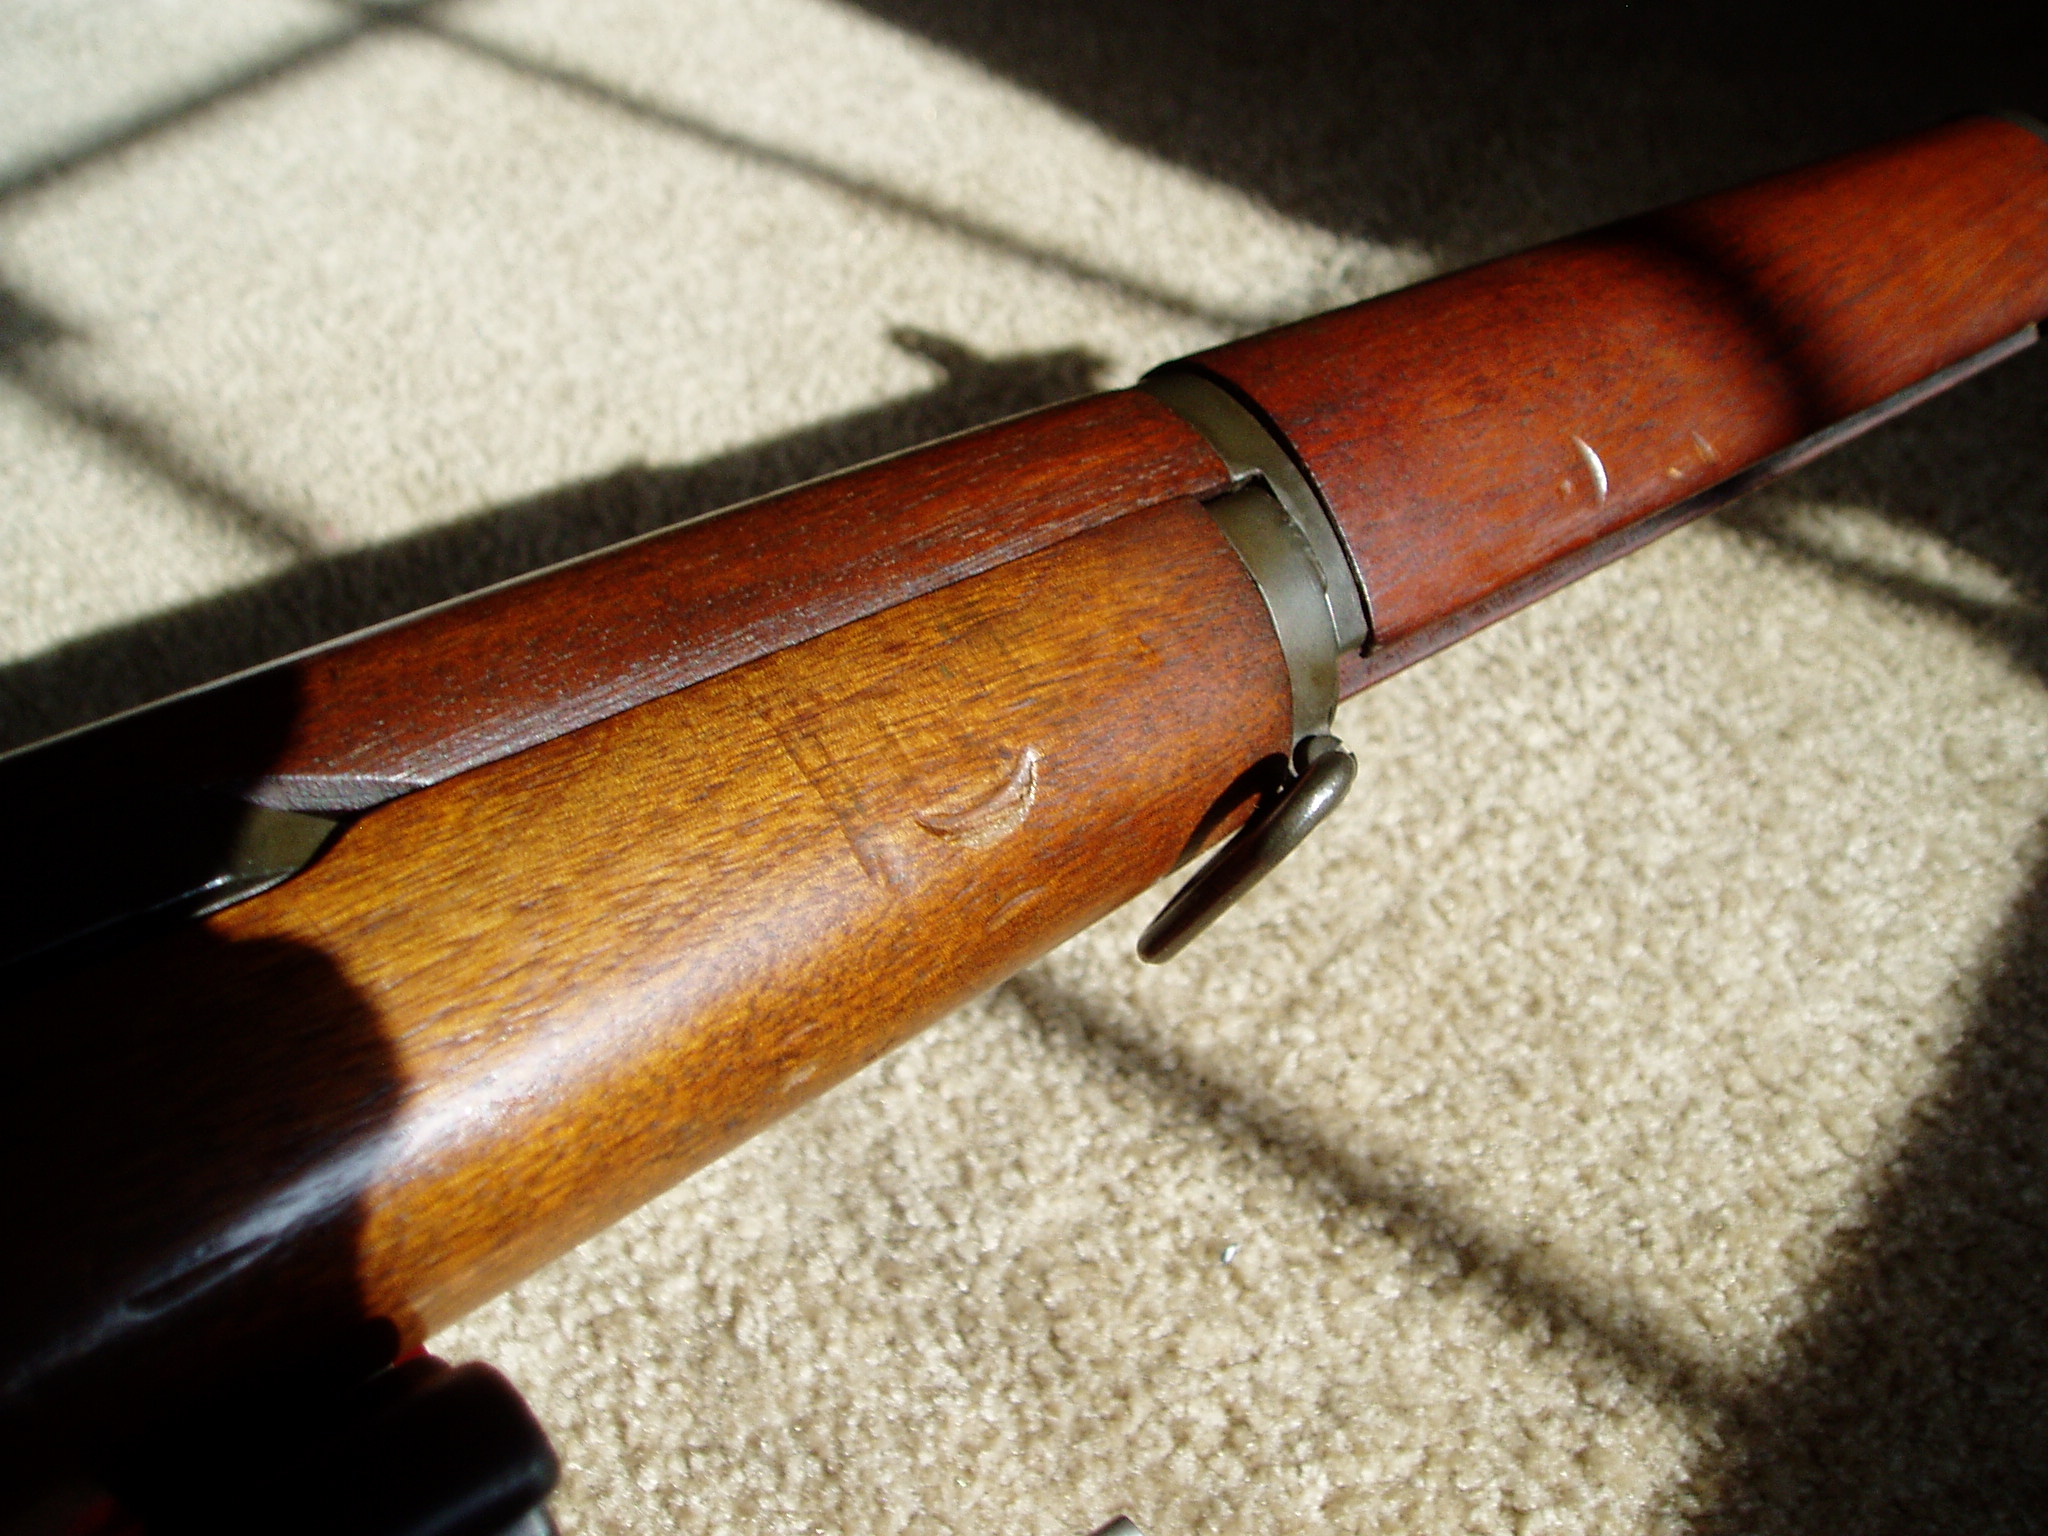
In this pic, we can see where the op rod is rubbing just a little bit. For an issue rifle, this alone is not something that will make a big difference, but if the op rod is dragging elsewhere as well, the total effect can be detrimental to accuracy. Ideally, the op rod should not drag at all.
|
| This image has been resized. Click this bar to view the full image. The original image is sized 2048x1536. |
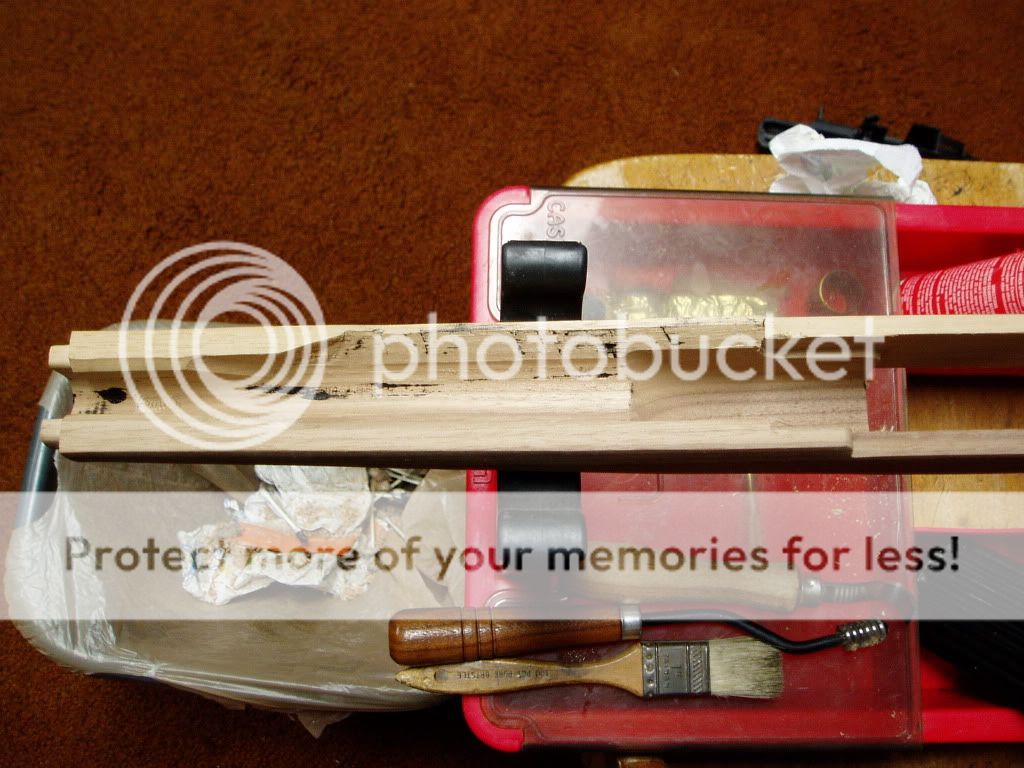
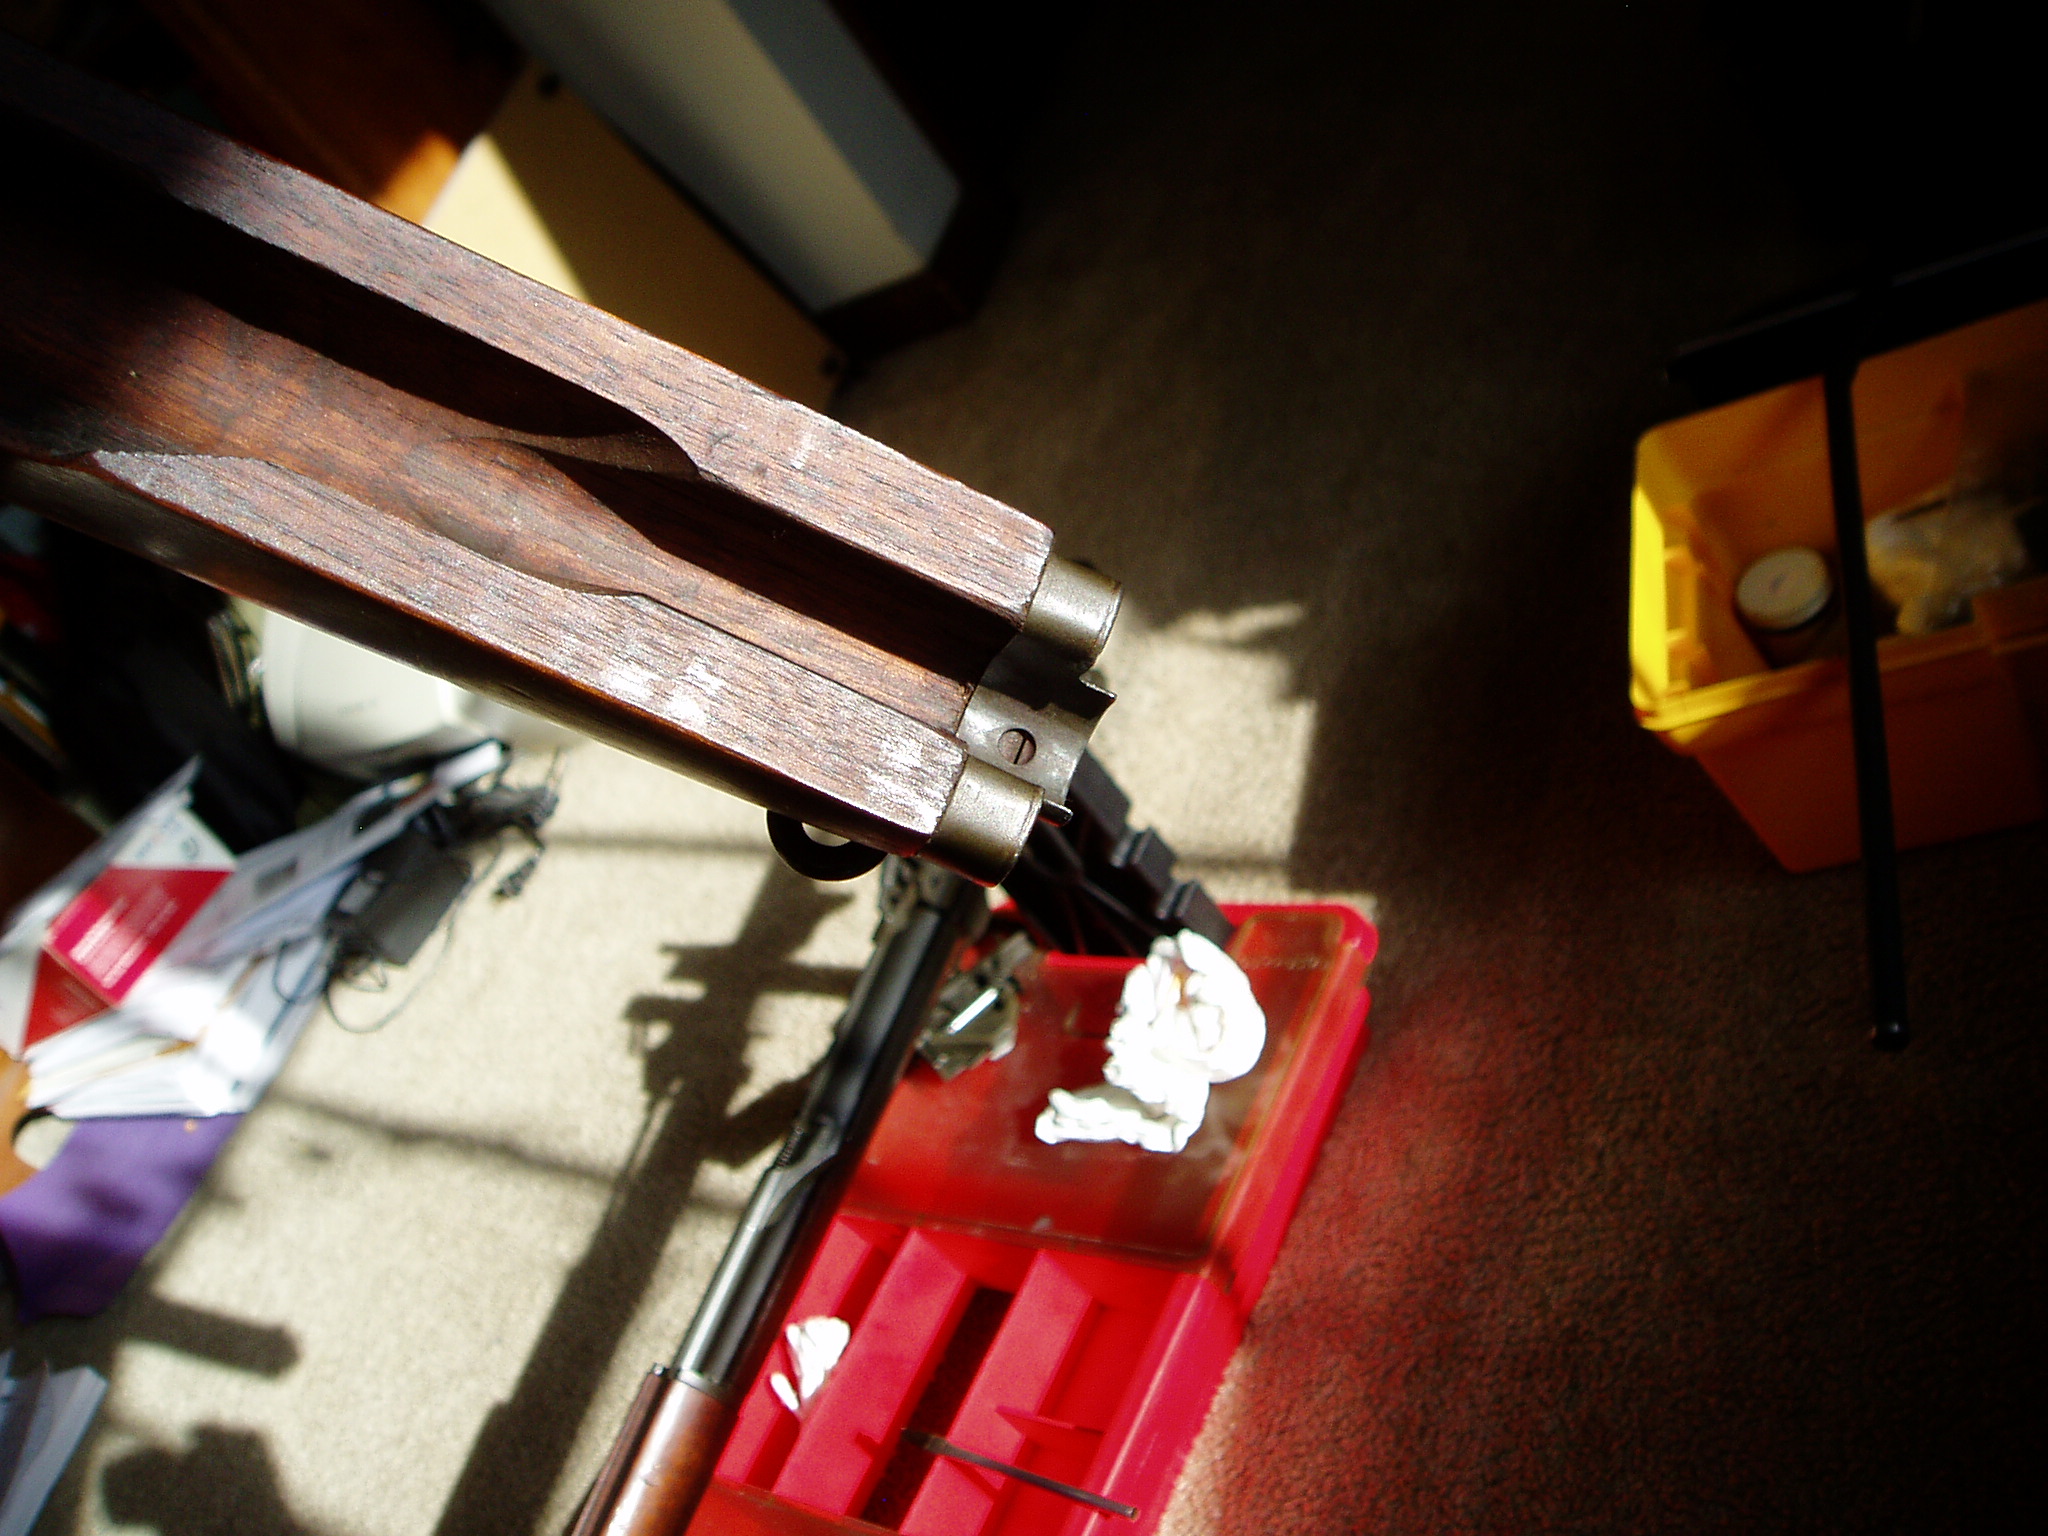
The stock ferrule shows rub marks. Here again, the contact is light, but none is better. A Dremel with the appropriate size grinding stone makes short work of this.
To determine if an op rod is dragging, remove the op rod spring and engage the safety so the hammer is cammed down out of bolts path and reassemble the rifle. Now tilt the muzzle up about 30-35 degrees. The op rod and bolt should slide to the rear of their own weight. Depress the muzzle, and they should go all the way to battery. It is possible to pass this test and still have light contact marks as we see here. The op rod is hollow and flexes under load.
|
| This image has been resized. Click this bar to view the full image. The original image is sized 2048x1536. |
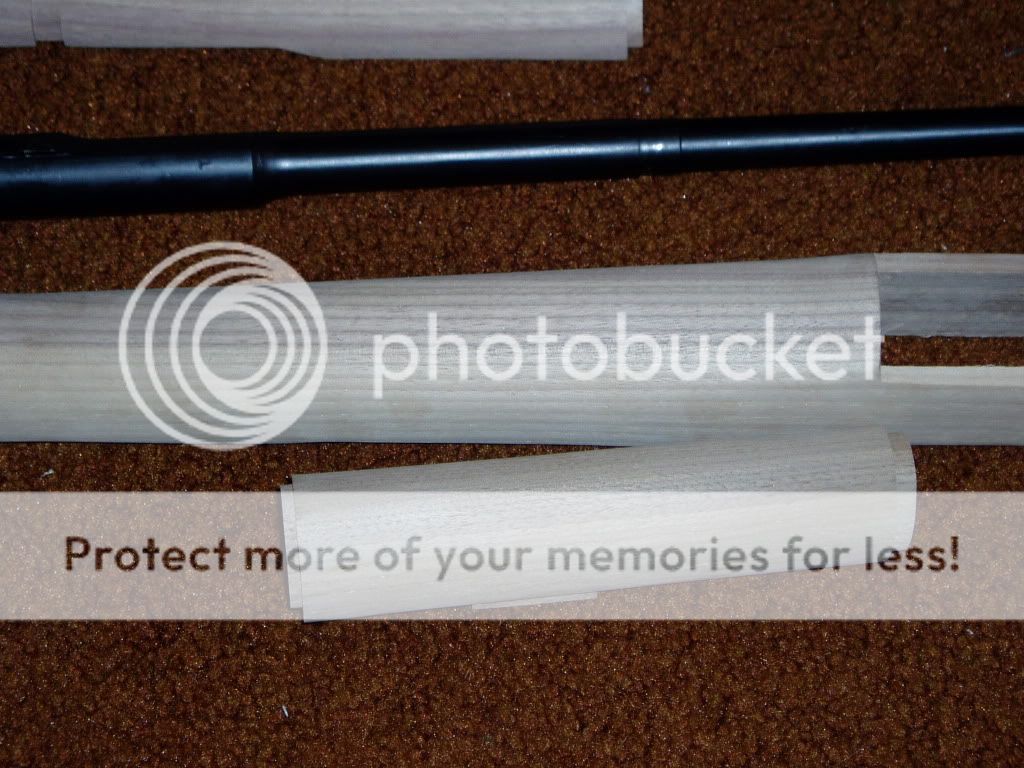
Dents and dings in the stock can be steamed up if the wood fibers are not cut. Dents like this will steam up and refinish nicely.
|
| This image has been resized. Click this bar to view the full image. The original image is sized 2048x1536. |
To steam up dents, set a clothes iron to the hottest setting and pre heat. Take an old wash cloth or other cotton rag and soak with water. Wring out so it doesn't drip. Place the wet rag over the dent and press the iron onto the spot. It may take more than one application to raise larger dents.
Damage like this where the wood fibers are crushed won't steam up.
|
| This image has been resized. Click this bar to view the full image. The original image is sized 2048x1536. |
The hand guards.
Both hand guards are solid with no evidence of cracks.
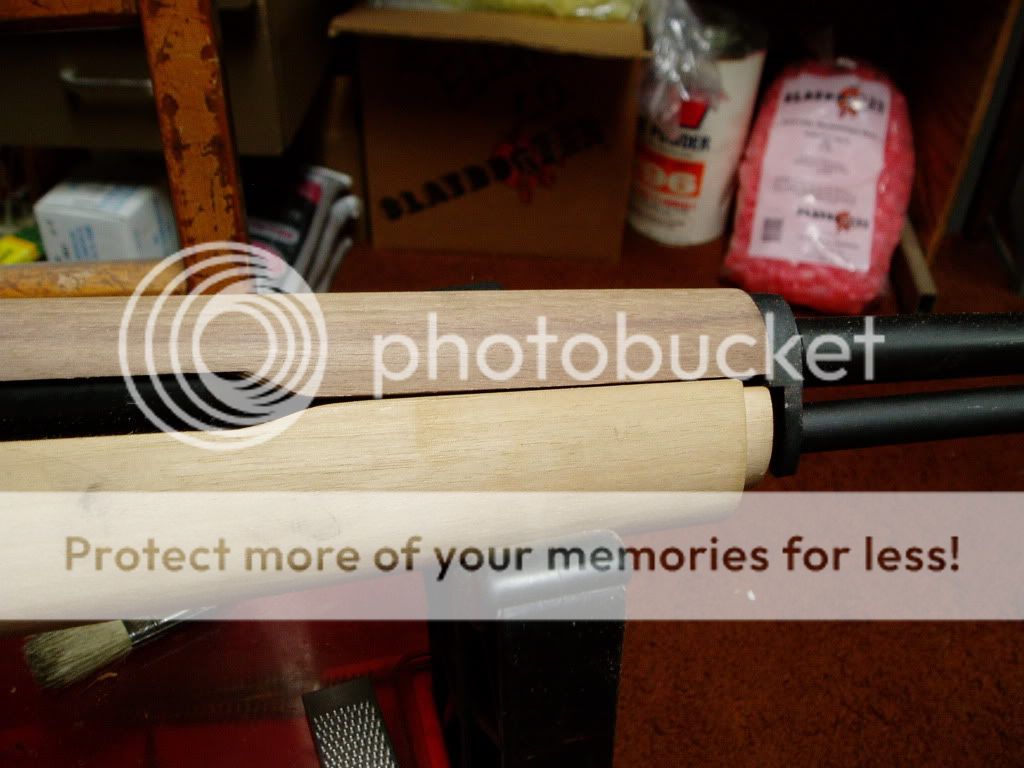
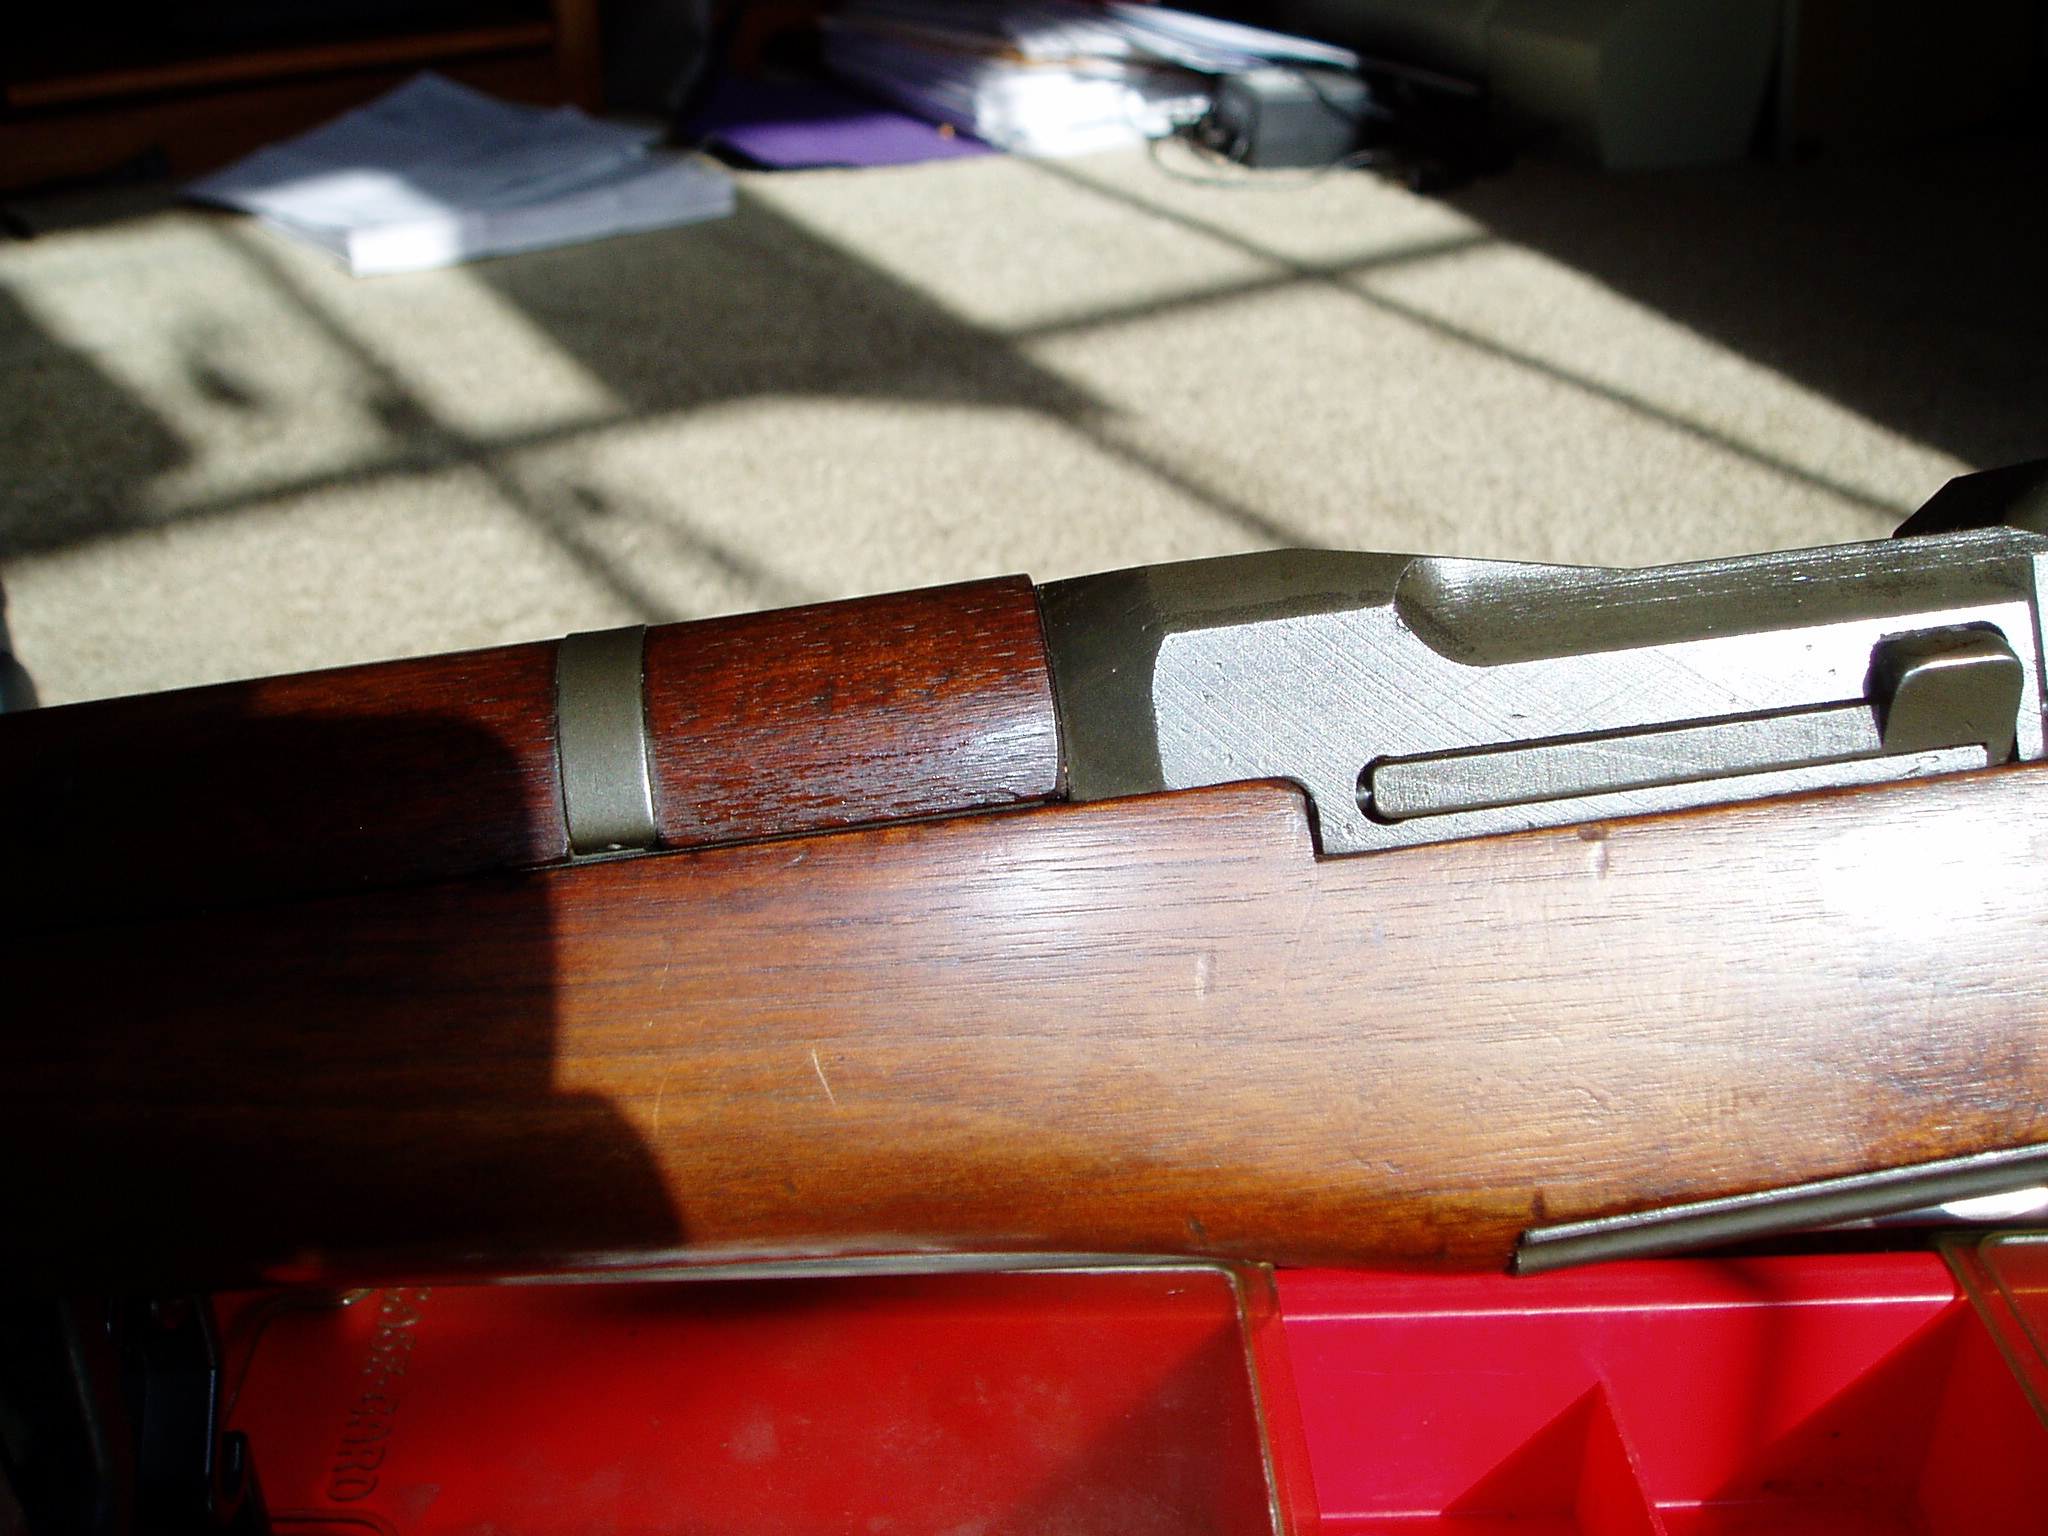
The rear hand guard fits as most of them do and is a bit too long. You want a little clearance between the receiver and the hand guard.
|
| This image has been resized. Click this bar to view the full image. The original image is sized 2048x1536. |
It also contacts the stock on both sides. Here again you want a small gap in this area for best results.
|
| This image has been resized. Click this bar to view the full image. The original image is sized 2048x1536. |
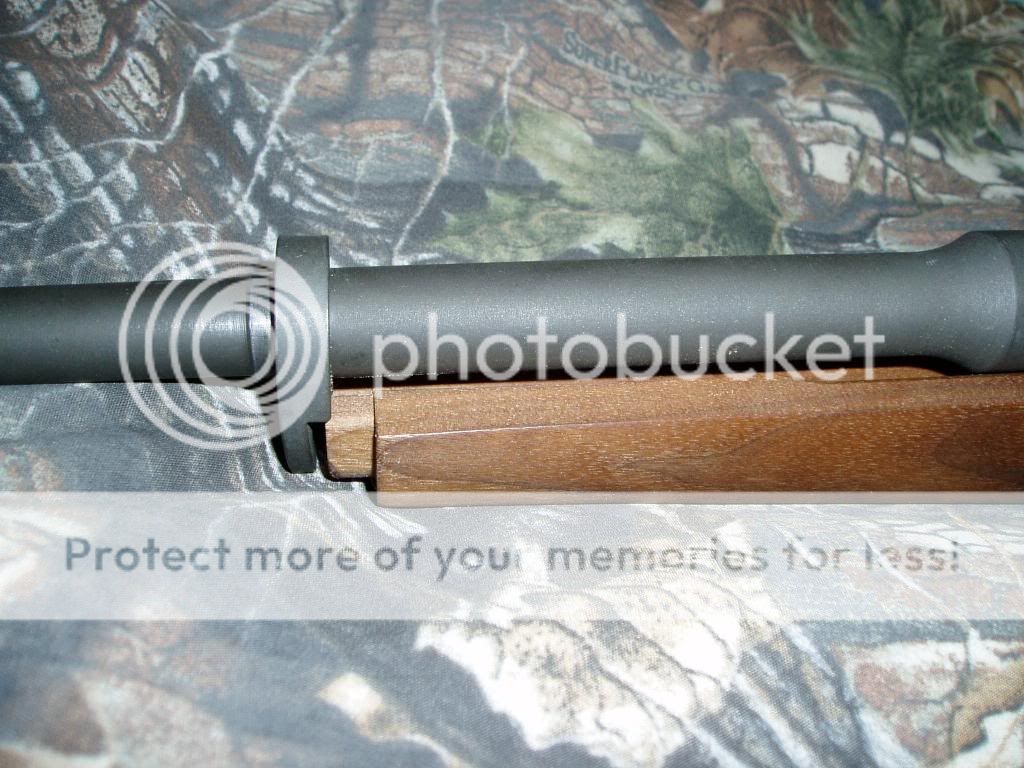
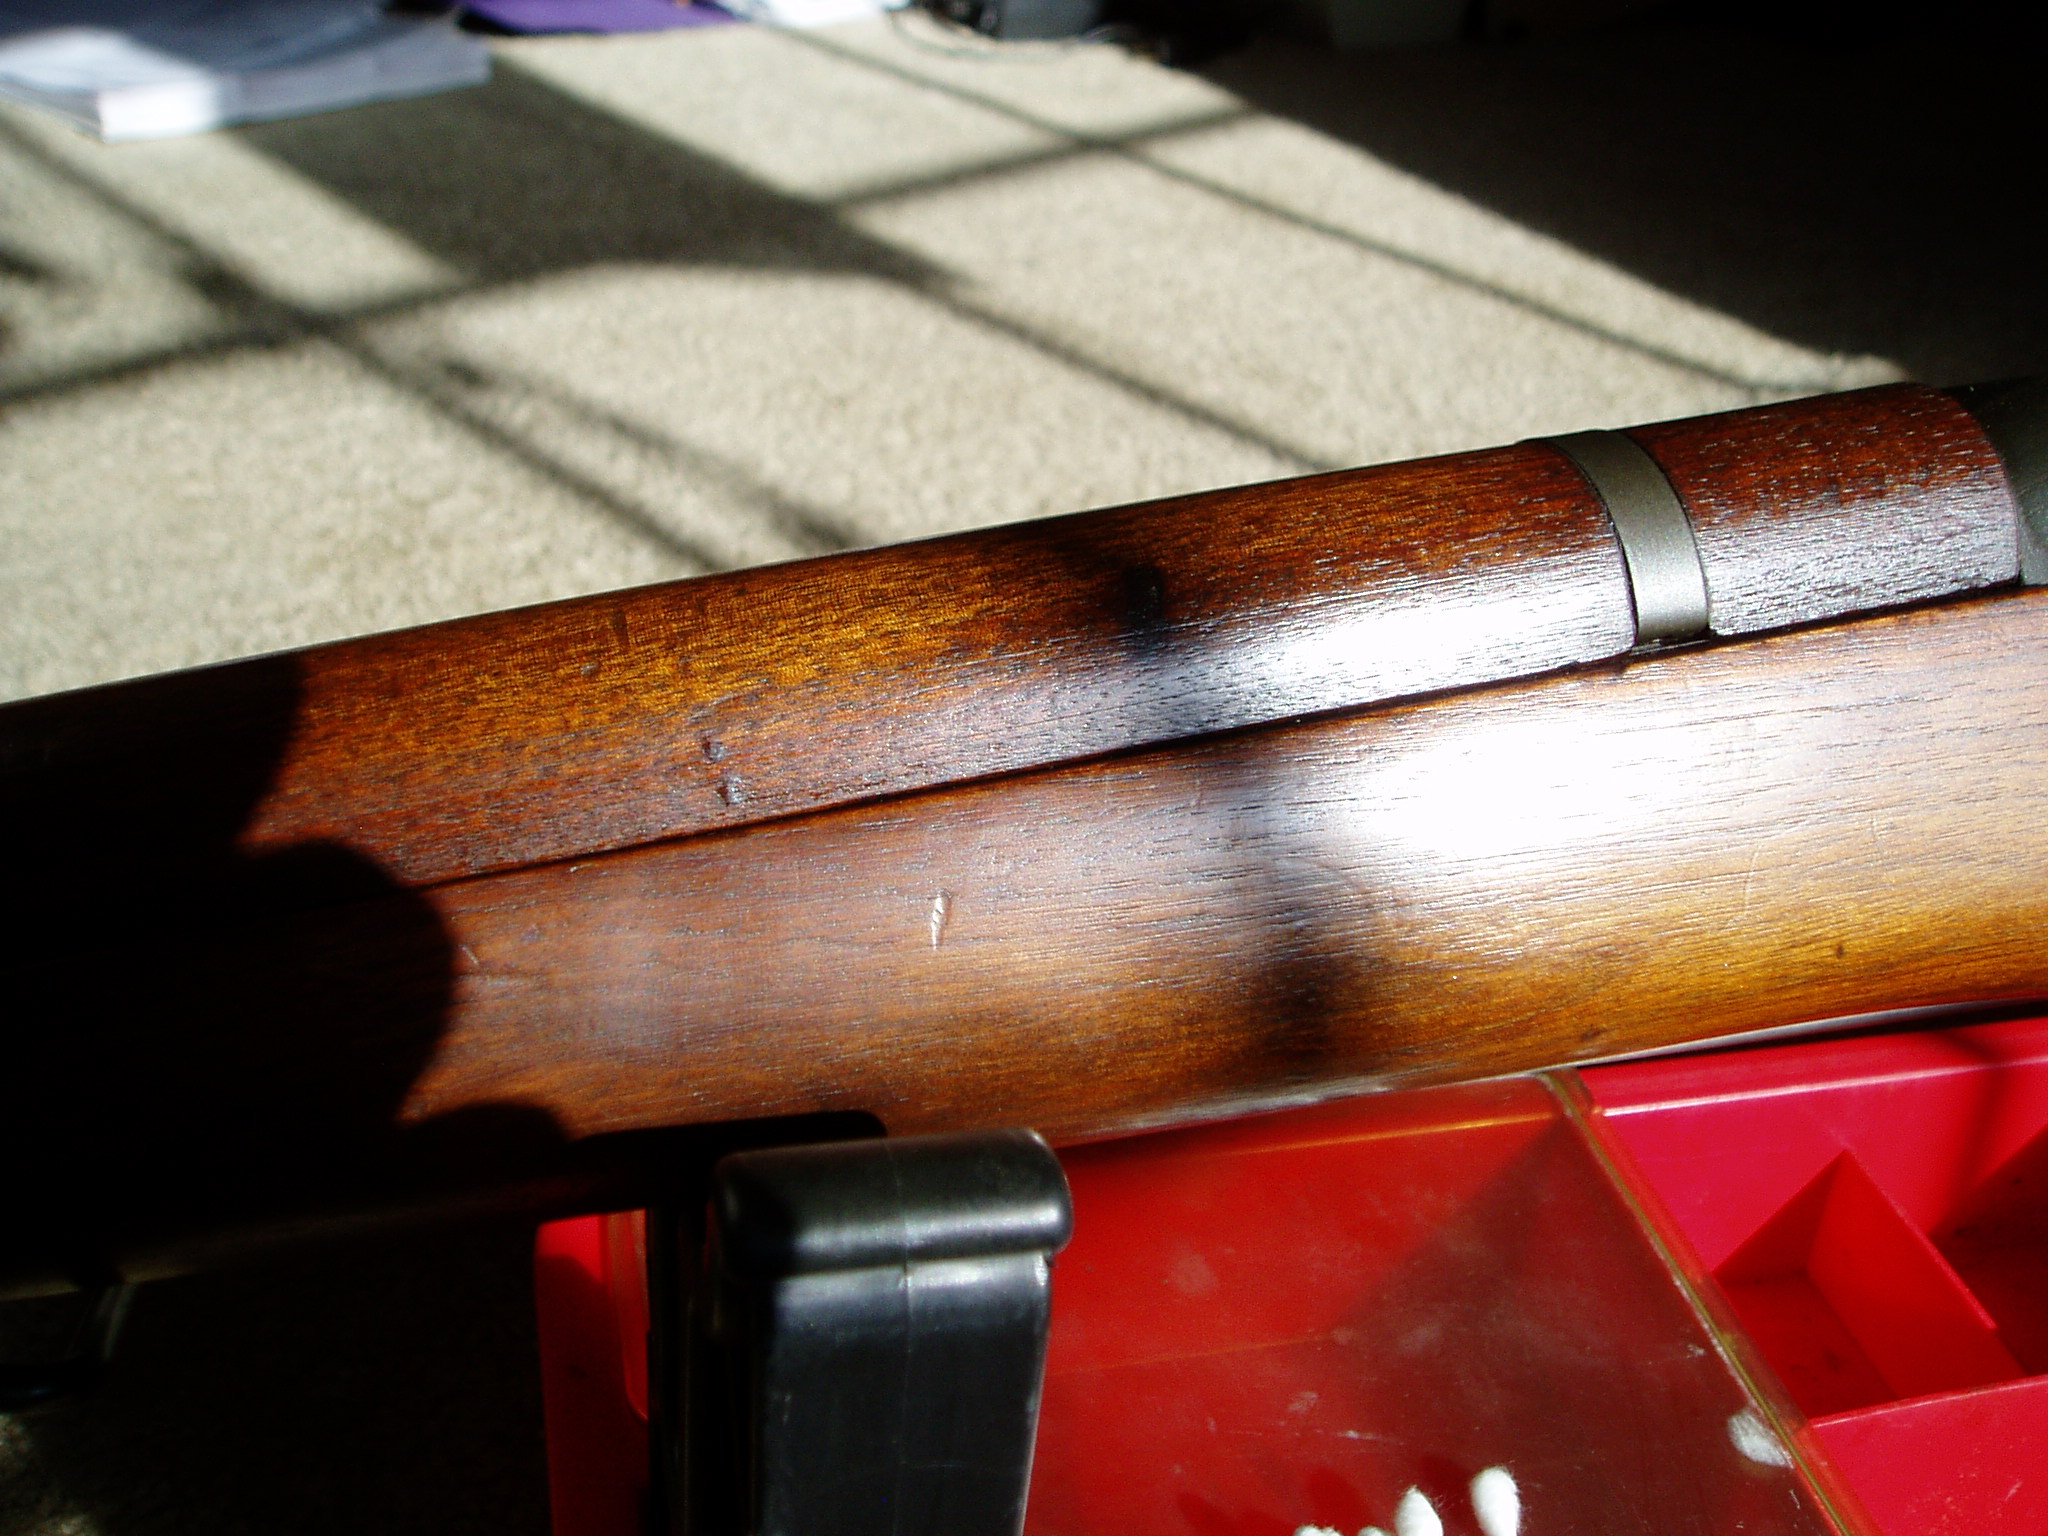
The front hand guard has no fore and aft play. This is caused by someone who cranked down too hard on the gas cylinder lock and caused the gas cylinder to be pressed into contact with the hand guard. The fix here is to unscrew the gas cylinder lock one revolution and reinstall the gas plug. If the gas cylinder is tight on the splines, it may have to be tapped forward.
|
| This image has been resized. Click this bar to view the full image. The original image is sized 2048x1536. |
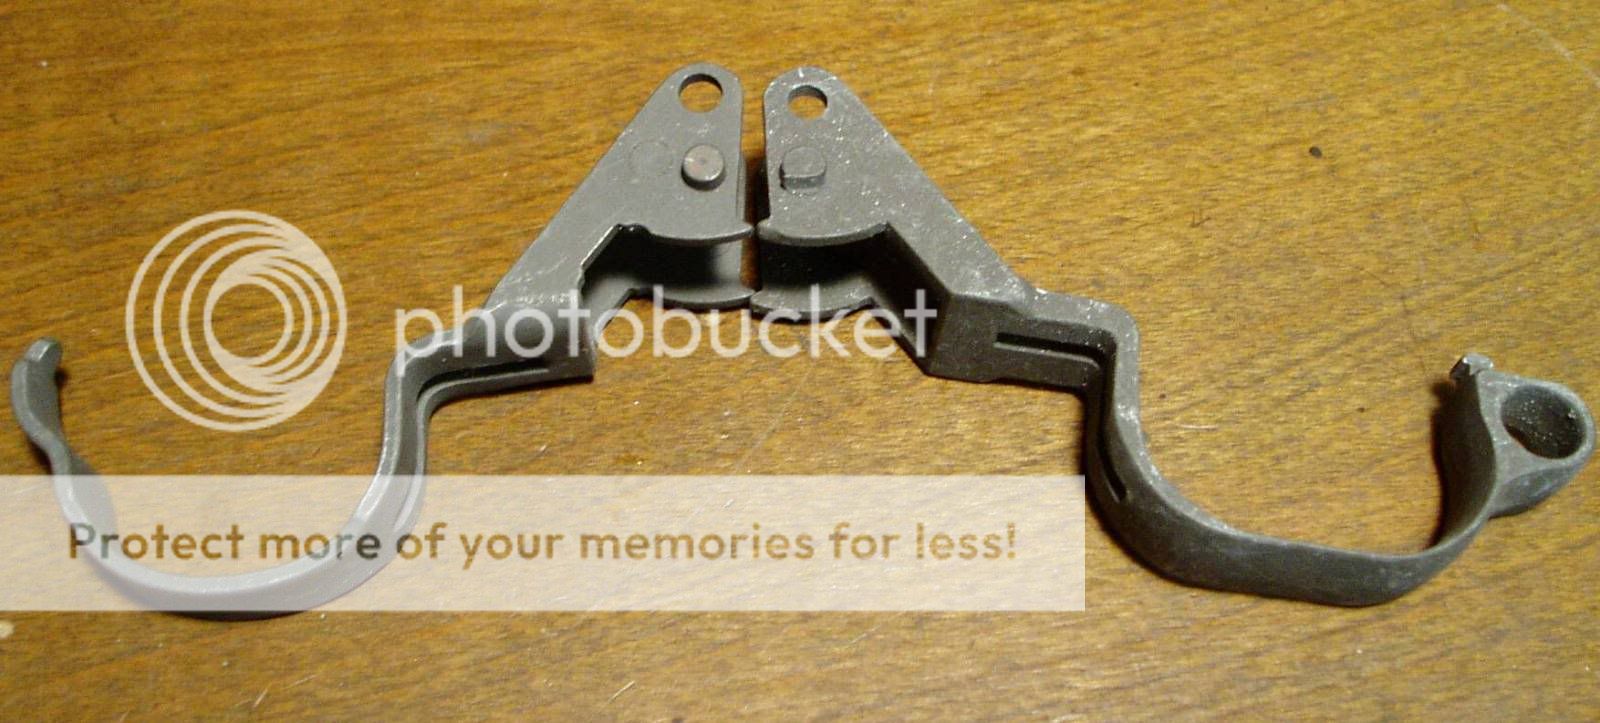
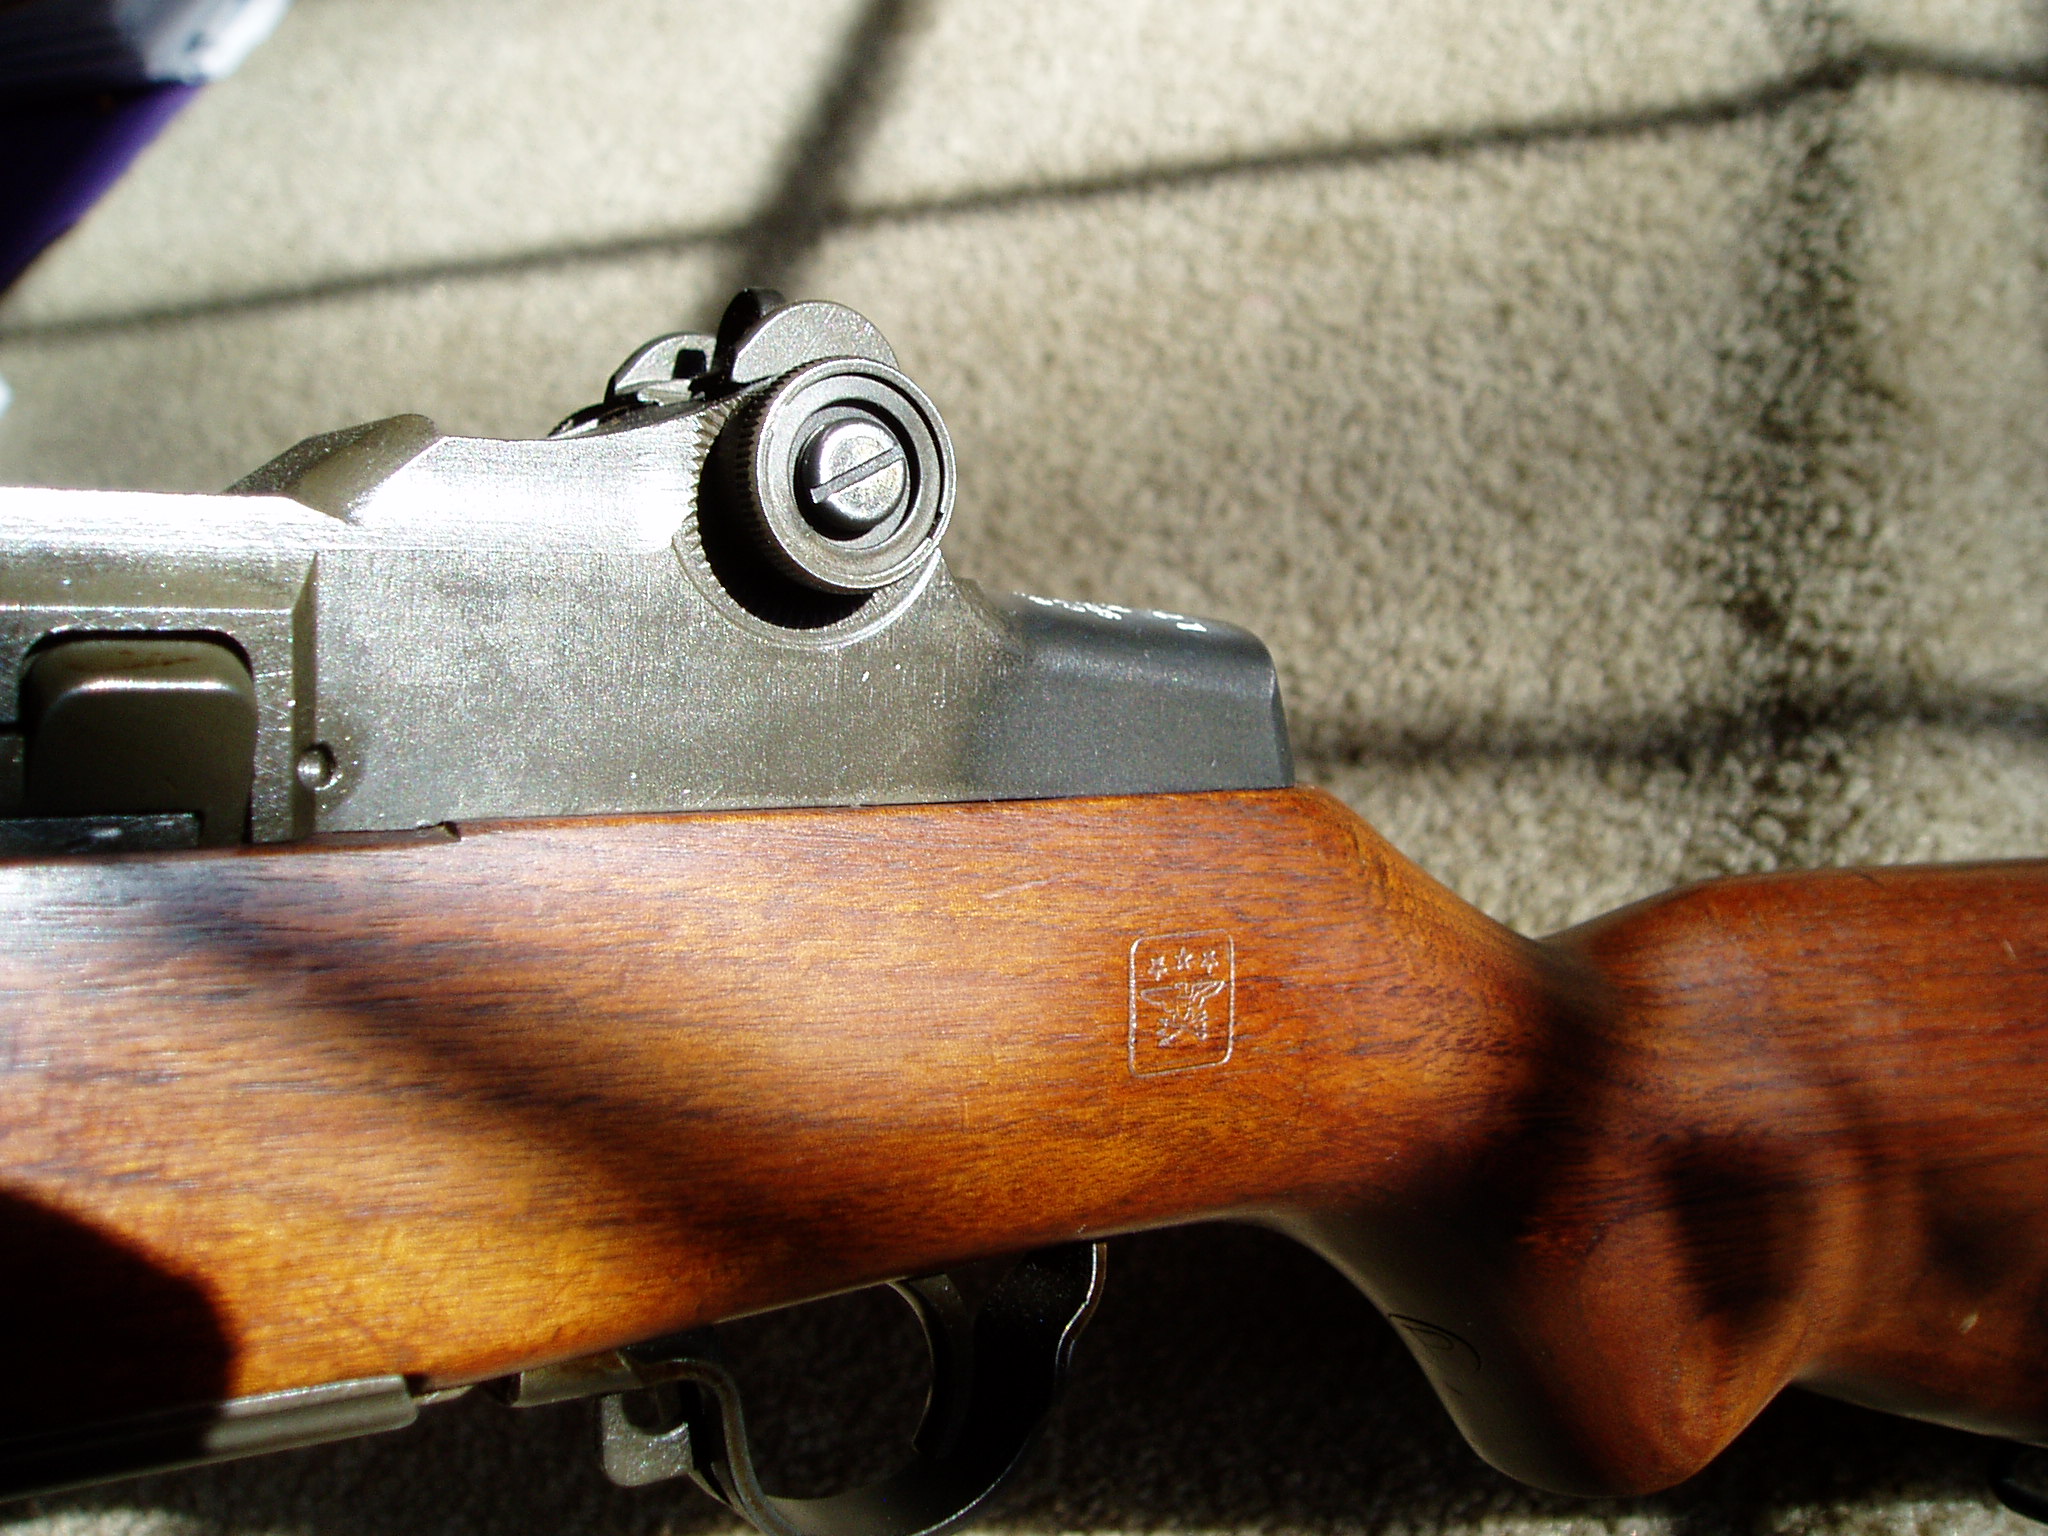
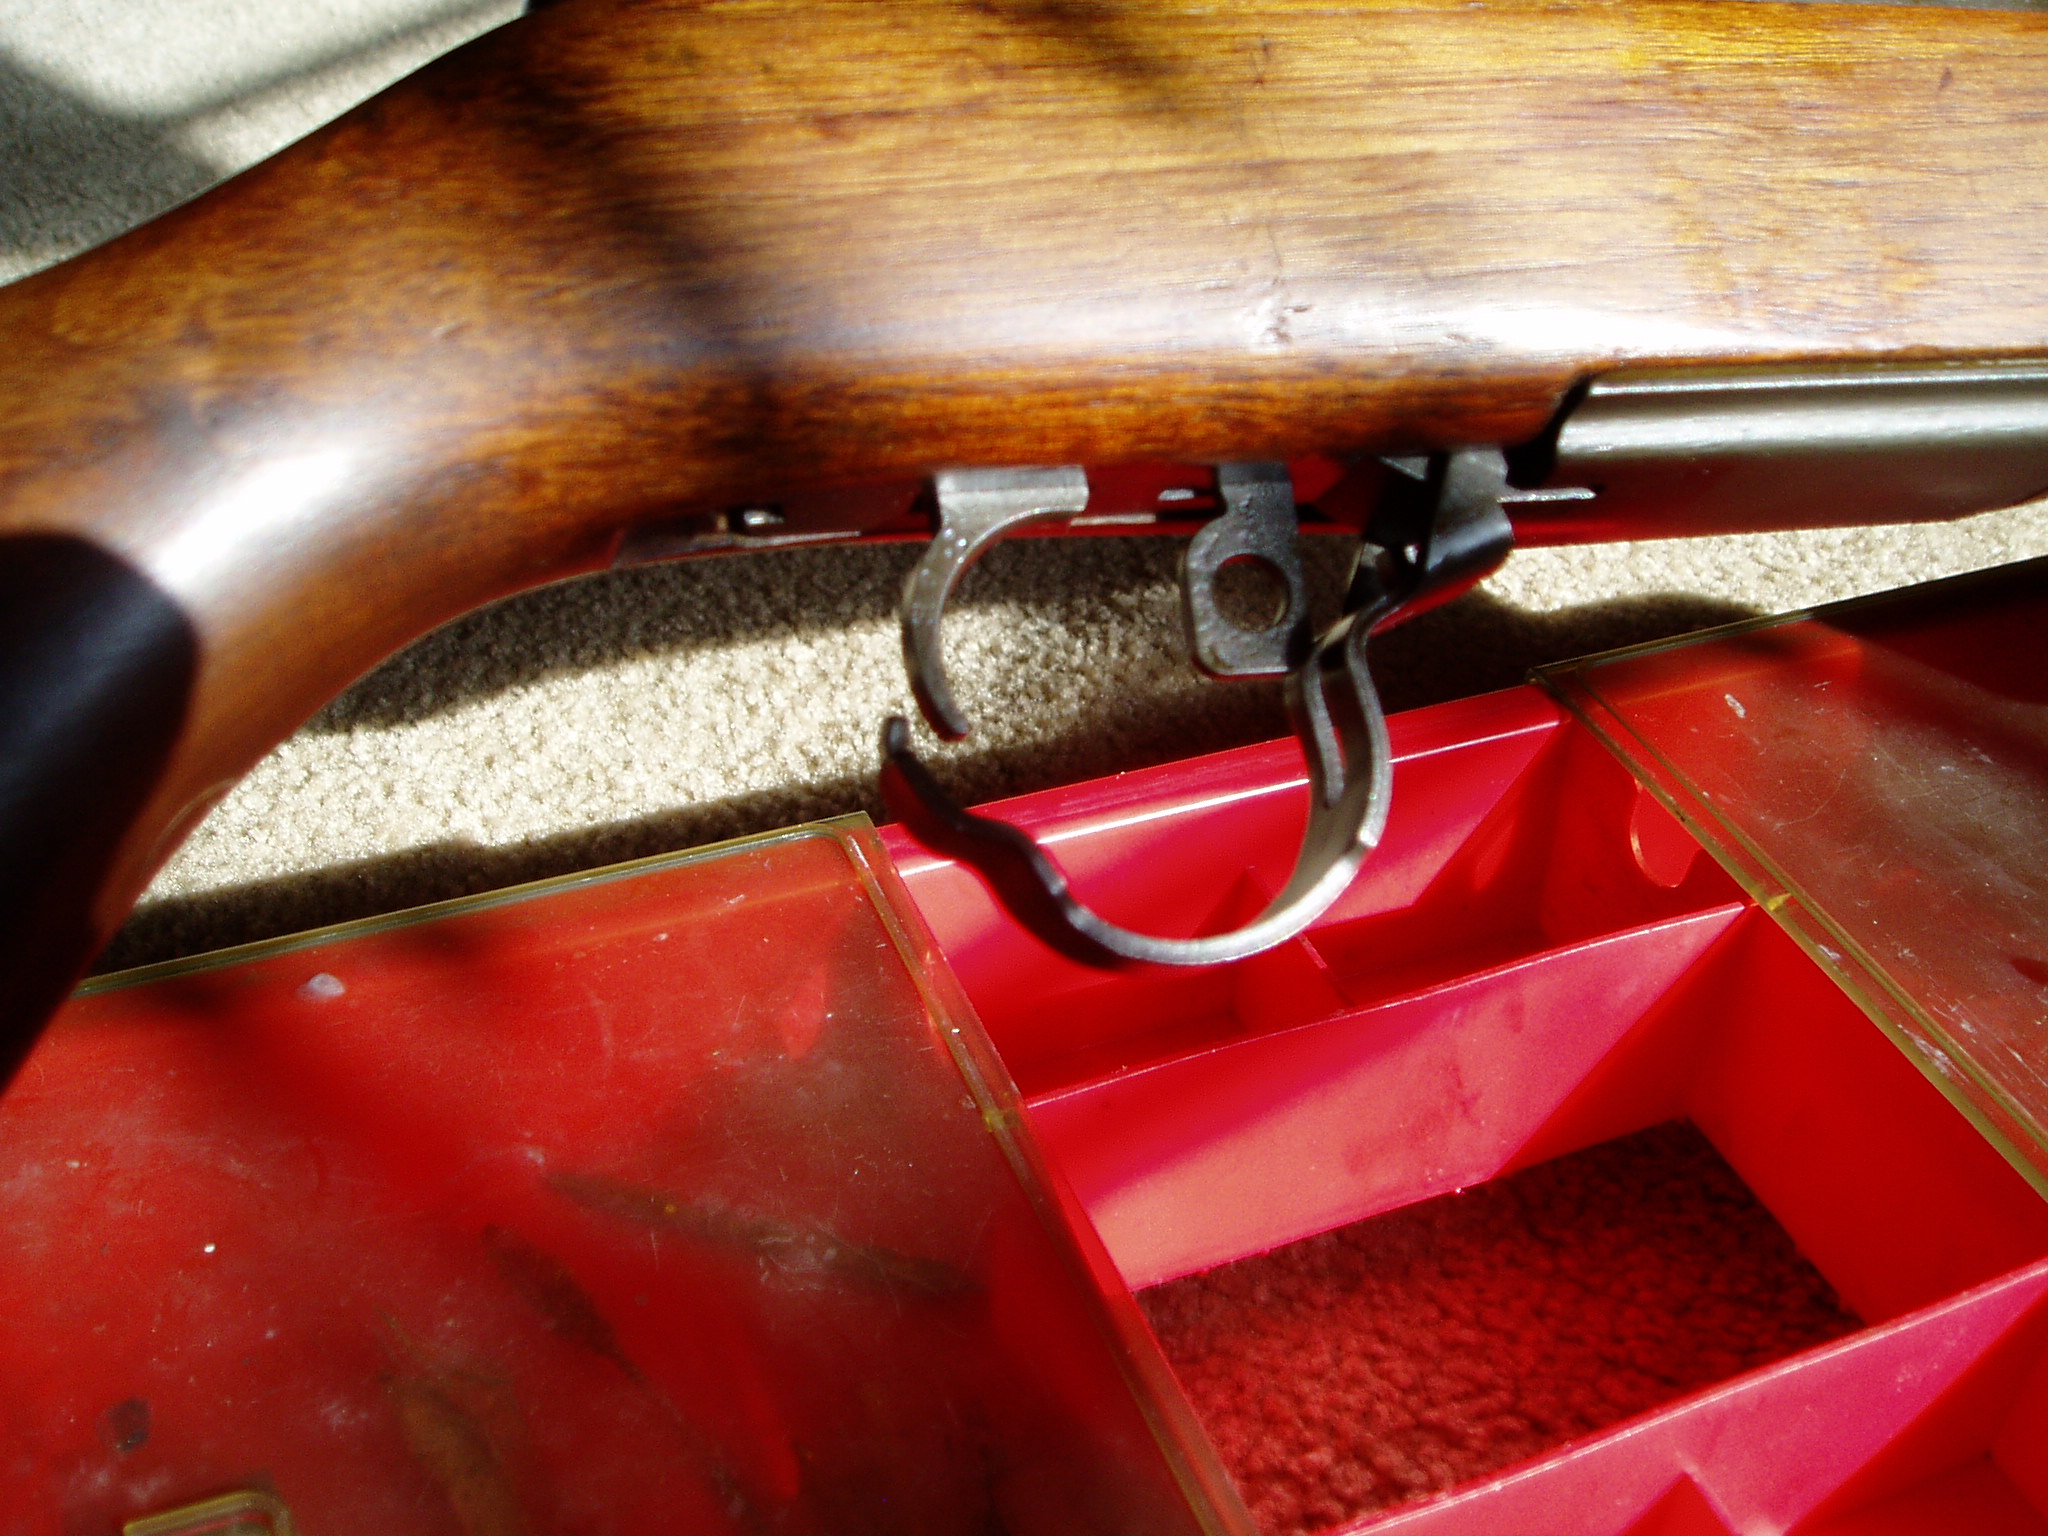
Draw tension.
I was quite surprised upon receipt of this rifle that the draw tension was ideal. Examination revealed nice round trunnions on the trigger guard.
|
| This image has been resized. Click this bar to view the full image. The original image is sized 2048x1536. |
You normally only see that on rifles with new stocks, or that have been glass bedded. Over time, the wood fibers compress from leaving the rifle assembled and all the parts under tension. After 50-70 years, the tension is all but gone. You can try the steaming trick here as well, and if the stock is not too bad, you may be able to get some draw tension back.
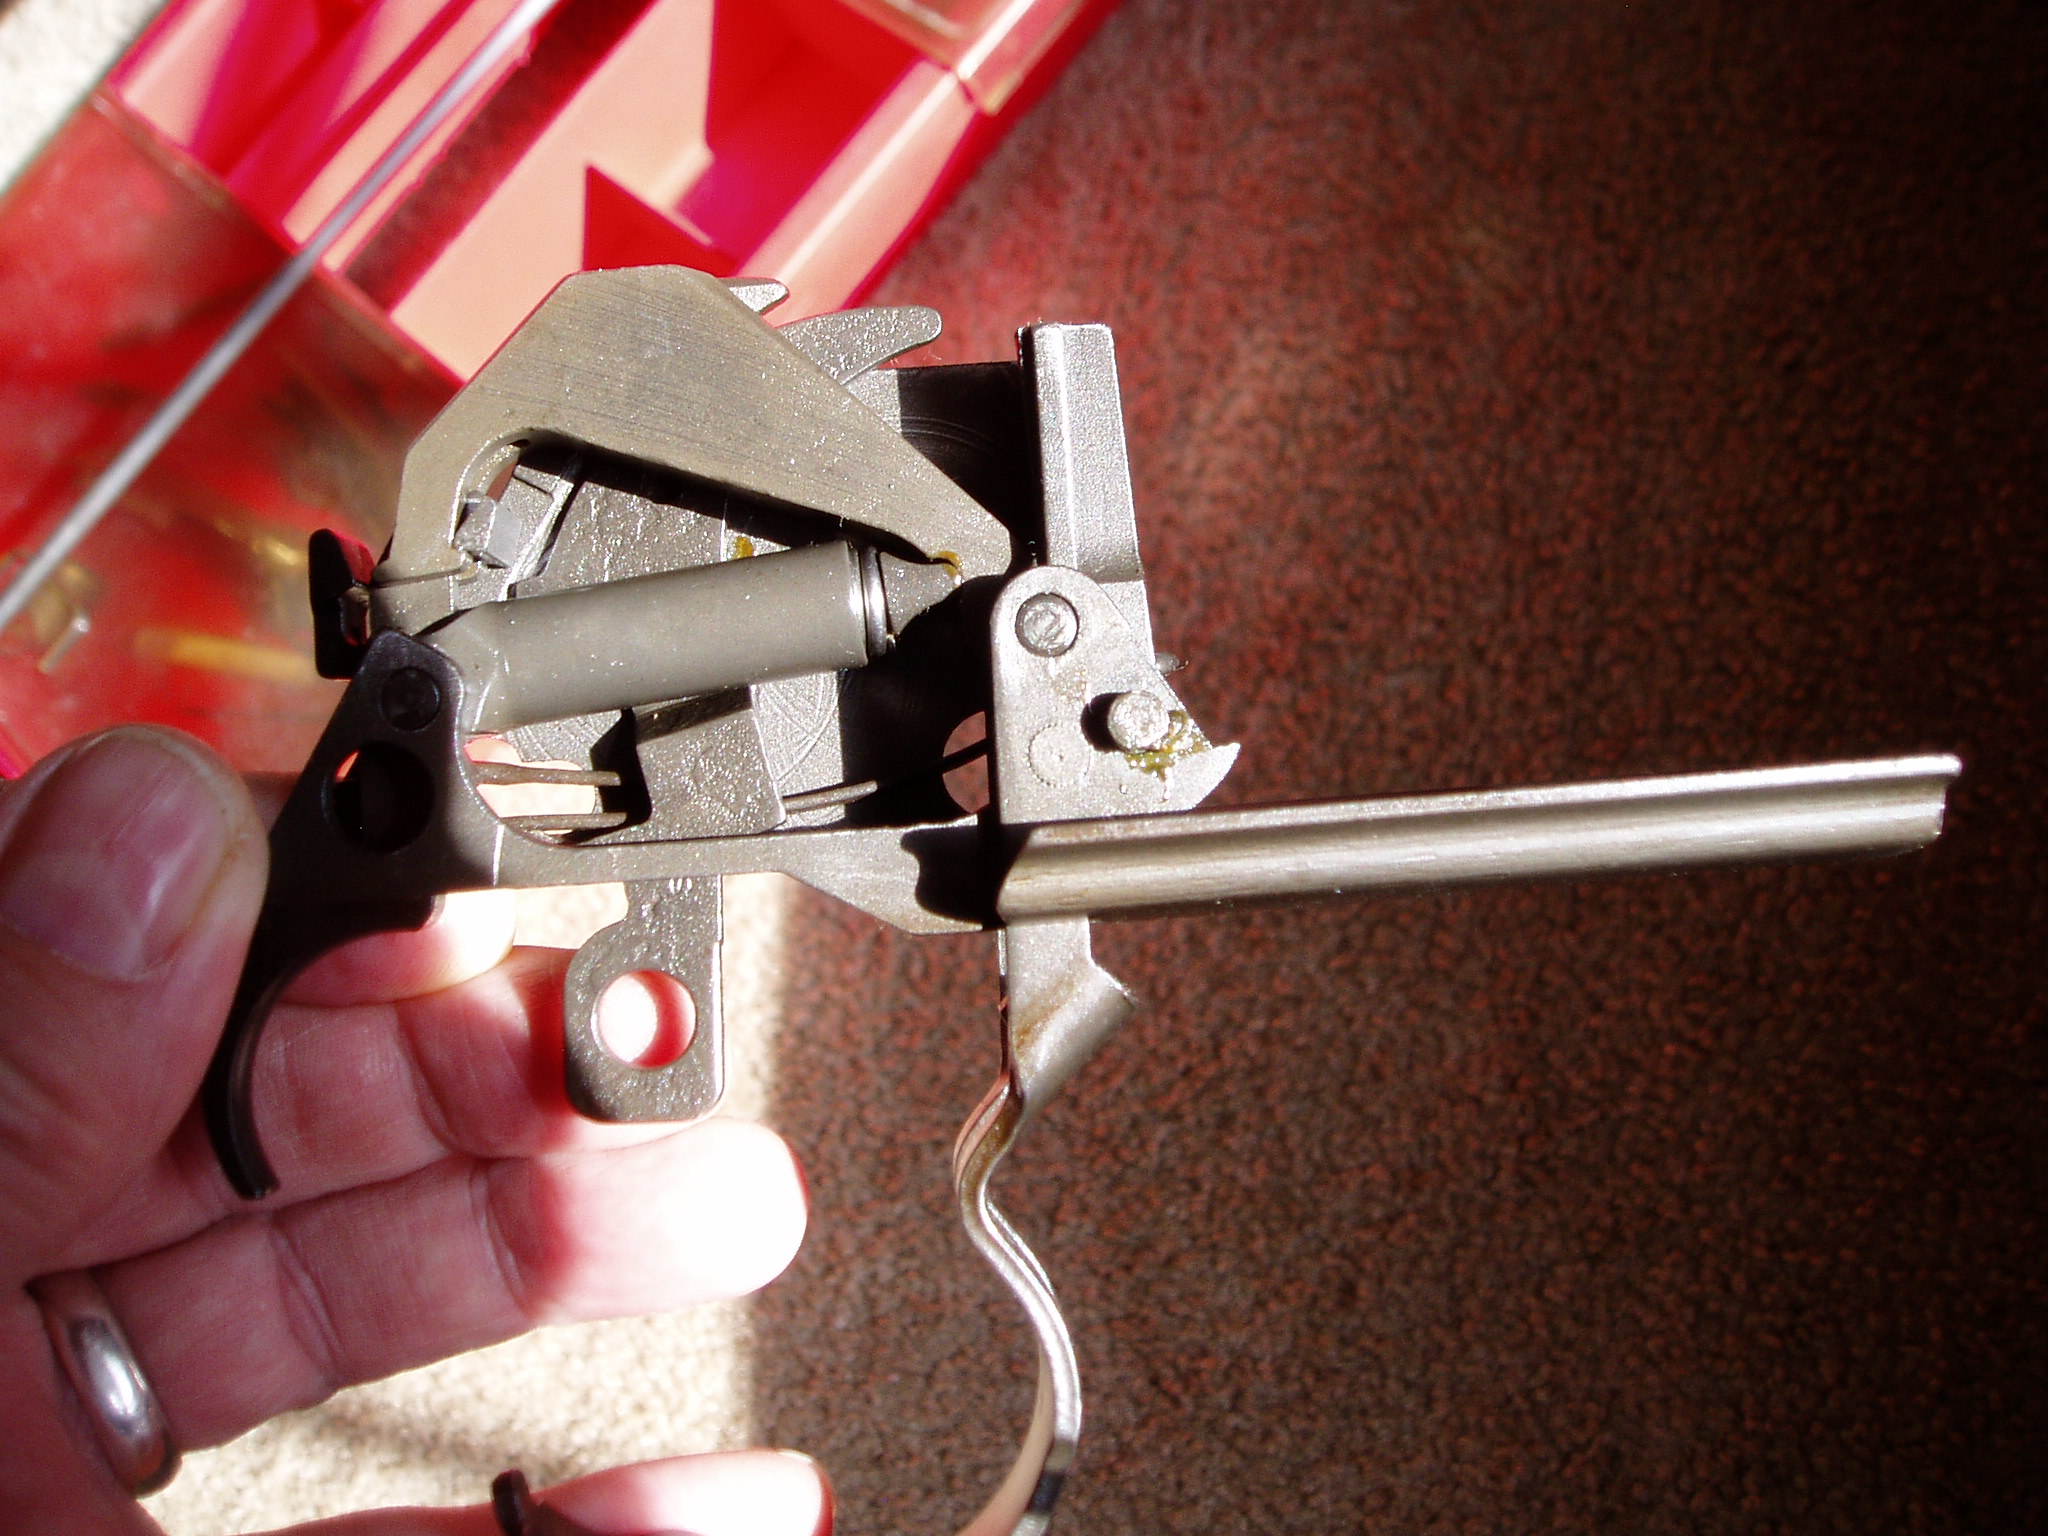
In the case of this rifle, Springfield Armory did something I have not seen before on an issue rifle. They glass bedded the trigger group to get the tension back. Even though done by the military and received from CMP this way, this is a DQ for JCG matches.
This is old school fiber glass resin bedding as used at the time. Today, you would use a product specifically made for bedding with either aluminum or steel powder in it for more strength than plain resin.
|
| This image has been resized. Click this bar to view the full image. The original image is sized 2048x1536. |
This is what ideal draw tension looks like. The trigger guard closes easily up to this point, where resistance is encountered. To close and latch the trigger guard from here takes a good amount of hand pressure using the palm of the hand. If you can close the trigger guard with finger pressure, draw tension will be too low.
|
| This image has been resized. Click this bar to view the full image. The original image is sized 2048x1536. |
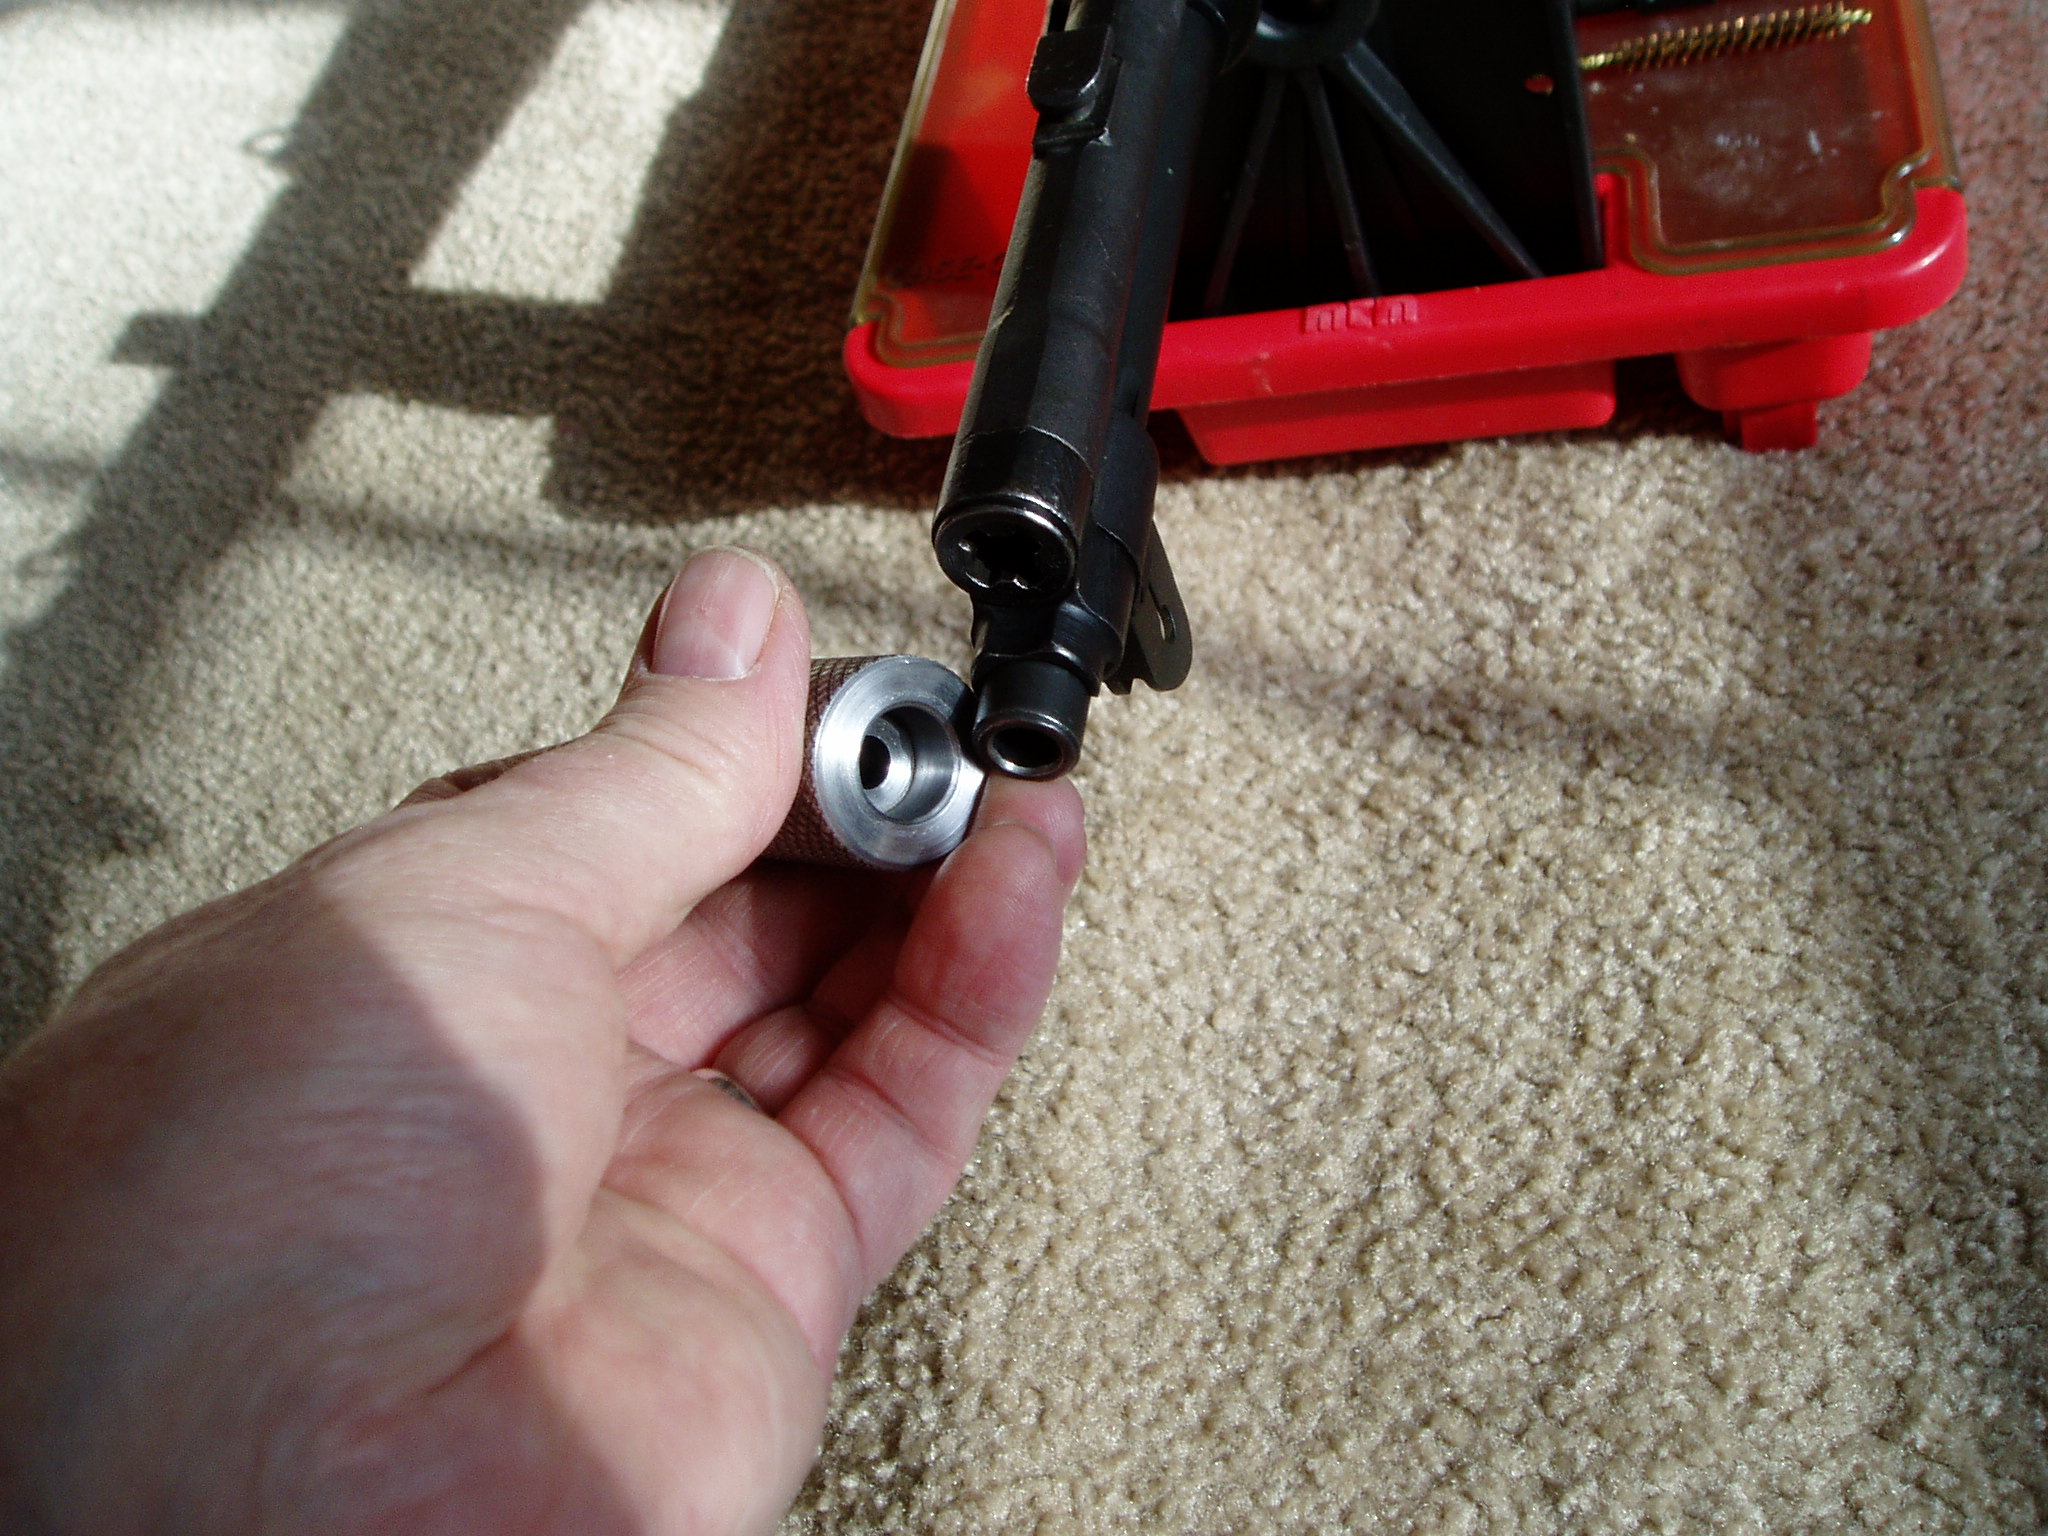
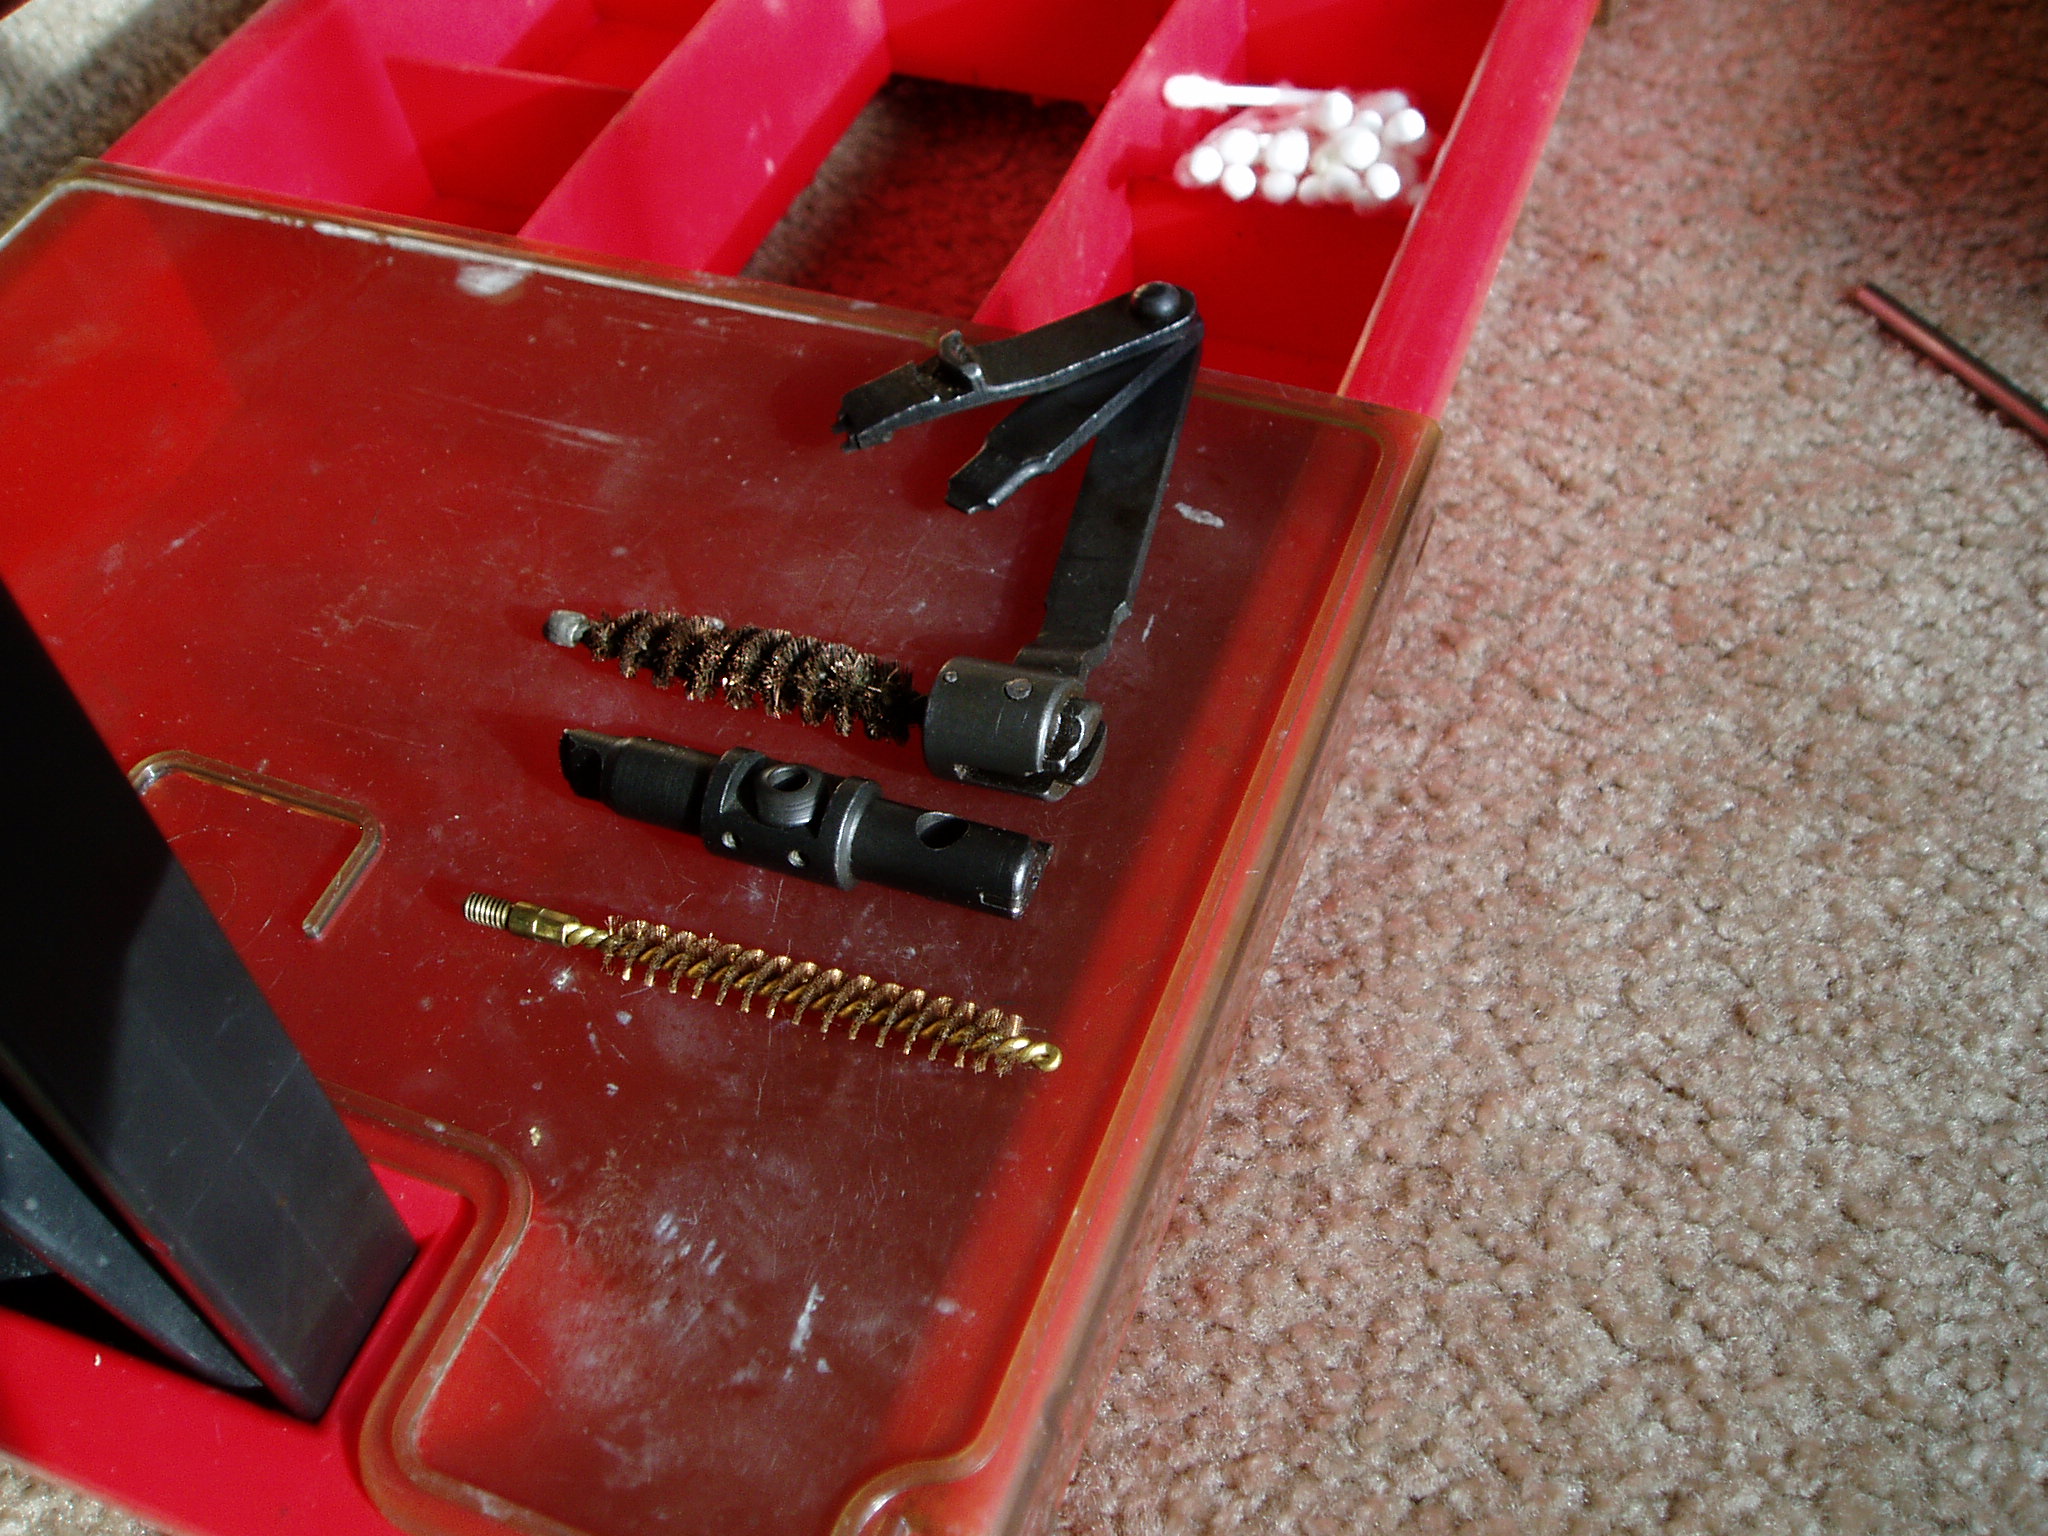
The metal.
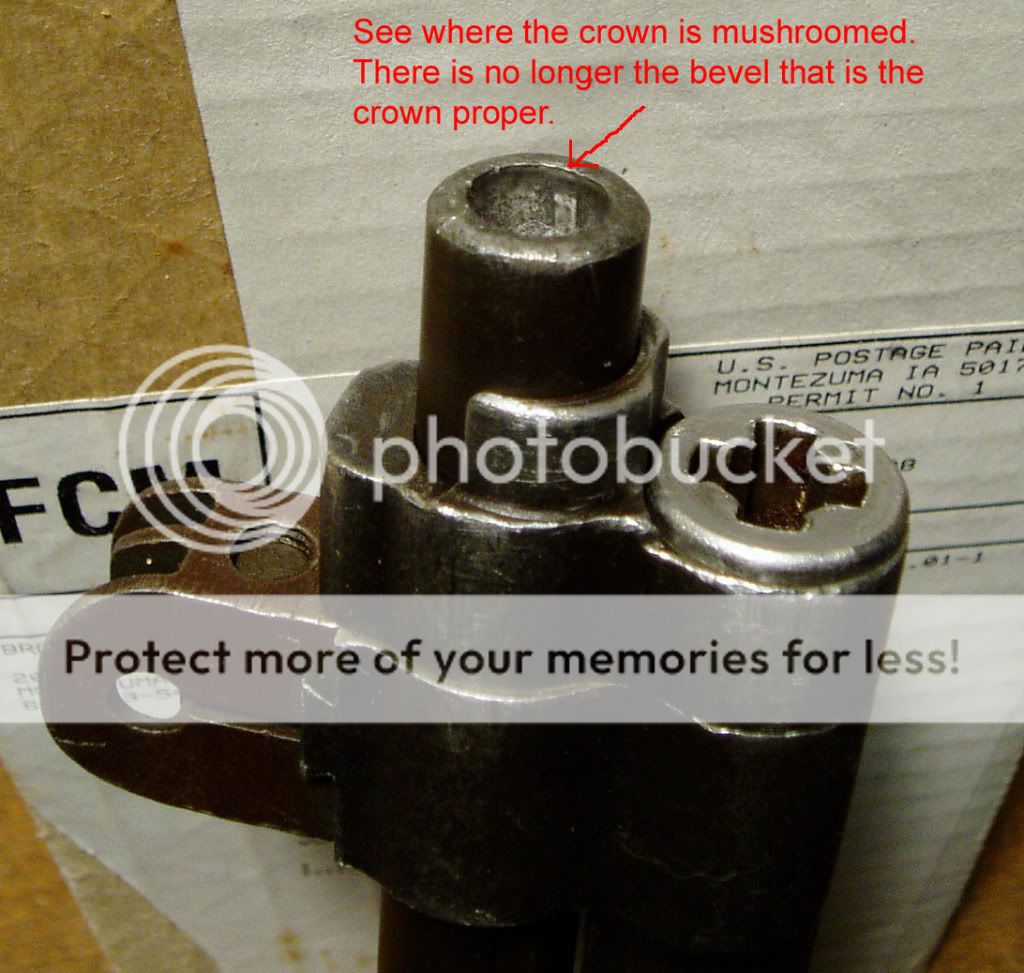
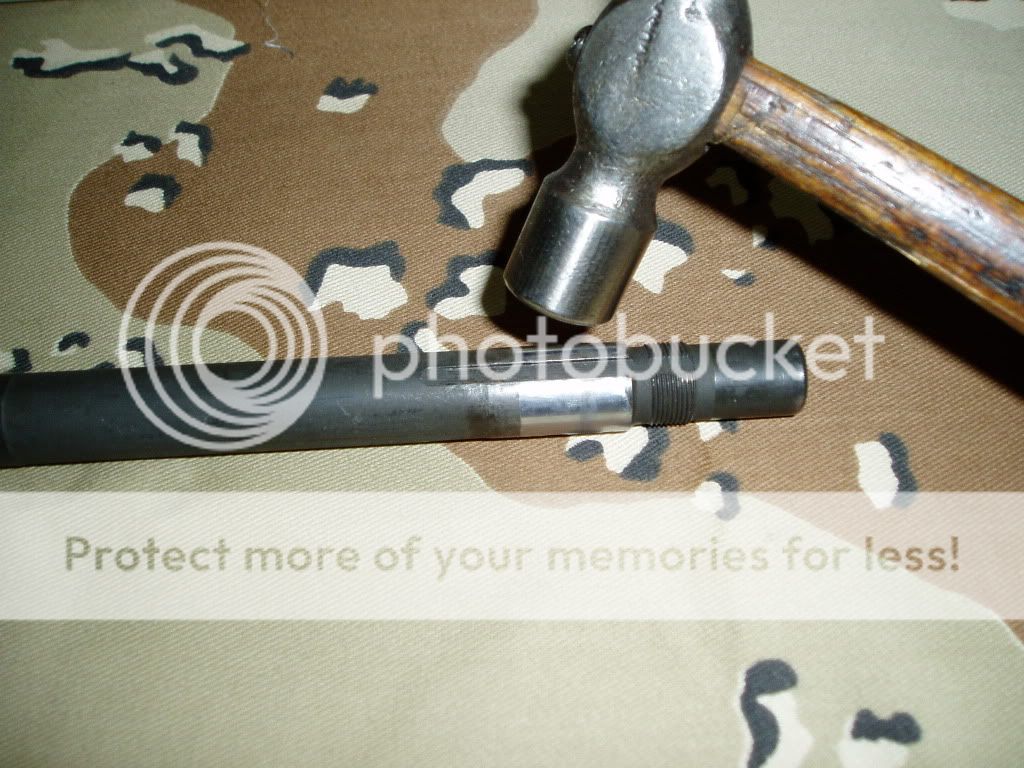
The first thing to look for is the condition of the rifling and crown. A three piece GI cleaning rod, applied with all the enthusiasm a 18 year old GI can muster can destroy a barrel. If you've never seen the result, here's a barrel that was taken off my first M1. The rifle couldn't keep it shots on a paper plate at 100 yds. There is no rifling for 3/8".
|
| This image has been resized. Click this bar to view the full image. The original image is sized 1023x758. |
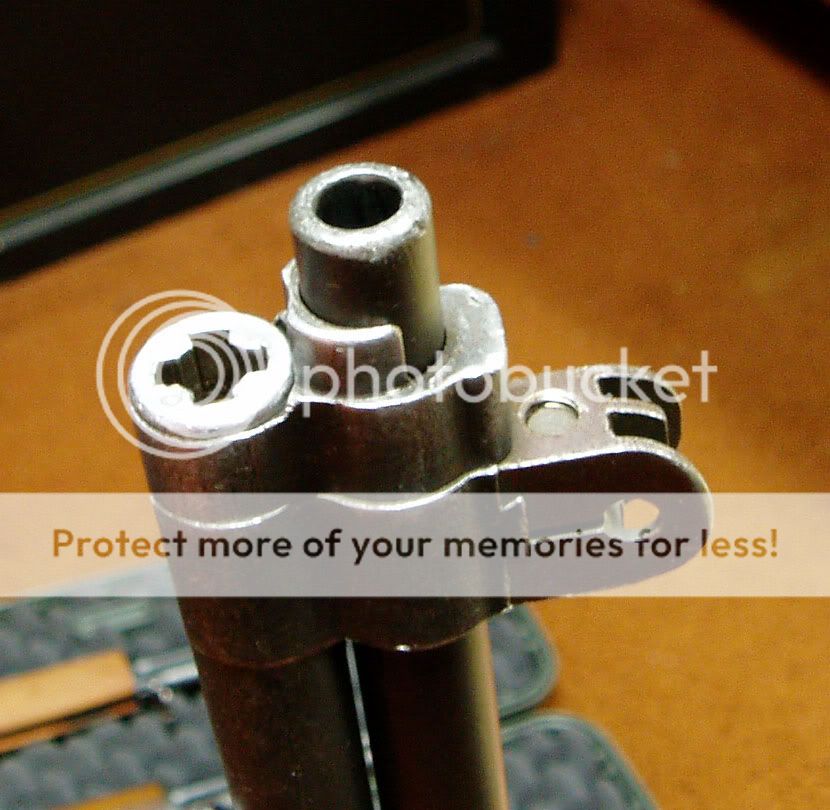
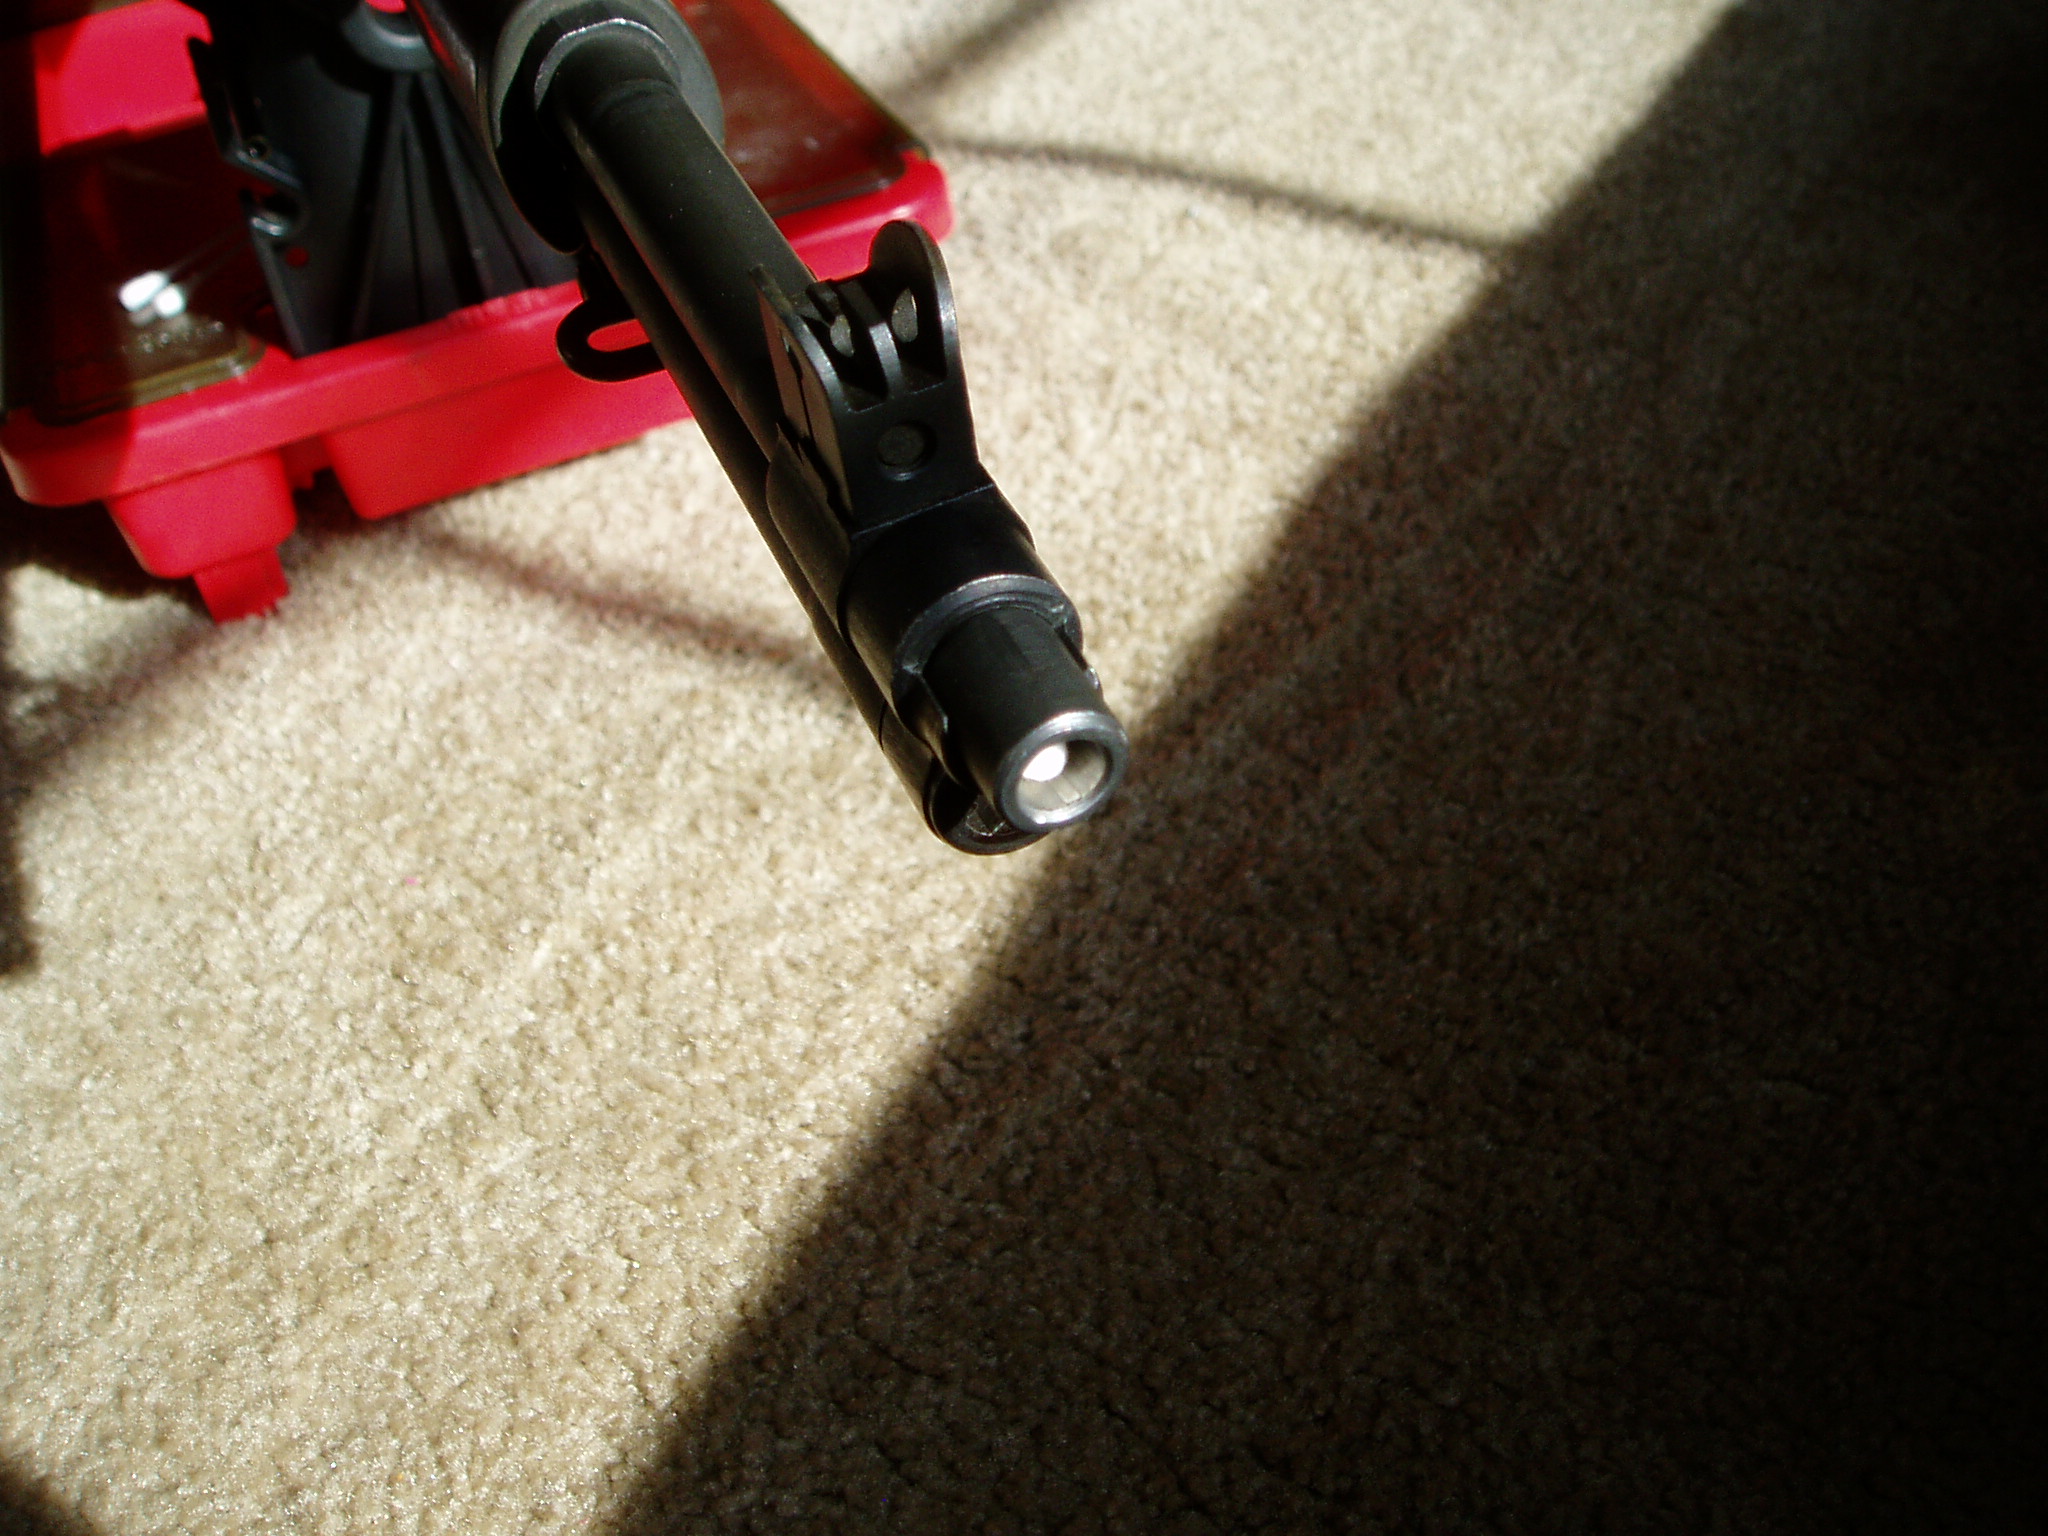
Fortunately, our subject rifle has a good muzzle. Under magnification, the rifling should be sharp all the way to the crown. Sticking a Q-Tip in the bore to reflect light helps to see better.
|
| This image has been resized. Click this bar to view the full image. The original image is sized 2048x1536. |
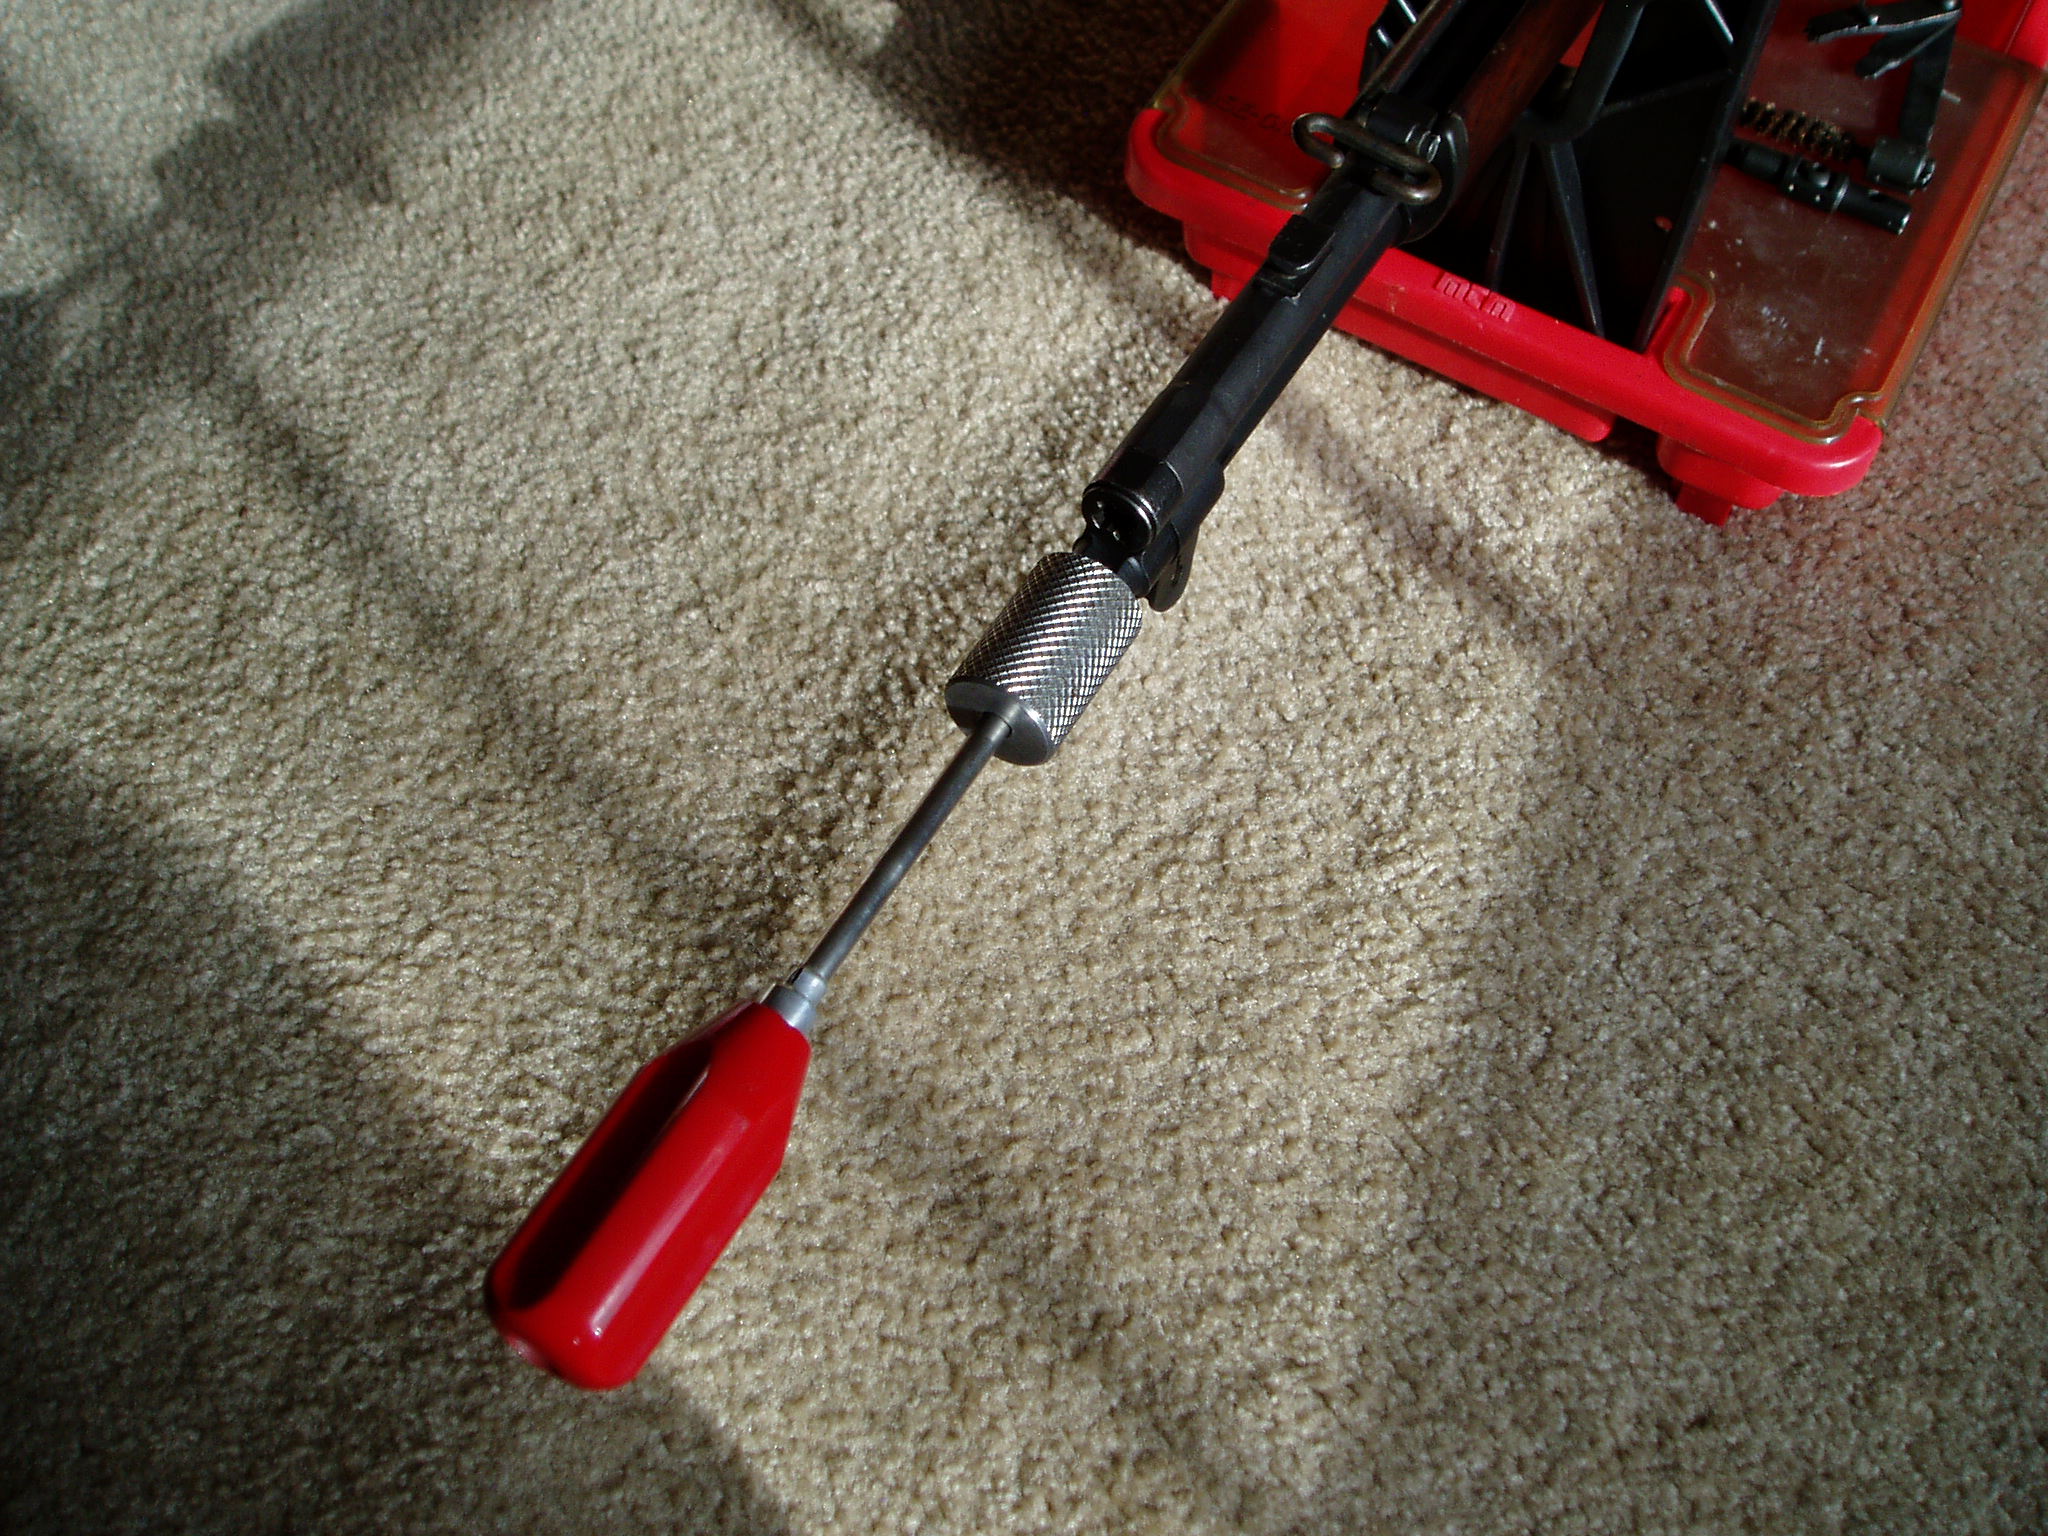
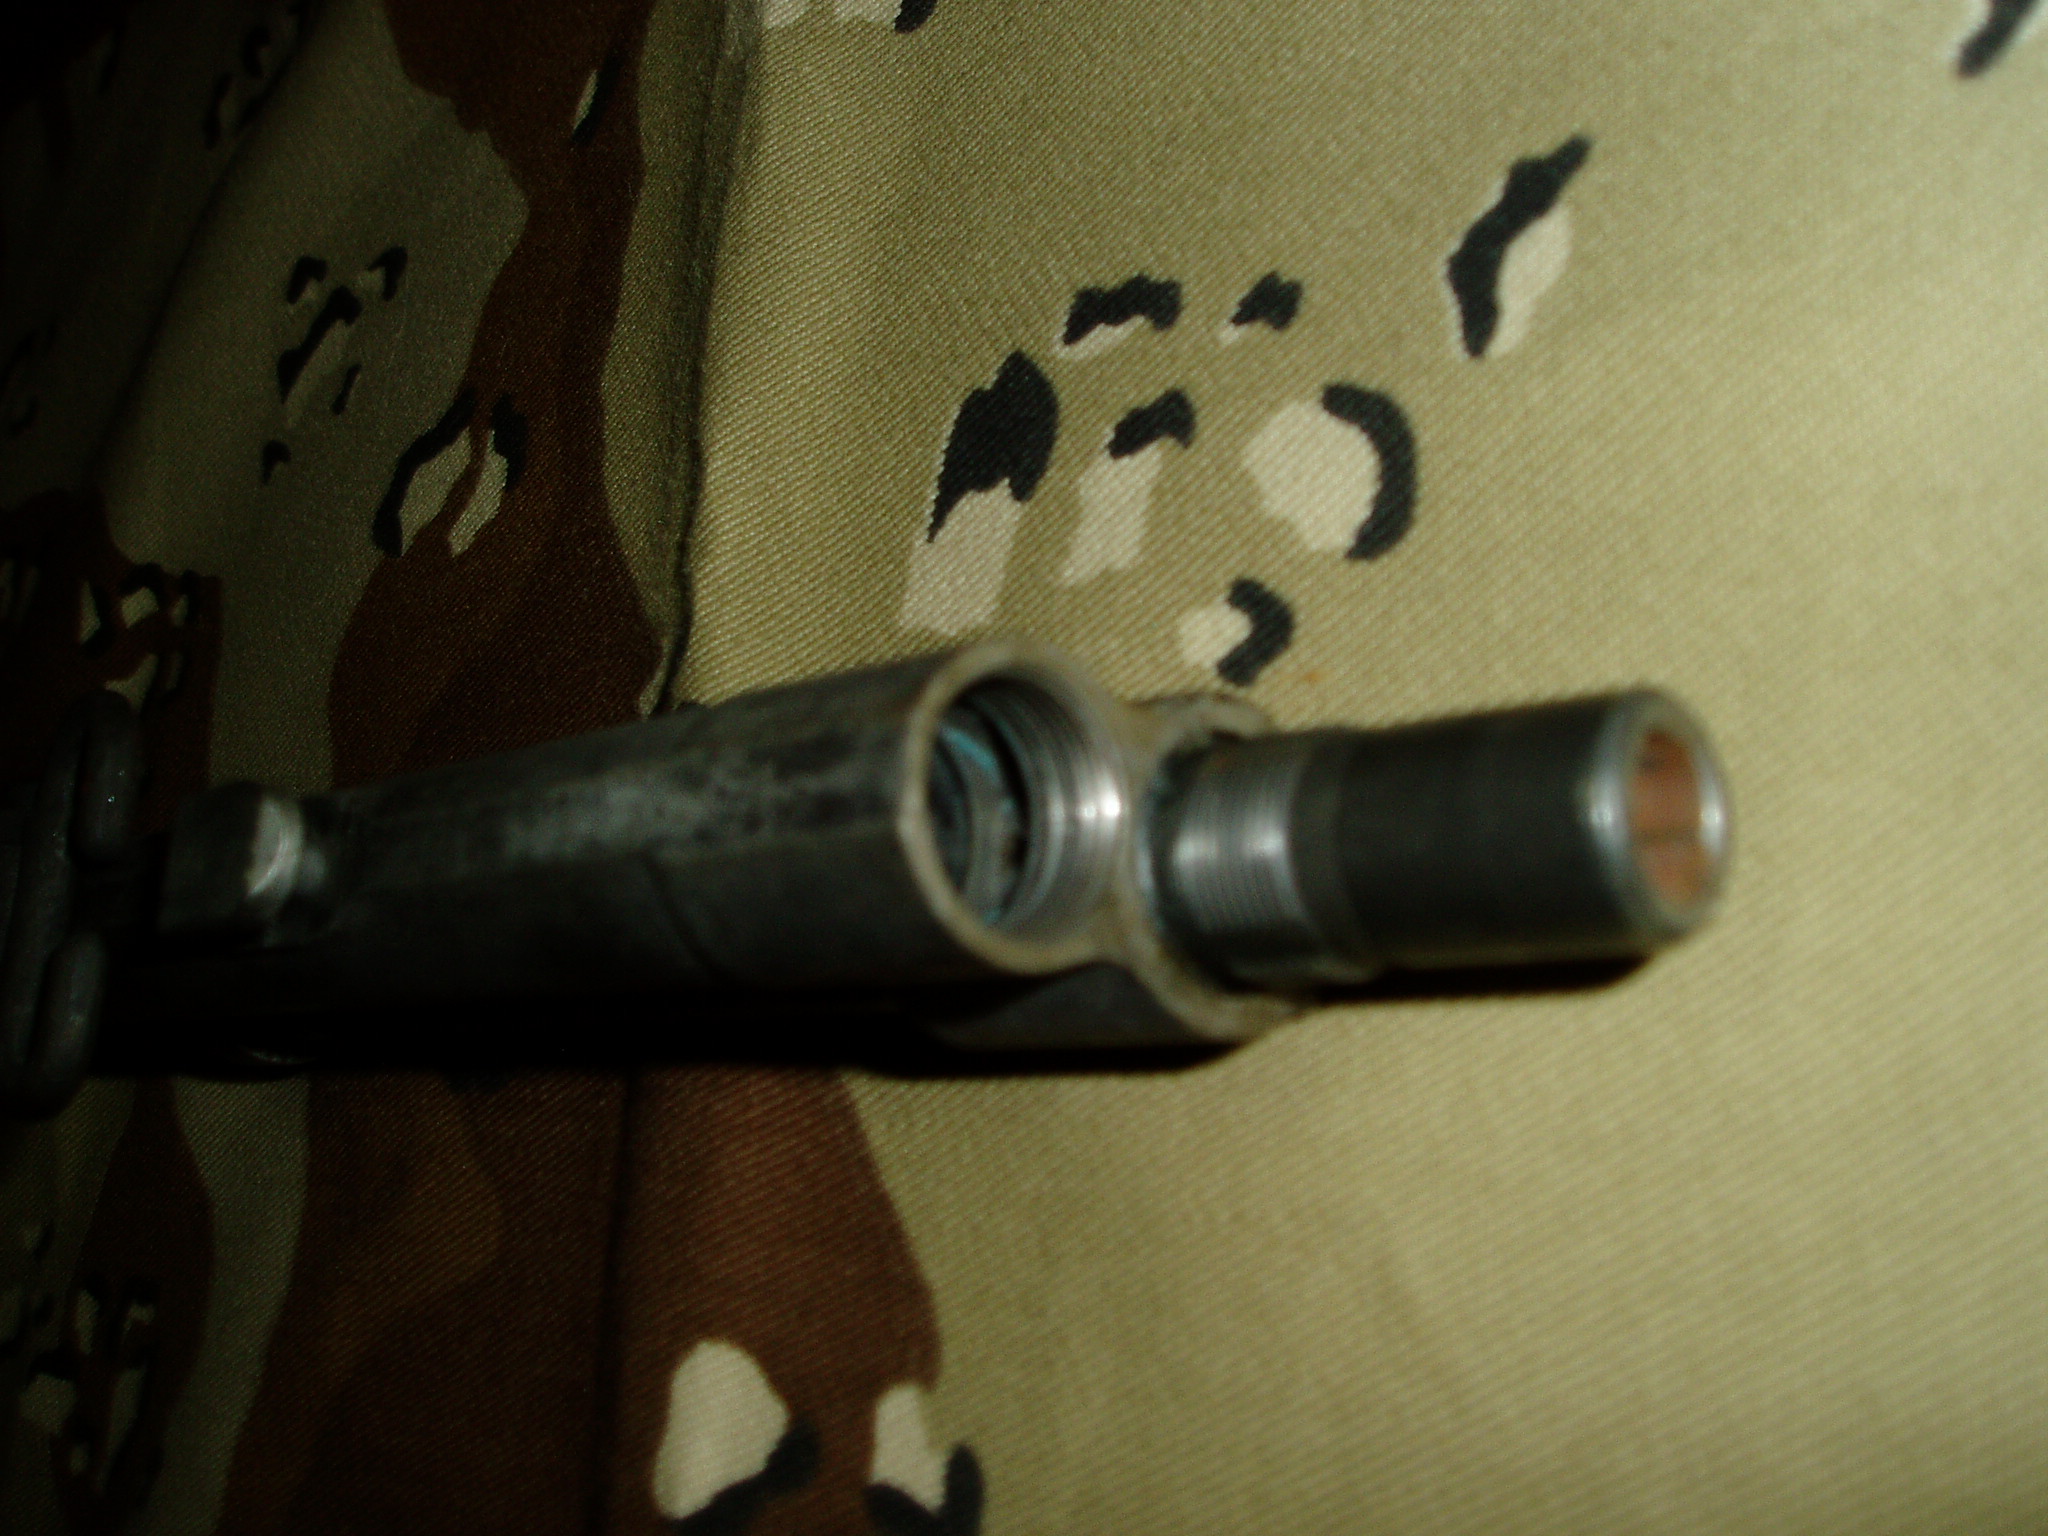
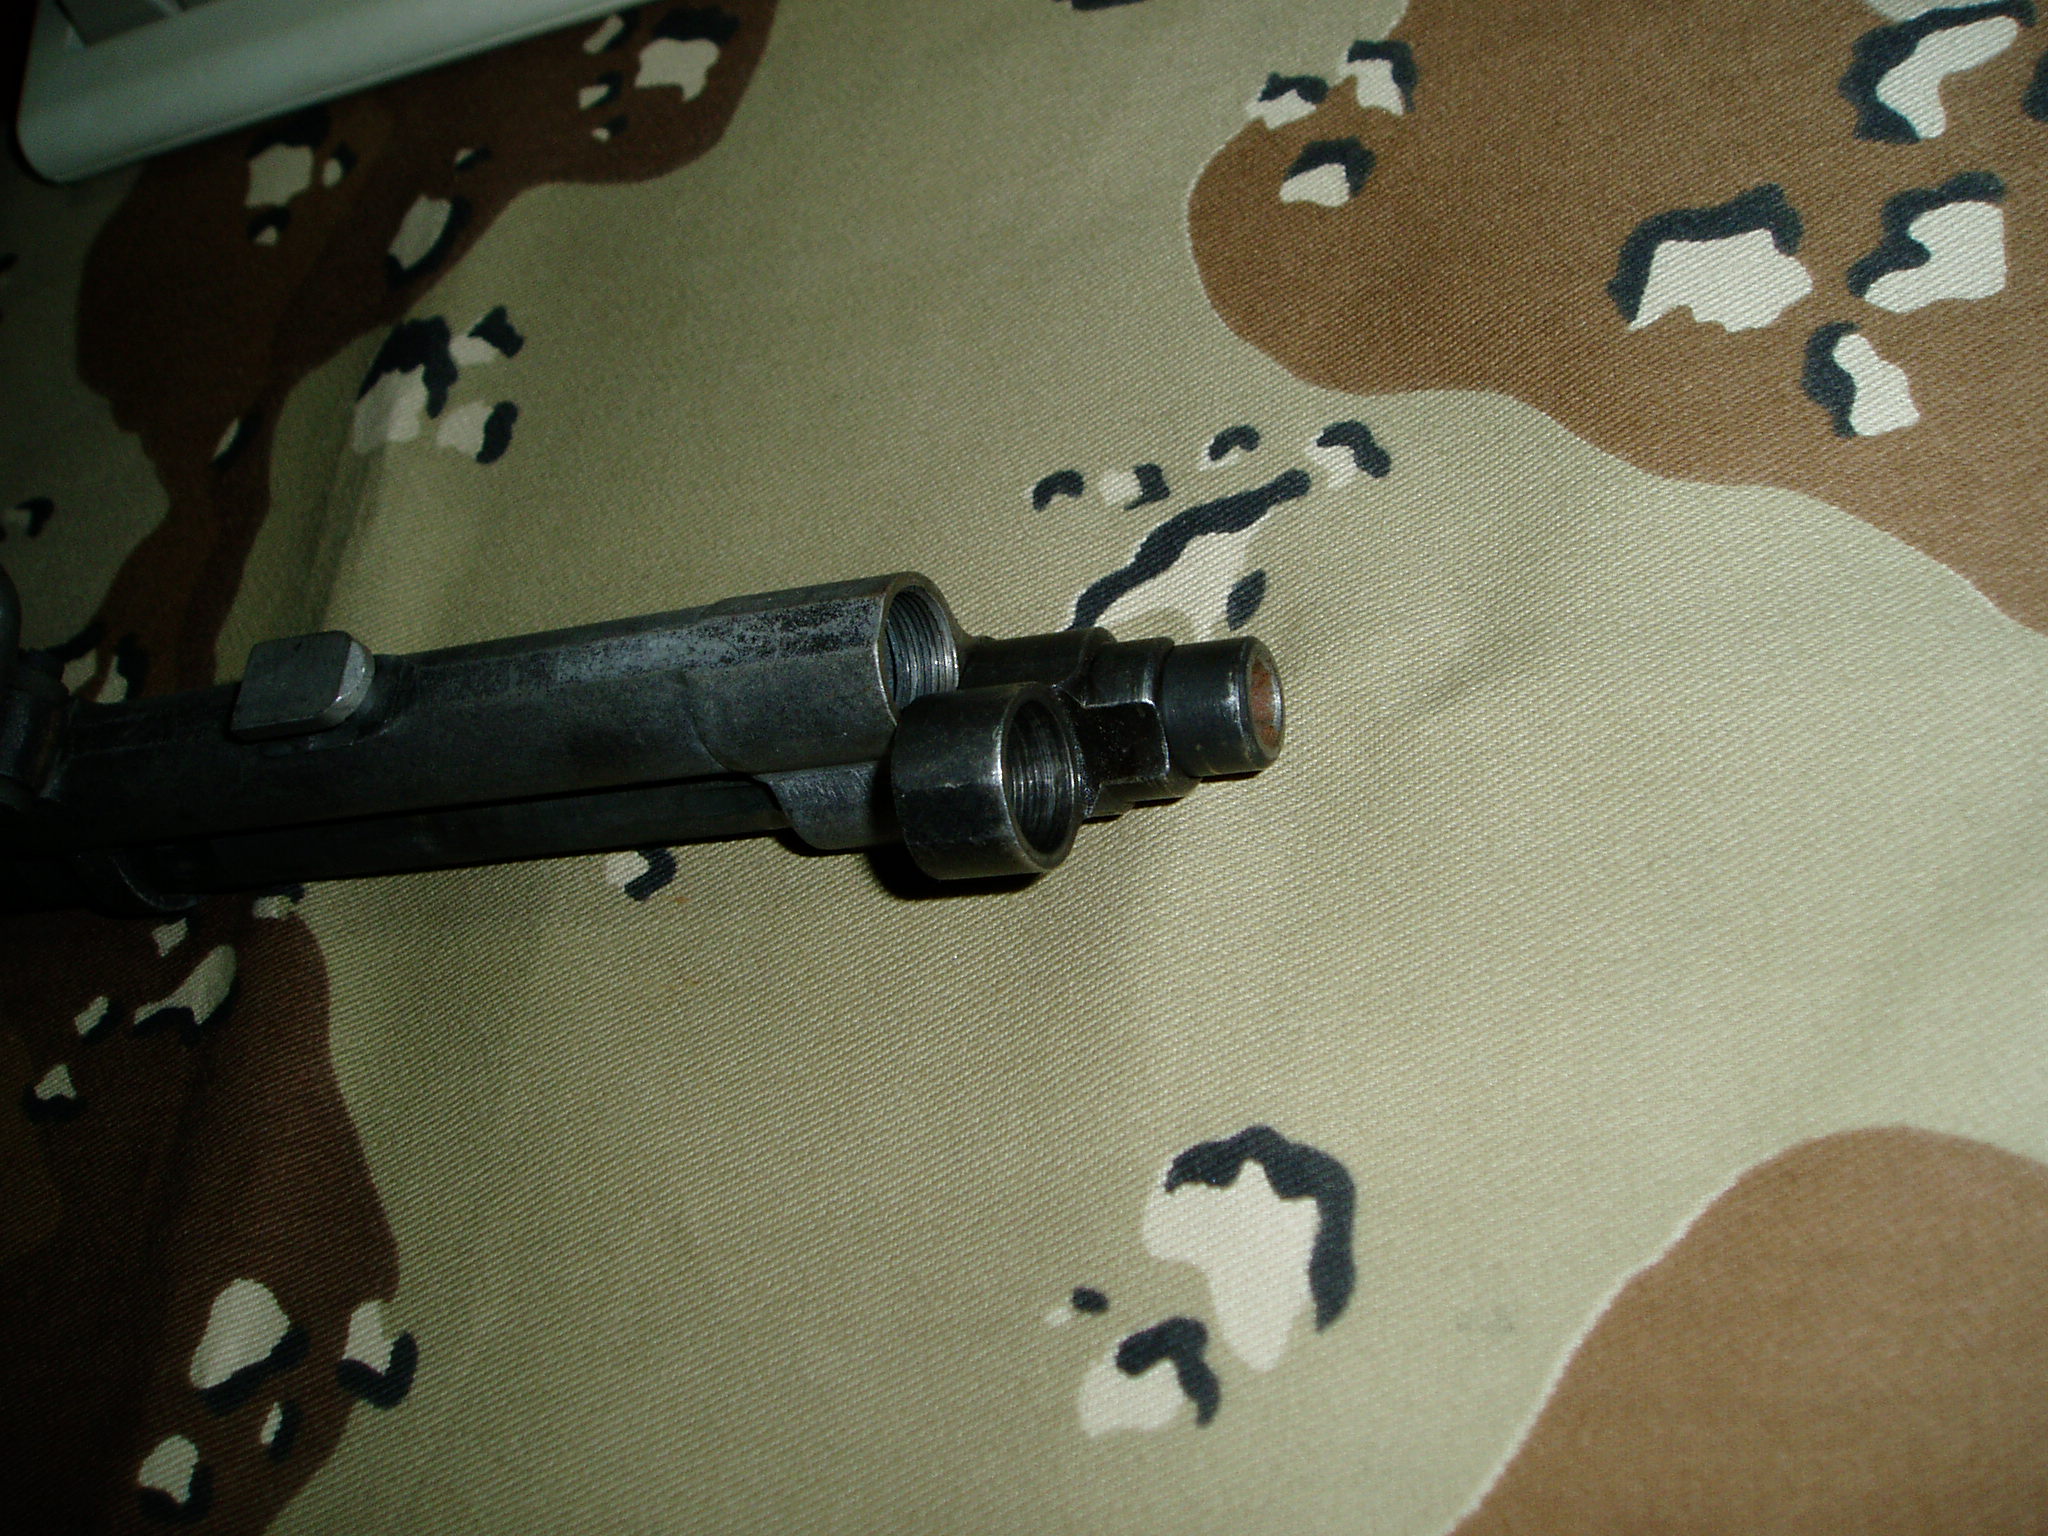
Next, grab the gas cylinder at the front sight and try to rotate it. If you feel any movement, the splines on the barrel need to be peened to tighten things up. Use a small hammer and lightly tap the rear 1/3 of the spline on either side of the groove. It doesn't take much tapping, so don't overdo it. You want the gas cylinder to be a drive on fit to the barrel. It should take a standard ball peen hammer and a block of wood using light taps to drive the gas cylinder on. Invert the gun and look for the gas port to center up in the opening.
|
| This image has been resized. Click this bar to view the full image. The original image is sized 2048x1536. |
|
| This image has been resized. Click this bar to view the full image. The original image is sized 2048x1536. |
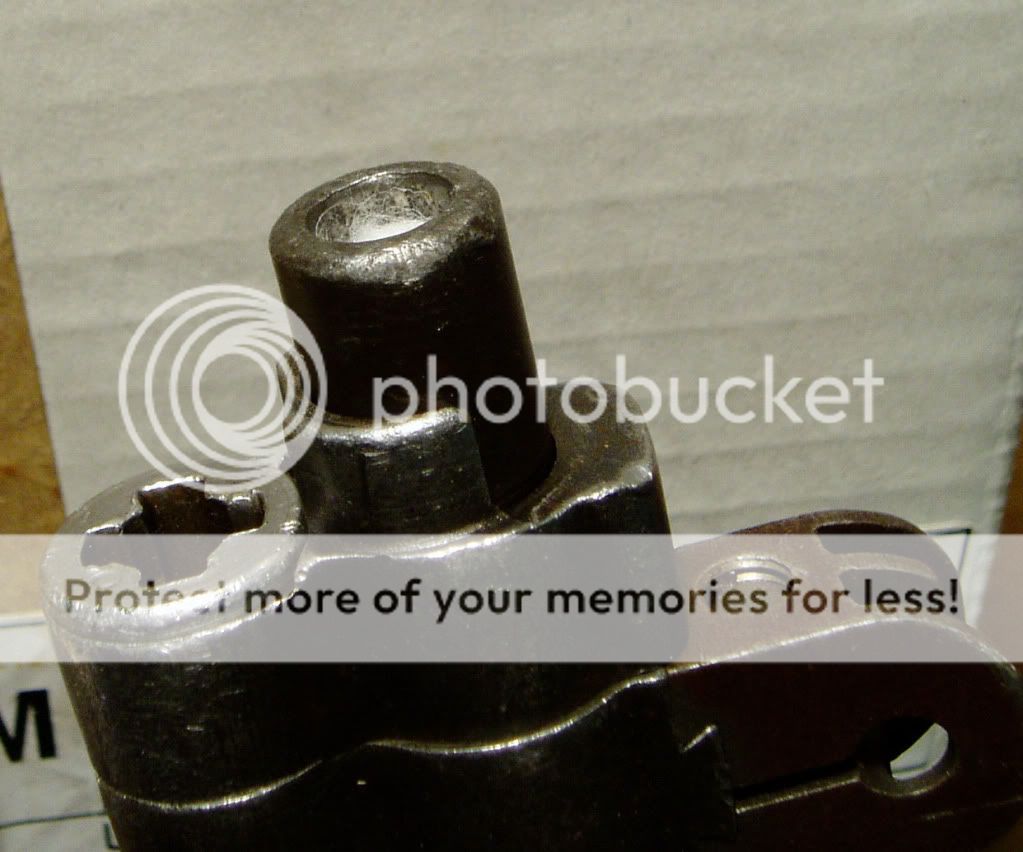
Install the gas cylinder lock. You want it to stop at this point and require a little force to turn into final alignment with the gas cylinder. If it goes past lining up before stopping, either tap the gas cylinder slightly forward if less than a half turn past, or turn the lock the remaining amount clockwise to achieve alignment and being tight at the same time.
(This is the bad barrel with no rifling in the end. I used it for the pic because it was handy)
|
| This image has been resized. Click this bar to view the full image. The original image is sized 2048x1536. |
Op rod.
The op rod consists of a forged steel handle welded to a drawn steel tube with a stainless piston on the end. The op rod is the weak link as it were in the M1's design. It works fine when using USGI ammo or equivalent, but can be bent by commercial ammo using powders outside the M1's tolerance.
When viewed from above, the op rod tube should appear straight with no left or right bend. From the side, it has two bends necessary for barrel clearance.
|
| This image has been resized. Click this bar to view the full image. The original image is sized 2048x1536. |
Image limit reached. To be continued next post.
Last edited: