
Thought everyone has heard of this, but after talking with another member in a PM, maybe not. High Power shooters have been doing this since the 90's, so I thought everyone else was too.
To keep the action gas from leaking out the back of the receiver and making your aiming eye water, there is a simple fix that is effective, and can be done in a few minutes. No special tools or skills required. All you need is:
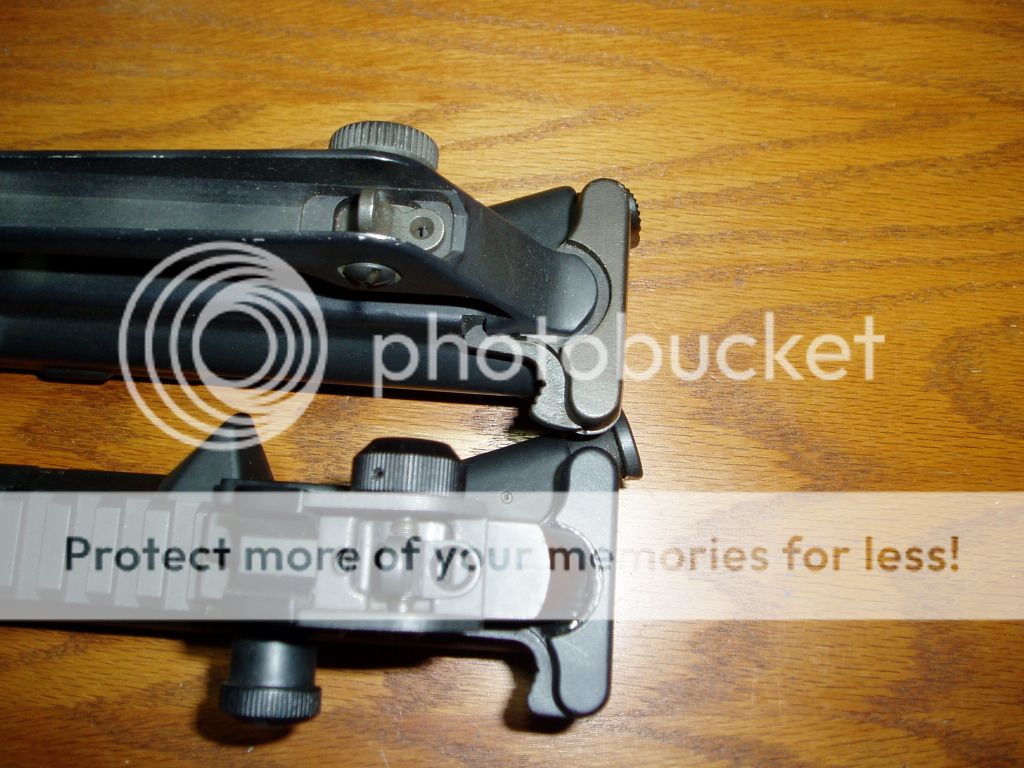
Separate the upper from the lower and remove the BCG and CH.
You are going to de-grease the semi circular area on the top of the charging handle. Use both ends of the Q-Tip to get all the oil and dirt off. Repeat until the Q-Tip remains white.
Use the other Q-Tip and apply a thin film of gun grease or oil to the areas indicated in the pics and surrounding metal within about 1/2" or so of the RTV. We want the RTV to stick to the CH in the recessed semi circular area only, but not the upper receiver.


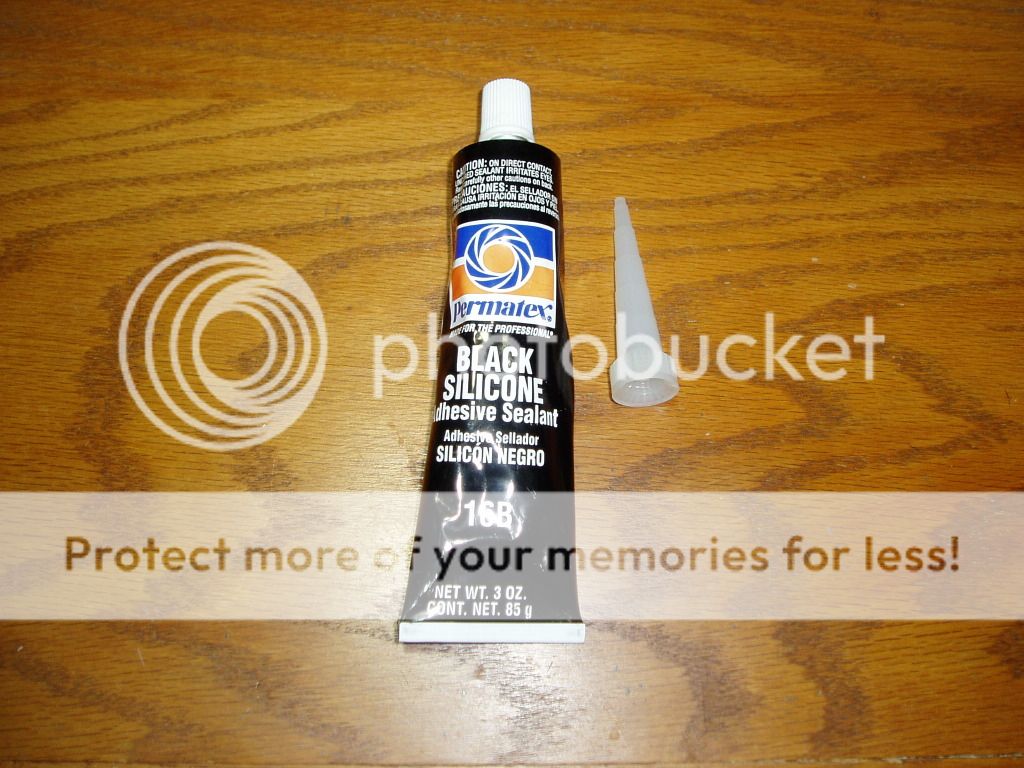
Cut the plastic applicator tip on a 45* angle with a sharp knife at the mid point of the smallest section.
Apply a generous bead about 3/16" diameter to the semi circular area of the CH. You want to apply enough so that it squishes out a little when the CH is in the closed/latched position.
Notice that when the charging handle is forward and latched that there is a small amount of fore and aft movement possible. After applying the RTV and latching the CH, you want to gently pull the CH rearward before leaving it to cure.
To make it pretty, wet your finger in some water and firmly run it over the fresh RTV following the semi circular cut out as you would when caulking a bath tub or sink.
Leave to cure for 24 hrs.
If you have a little bit of thin RTV that needs trimming, borrow the wife's cuticle scissors which work nicely.
When done, the RTV is barely noticeable, and keeps the gas from leaking through nicely.
To keep the action gas from leaking out the back of the receiver and making your aiming eye water, there is a simple fix that is effective, and can be done in a few minutes. No special tools or skills required. All you need is:
- A tube of Permatex RTV silicone. Black if you don't want it to be noticeable, or one of the various colors if you want some contrast.
- A couple of Q-tips.
- Gun grease or oil.
- Something to degrease metal with. Brakleen, carb spray, BC Gun Scrubber etc.

| This image has been resized. Click this bar to view the full image. The original image is sized 1024x768. |
Separate the upper from the lower and remove the BCG and CH.
You are going to de-grease the semi circular area on the top of the charging handle. Use both ends of the Q-Tip to get all the oil and dirt off. Repeat until the Q-Tip remains white.
Use the other Q-Tip and apply a thin film of gun grease or oil to the areas indicated in the pics and surrounding metal within about 1/2" or so of the RTV. We want the RTV to stick to the CH in the recessed semi circular area only, but not the upper receiver.
|
| This image has been resized. Click this bar to view the full image. The original image is sized 1024x768. |
|
| This image has been resized. Click this bar to view the full image. The original image is sized 1024x768. |
Cut the plastic applicator tip on a 45* angle with a sharp knife at the mid point of the smallest section.
Apply a generous bead about 3/16" diameter to the semi circular area of the CH. You want to apply enough so that it squishes out a little when the CH is in the closed/latched position.
Notice that when the charging handle is forward and latched that there is a small amount of fore and aft movement possible. After applying the RTV and latching the CH, you want to gently pull the CH rearward before leaving it to cure.
To make it pretty, wet your finger in some water and firmly run it over the fresh RTV following the semi circular cut out as you would when caulking a bath tub or sink.
Leave to cure for 24 hrs.
If you have a little bit of thin RTV that needs trimming, borrow the wife's cuticle scissors which work nicely.
When done, the RTV is barely noticeable, and keeps the gas from leaking through nicely.
|
| This image has been resized. Click this bar to view the full image. The original image is sized 1024x768. |