
How To Improve An M1 Trigger In One Easy Lesson
I remember the day back in 1985 when my first M1 arrived in the mail from the DCM. A very nice condition H&R that I promptly took out to shoot. I thought it was the best $165 I ever spent. The fly in the ointment was the gritty GI trigger which was made worse after I reparkerized the rifle. Time to call my friendly neighborhood service rifle armorer.
Our State Association armorer at the time was a fellow who loved to share what he knew with those willing to learn. I took full advantage of this opportunity, learned a lot, and got my rifles worked on at the same time. In this lesson, we will deal with turning that gritty heavy GI trigger into something much more manageable.
These instructions are also applicable to the M1A as well. The trigger mechanism is essentially the same on both rifles.
Disclaimer
Working on a trigger is not for everyone. I have shooting buddies who are not mechanically inclined and leave everything beyond cleaning to an armorer. I have others who rebarrel and glass bed their own guns as a weekend project and get enjoyment and satisfaction from doing it. This post is for the latter. If you are the former, please think twice before working on any trigger, or better yet, have an armorer supervise your work until your are declared skillful enough to tackle the job.
Safety Checks & Disassembly
Prior to disassembly, perform the following safety function checks. If the trigger group doesn’t pass them all, it’s not a candidate for what is to follow. Replace the bad parts and recheck before proceeding.
Start by removing the trigger group from the rifle. The hammer needs to be cocked to do this so cycle the bolt to cock the hammer.
Pivot the trigger guard down and forward and remove the trigger group from the rifle.
1. Engage the safety. The safety should cam the hammer back and out of engagement with the trigger. There is also a shoulder on the safety to block the trigger in the event the top of the safety breaks off.
2. With the safety off, cock the hammer and check for contact with the hook on the forward end of the safety lever when you cushion the hammers fall. If the safety spring is weak, it may not hold the safety in the fully disengaged position allowing the hammer to strike it and eventually break the tip off.
3. Using machinists blue, coat the trigger engagement surface and inside hammer hooks and cycle the trigger to check hook contact. Both hooks should leave a mark indicating equal contact.
4. Cock the hammer and gradually squeeze the trigger up to the second stage. Inspect the inside hammer hooks. Issue serviceable trigger groups should have at least 50% engagement.
5. Check disconnector function. Cock the hammer while holding trigger to the rear. Release the hammer. Sear must hold the hammer with at least 50% engagement of the outside hooks.
6. Slowly release the trigger. Handoff from outside to inside hooks should not occur without 50% overlap of the hammer hooks. Obviously, the hammer must not fall.
Decock the hammer by restraining it with your left thumb while pressing the trigger with your right index finger. Ease the hammer forward.
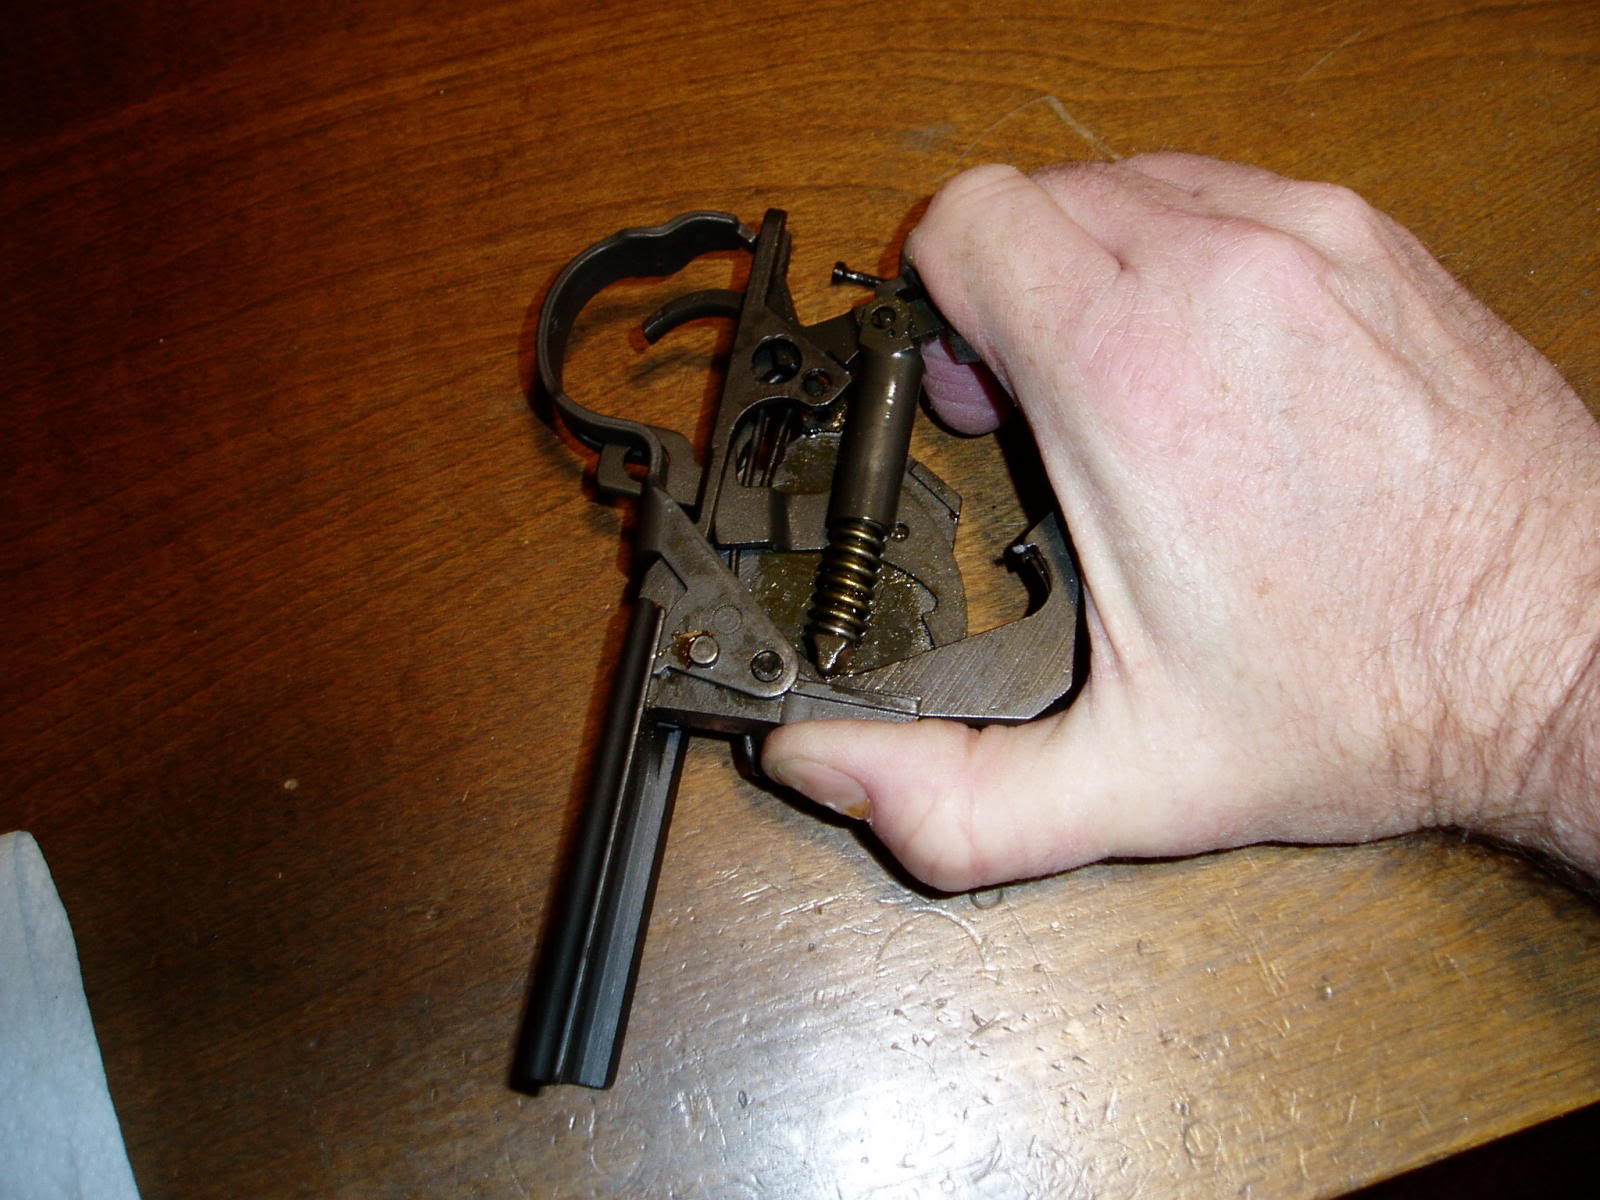
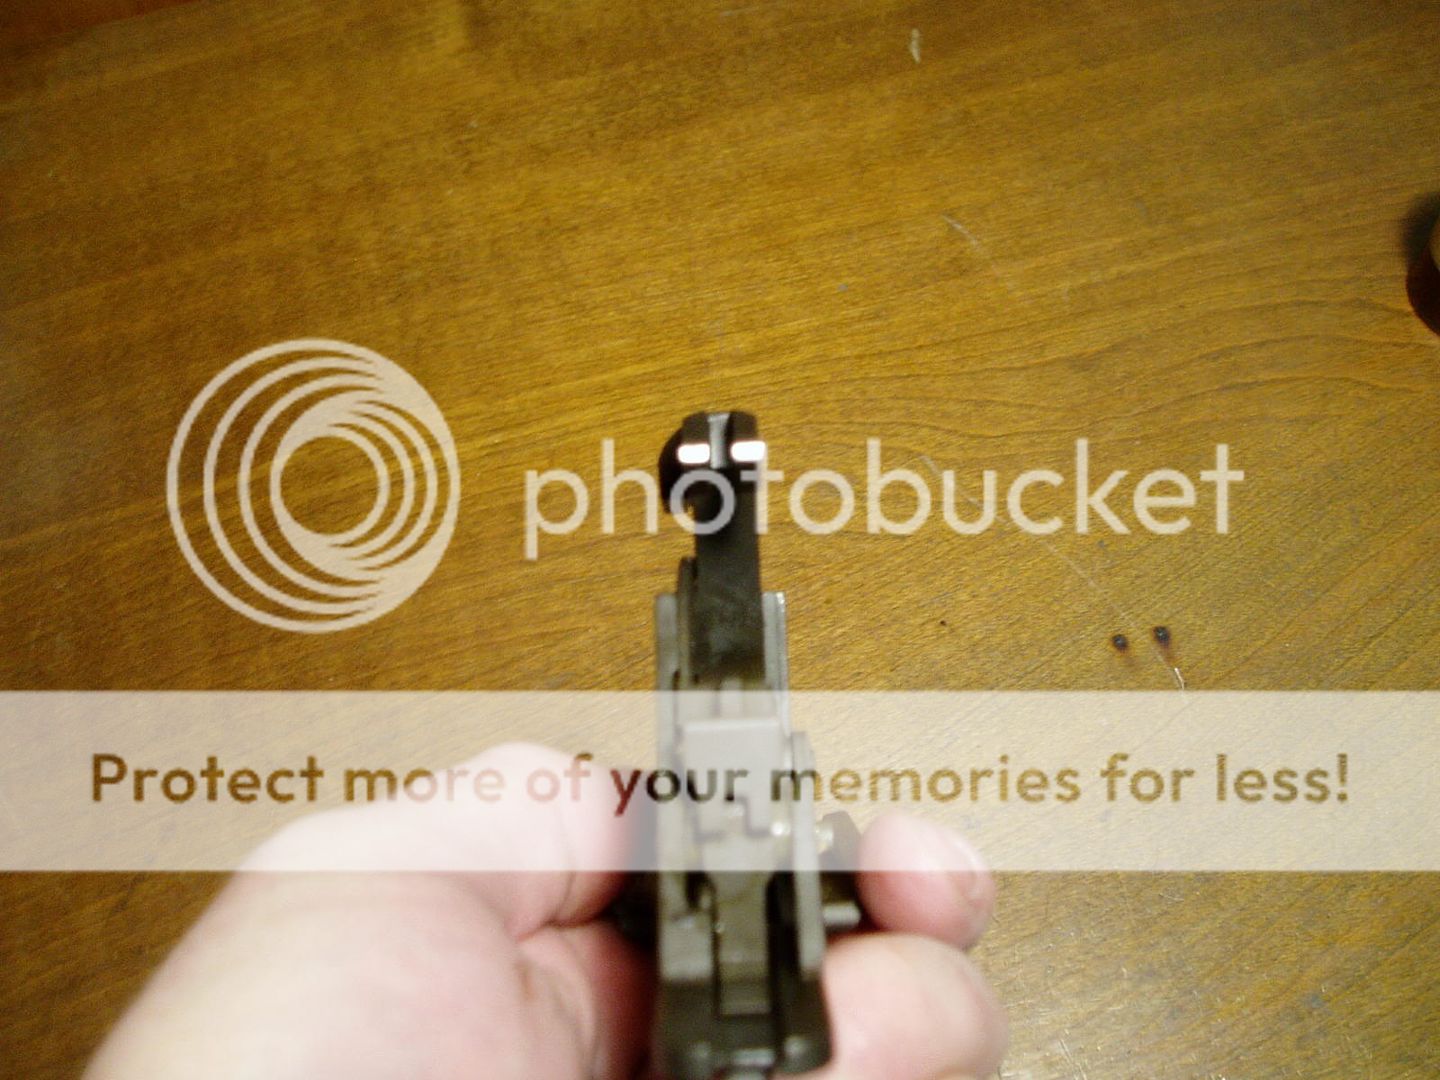
Grasp the trigger group with the right hand by placing your right thumb against the trigger housing in front of the hammer. Wrap the middle joint of your right index finger behind the sear and squeeze to relieve the spring tension from the trigger pin. While maintaining pressure, press out the trigger pin from the port side of the trigger housing with the tip of a bullet. Once the head of the pin protrudes from its recess, grasp it with your fingers and remove. Gradually release the pressure of the hammer spring and the trigger, hammer spring, and housing are easily separated from the trigger group. Closely observe the position of the trigger in its slot in the trigger housing and the position of the hammer spring housing as you release spring tension. You will reverse this procedure to reassemble. (See photo)
Press out the hammer/trigger guard pivot pin (left-to-right). Notice that it has a slight head on one side. The head has to be on the right side when it goes back together. Remove the hammer.
Remove the safety by pressing it away from the trigger housing wall. It will pop right out.
Slide the trigger guard rearward to clear the right wall of the trigger housing. Rotate CCW and remove.


Parts Inspection
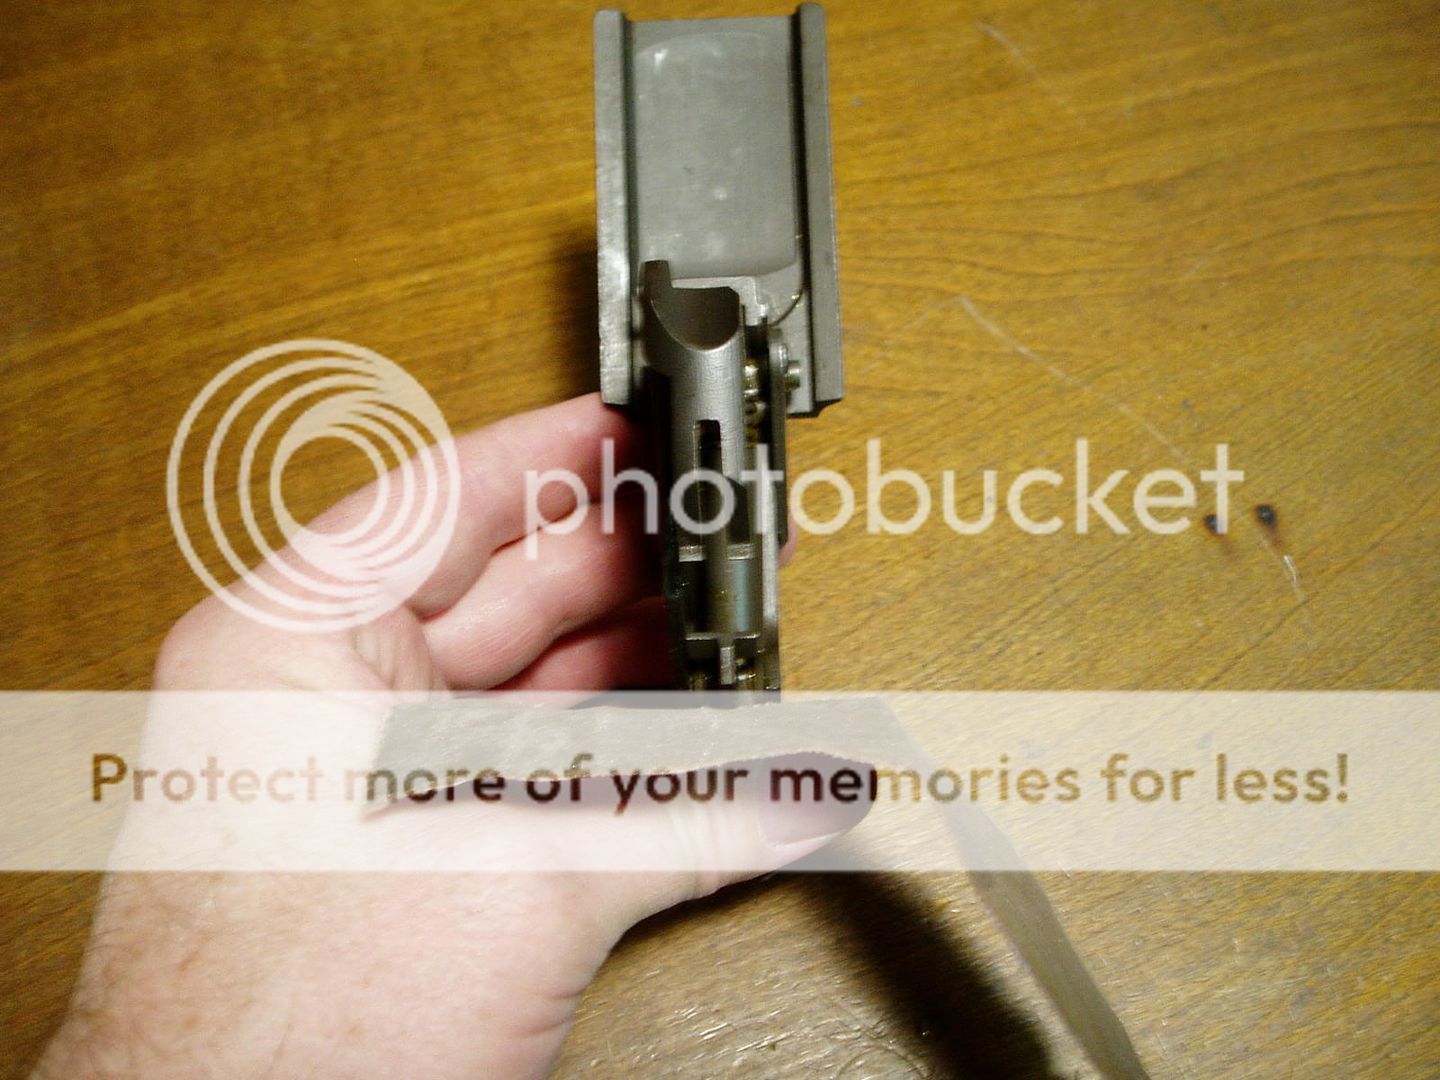
Examine each part closely for excessive wear and cracks or chipped surfaces. The ears on the hammer spring housing are prone to cracking thru the holes. The hammer hooks and engagement surface of the trigger should be checked for cracks and chipped areas. Check the pins for straightness. Check the trigger housing for cracks at the holes and ensure it’s not bent. The Hammer should not drag anything during its arc. The trigger should not drag the slot in the trigger housing. Replace any parts that don’t measure up. This trigger housing is bent. It won't draw up evenly on the stock.
One other thing to check that doesn’t affect the trigger pull but does have a negative effect on accuracy. Check the trigger guard trunnions. These are the little nubs that stick out on each side of the forward part of the guard next to the pivot pin and engage recesses in the receiver to clamp wood and steel together. These trunnions are round when new. 60+ years of field stripping and no grease leaves most of them with a flat spot that may not provide a tight fit with an old stock. Aftermarket stocks have extra wood to overcome this problem and cannot usually be paired with a trigger guard with unworn trunnions. If you have insufficient clamping pressure when you close the trigger guard, try and find another guard with trunnions that are rounder than what you have.

Getting Out The Grittiness
The grittiness you feel in the first stage of the trigger as well as the cycling of the bolt on a newly refinished M1 is largely due to the Parkerized finish. A newly reparked M1 feels like it has a little sand in it when cycled and dry fired compared to a well worn specimen. Here’s how to fix that. If you have a well broken in trigger group and do not intend to repark, you may elect to forego some of this and just stone the trigger itself.
The object here is to stone away the Parkerized finish. We do not want to remove metal to make the parts as slick as a mirror. Just cut the Parkerizing, and stone the high spots. You are not going to get every last tool mark out, so don’t try, especially on Winchester parts.
The stone to use for this work is an India stone. This stone is coarser than an Arkansas stone which is too fine for this type of thing. Put a drop or two of solvent on the stone periodically to float away the cuttings.
Start with the trigger housing. Lay it flat on a bench block and stone the area where the safety rides as well as the hammer arc. Don’t worry about getting all the tool marks, just stone away the phosphate.
Stone the side of the safety that touches the trigger housing. His will make the safety operate a little smoother.
Next stone the pad on the side of the hammer that faces the safety as well as the area around the pivot pin hole.
The ears on the hammer spring housing are usually pretty smooth compared to the other parts. Lightly stone the ears to just break the phosphate.
The pins can be lightly polished with emery cloth to remove any phosphate.

Last but not least is the trigger itself. Remove the phosphate from the area around the pivot pin hole on each side. Next is the engagement surface that holds the hammer hooks. Examine the engagement surface closely for wear marks in the phosphate indicating where the hammer hooks ride. This is the only area that will effect trigger pull. Tool marks elsewhere on the surface are of no consequence.
We want to stone away the finish and the worst of the tool marks but we don’t want to alter the angle of the engagement surface doing it and you don’t want to cut thru the case hardening. Normally, one would think you would need a special jig to do this right, but in this case, the solution is so simple, it’s almost absurd. For this to work, you need a non-skid surface to work on. I use a piece of plywood with old section of inner tube stretched across it. The underside of an old mouse pad from your computer would probably work just as well.
Wet your India stone with a drop or two of solvent. Stand the trigger upside down on the non-skid work surface. Lay the stone flat onto the engagement surface and release your hold on the trigger. Let the trigger follow the stone as you smooth it. If you tip the stone a little left or right, fore or aft, the trigger will tip with it maintaining the original angle. Resist the urge to hold the trigger while stoning. It will have a tendency to squirm a little. Alter the pressure applied to the stone as required to control it. (See photo)
Check your progress every couple of minutes, preferably with a magnifying glass. Here again, don’t sweat any deep tool marks not in the hook contact area. If you can get a 90% finish, call it good.

Reassembly
Reassemble the trigger group in the reverse order of disassembly lubricating each part with a good grease. Back in the heyday of the M14, Plastilube was the grease of choice. In spite of its name, it is a petroleum grease. Its primary attributes are that is the right consistency for the job, and it won’t melt and run down into the bedding. There are probably several high tech Teflon greases available now that will work just as well. Pick one.

Lube the following points as you reassemble. Avoid over lubricating as it just attracts grit. A thin film is sufficient.
Hammer pin
Sides of hammer at pin hole and where polished
Back side of safety and detent where spring rides
Hammer spring
End and shaft of hammer strut
Ears of hammer spring housing
Polished areas of the trigger
Trigger pin
Trigger guard trunnions
After getting your trigger group back together, you may want to stick it back in the rifle to see how it feels. It’s easier to judge the difference between before and after than trying to hold it in your hand.
At this point, what you should have is a trigger without any grittiness in the first stage, and a smoother release. It will still be heavier than you may like although a little lighter than when you started, and still have some creep in the second stage. How much will vary quite a bit from rifle to rifle. The safety should also be smoother and easier to engage and disengage.
This concludes the easy portion of this post. While the rest is not technically difficult, you need to understand exactly what you are doing, why you are doing it, and how to fix it if you go too far.
If what we have done thus far has taxed the limits of your mechanical abilities, then stop here. Done properly, this next procedure will decrease second stage weight and creep by stoning the hammer hooks to reduce sear engagement of the second stage. Done incorrectly, the rifle could double, triple, or all eight. So if after reading this, you don’t feel confident about being able to perform these next steps, STOP. At this point, your trigger is already better than when you started. Many of you may be happy with the improvement gained thus far and call it quits right here. Get a Service Rifle armorer to stone the hooks if you are concerned about messing it up. Better safe than sorry.
Weight Watchers
Ole John C. was a firearms genius. He figured out (among other things) how to make the M1 hammer spring do three different tasks at the same time. As its name implies, it powers the hammer, but it also serves as the trigger return spring and the sear spring. (The sear is also the disconnector by the way.) Because of this, it is not a good idea to shorten or replace the hammer spring with one that is lighter. You may very well compromise the function of the disconnector as a result
Study your trigger group and look at how the trigger, hammer, and sear interact. That long first stage is there for safety. Military rifles occasionally get dropped and all that sear engagement is insurance that it won’t go bang when the inevitable happens. What we’re concerned with now is what happens when you pull through the second stage. This is where the creep and weight are in an issue trigger.
A M1 hammer has two sets of hooks. The inside hooks, which are under the tail of the hammer, and the outside hooks, which are on top of the tail of the hammer. The function of the inside hooks is to engage the surface that you stoned on the trigger and hold the hammer cocked until the trigger is pulled. The purpose of the outside hooks is to engage the sear/disconnector after firing and recocking when the trigger is held to the rear. When you release the trigger, the outside hooks are disengaged from the sear/disconnector, and the hammer is caught by the inside hooks. This is the click you hear when you release the trigger. The outside hooks also dictate how close to the edge of the trigger engagement surface the inside hooks can get before releasing the hammer. When you pull through the first stage and the trigger stops at the second stage, that’s the outside hooks contacting the face of the sear. The weight of the second stage is the pressure it takes to overcome the tension placed on the sear by the hammer spring. Creep is the distance the trigger must travel to disengage the inside hooks and release the hammer.
As can be seen in the photo of the issue trigger group, issue hammer hooks do not always bear evenly on the sear. In the photo, the left hook is not bearing at all. So in this case, the right hook needs to be stoned until both hooks bear evenly. Once that is achieved, both hooks are stoned together, checking frequently to ensure both maintain equal contact with the sear. Stone the hooks as shown in the photo keeping the stone perpendicular to the bottom of the trigger group. Check by pulling the trigger up to the second stage while holding the trigger group up to a light source. Rotate the group until the left hook is between the light and you. If you can see light between the hook and sear, it’s not touching. Check the right hook the same way. (I tried to get a photo of this but did not succeed)

Pull back the sear with your thumb and put a thin film of grease between it and the back of the trigger where they touch. Pull the trigger up to the second stage and observe the grease film. At first, you will see the film stretch as the two parts separate. Continue to stone and check using the grease film as an indicator of how far you have to go. Don’t forget to keep an eye on the hooks for even bearing. When you can just barely detect the grease film stretching prior to the hammer releasing, start weighing the trigger to see where you’re at. Stone a little, check frequently. When finished, you want at least .020 engagement when you pull up to the second stage.
At this point it’s easy to go too far and lose the second stage altogether. When that happens, and it probably will on your first try at this, you end up with a trigger with a long smooth first stage, and then it just releases. This is not good.
All is not lost however.
Getting Back the Edge
When you go to Camp Perry, everyone must have a piece of colored tape on their trigger guard indicating that the trigger has been checked by an armourer and will hold 4.5 lbs. If a trigger fails to “make weight”, this is what the armourer will do.
Remove the trigger group.
Release the hammer.
Pull back the sear.
Insert a strip of fine emery cloth between the sear and trigger with the abrasive side facing the trigger and about two inches hanging out to the left.
Release the sear pinching the emery between sear and trigger.
Pull smartly to the right.
Repeat if necessary.
This does the opposite of what stoning the hooks does. It will get you back a few thousands of sear engagement and put a little weight back on the second stage. You now have another chance to do it properly. Don’t get carried away however. We need hooks, not nubs. If you overdo the stoning, a new hammer is in your future at best.
Recommendations
Cheap spring scales are for weighing fish. Buy, borrow, or fabricate a proper weight set to do triggers. Springs can change over time, dead weight can’t.

Don’t get obsessive over what the weights say. Some folks think they have to have a 4.5 lb. trigger because that’s the rule book limit and if the trigger holds 4.75 or 5lb., it’s not good enough. If you can tell the difference between two equally crisp triggers, one 4.5 lb. and one 4.75 lb., you’re a better man than I, Gunga Din.
On your first try, shoot for no less than 4.75 and preferably 5 lbs. The trigger will get lighter as it wears in. Put 100 rnds through the gun and see how it feels and what it weighs. You can always pull the trigger group out and stone it a little more if necessary. Remember, better safe than sorry.
4.5 lb. is actually the lowest safe weight an M1 trigger can be adjusted to and last. If it’s done right, a crisp 5 lb. trigger will feel lighter to your finger than the weights would lead you to believe. Crispness trumps the scale every time.
And lastly, if you aspire to build the ultimate M1 on a budget and do it yourself, do yourself a big favor and get a copy of Kuhnhausen’s book. The detail of the text and illustrations are outstanding. Complete dimensions so you can go to the gunshow armed with a mic and tell the treasure from the junk.
Go slow. Stone a little, check frequently!!

I remember the day back in 1985 when my first M1 arrived in the mail from the DCM. A very nice condition H&R that I promptly took out to shoot. I thought it was the best $165 I ever spent. The fly in the ointment was the gritty GI trigger which was made worse after I reparkerized the rifle. Time to call my friendly neighborhood service rifle armorer.
Our State Association armorer at the time was a fellow who loved to share what he knew with those willing to learn. I took full advantage of this opportunity, learned a lot, and got my rifles worked on at the same time. In this lesson, we will deal with turning that gritty heavy GI trigger into something much more manageable.
These instructions are also applicable to the M1A as well. The trigger mechanism is essentially the same on both rifles.
Disclaimer
Working on a trigger is not for everyone. I have shooting buddies who are not mechanically inclined and leave everything beyond cleaning to an armorer. I have others who rebarrel and glass bed their own guns as a weekend project and get enjoyment and satisfaction from doing it. This post is for the latter. If you are the former, please think twice before working on any trigger, or better yet, have an armorer supervise your work until your are declared skillful enough to tackle the job.
Safety Checks & Disassembly
Prior to disassembly, perform the following safety function checks. If the trigger group doesn’t pass them all, it’s not a candidate for what is to follow. Replace the bad parts and recheck before proceeding.
Start by removing the trigger group from the rifle. The hammer needs to be cocked to do this so cycle the bolt to cock the hammer.
Pivot the trigger guard down and forward and remove the trigger group from the rifle.
1. Engage the safety. The safety should cam the hammer back and out of engagement with the trigger. There is also a shoulder on the safety to block the trigger in the event the top of the safety breaks off.
2. With the safety off, cock the hammer and check for contact with the hook on the forward end of the safety lever when you cushion the hammers fall. If the safety spring is weak, it may not hold the safety in the fully disengaged position allowing the hammer to strike it and eventually break the tip off.
3. Using machinists blue, coat the trigger engagement surface and inside hammer hooks and cycle the trigger to check hook contact. Both hooks should leave a mark indicating equal contact.
4. Cock the hammer and gradually squeeze the trigger up to the second stage. Inspect the inside hammer hooks. Issue serviceable trigger groups should have at least 50% engagement.
5. Check disconnector function. Cock the hammer while holding trigger to the rear. Release the hammer. Sear must hold the hammer with at least 50% engagement of the outside hooks.
6. Slowly release the trigger. Handoff from outside to inside hooks should not occur without 50% overlap of the hammer hooks. Obviously, the hammer must not fall.
Decock the hammer by restraining it with your left thumb while pressing the trigger with your right index finger. Ease the hammer forward.
Grasp the trigger group with the right hand by placing your right thumb against the trigger housing in front of the hammer. Wrap the middle joint of your right index finger behind the sear and squeeze to relieve the spring tension from the trigger pin. While maintaining pressure, press out the trigger pin from the port side of the trigger housing with the tip of a bullet. Once the head of the pin protrudes from its recess, grasp it with your fingers and remove. Gradually release the pressure of the hammer spring and the trigger, hammer spring, and housing are easily separated from the trigger group. Closely observe the position of the trigger in its slot in the trigger housing and the position of the hammer spring housing as you release spring tension. You will reverse this procedure to reassemble. (See photo)
Press out the hammer/trigger guard pivot pin (left-to-right). Notice that it has a slight head on one side. The head has to be on the right side when it goes back together. Remove the hammer.
Remove the safety by pressing it away from the trigger housing wall. It will pop right out.
Slide the trigger guard rearward to clear the right wall of the trigger housing. Rotate CCW and remove.

| This image has been resized. Click this bar to view the full image. The original image is sized 1600x1200. |
|
| This image has been resized. Click this bar to view the full image. The original image is sized 1600x1200. |
|
| This image has been resized. Click this bar to view the full image. The original image is sized 1600x1200. |
Parts Inspection
Examine each part closely for excessive wear and cracks or chipped surfaces. The ears on the hammer spring housing are prone to cracking thru the holes. The hammer hooks and engagement surface of the trigger should be checked for cracks and chipped areas. Check the pins for straightness. Check the trigger housing for cracks at the holes and ensure it’s not bent. The Hammer should not drag anything during its arc. The trigger should not drag the slot in the trigger housing. Replace any parts that don’t measure up. This trigger housing is bent. It won't draw up evenly on the stock.
|
| This image has been resized. Click this bar to view the full image. The original image is sized 1600x1200. |
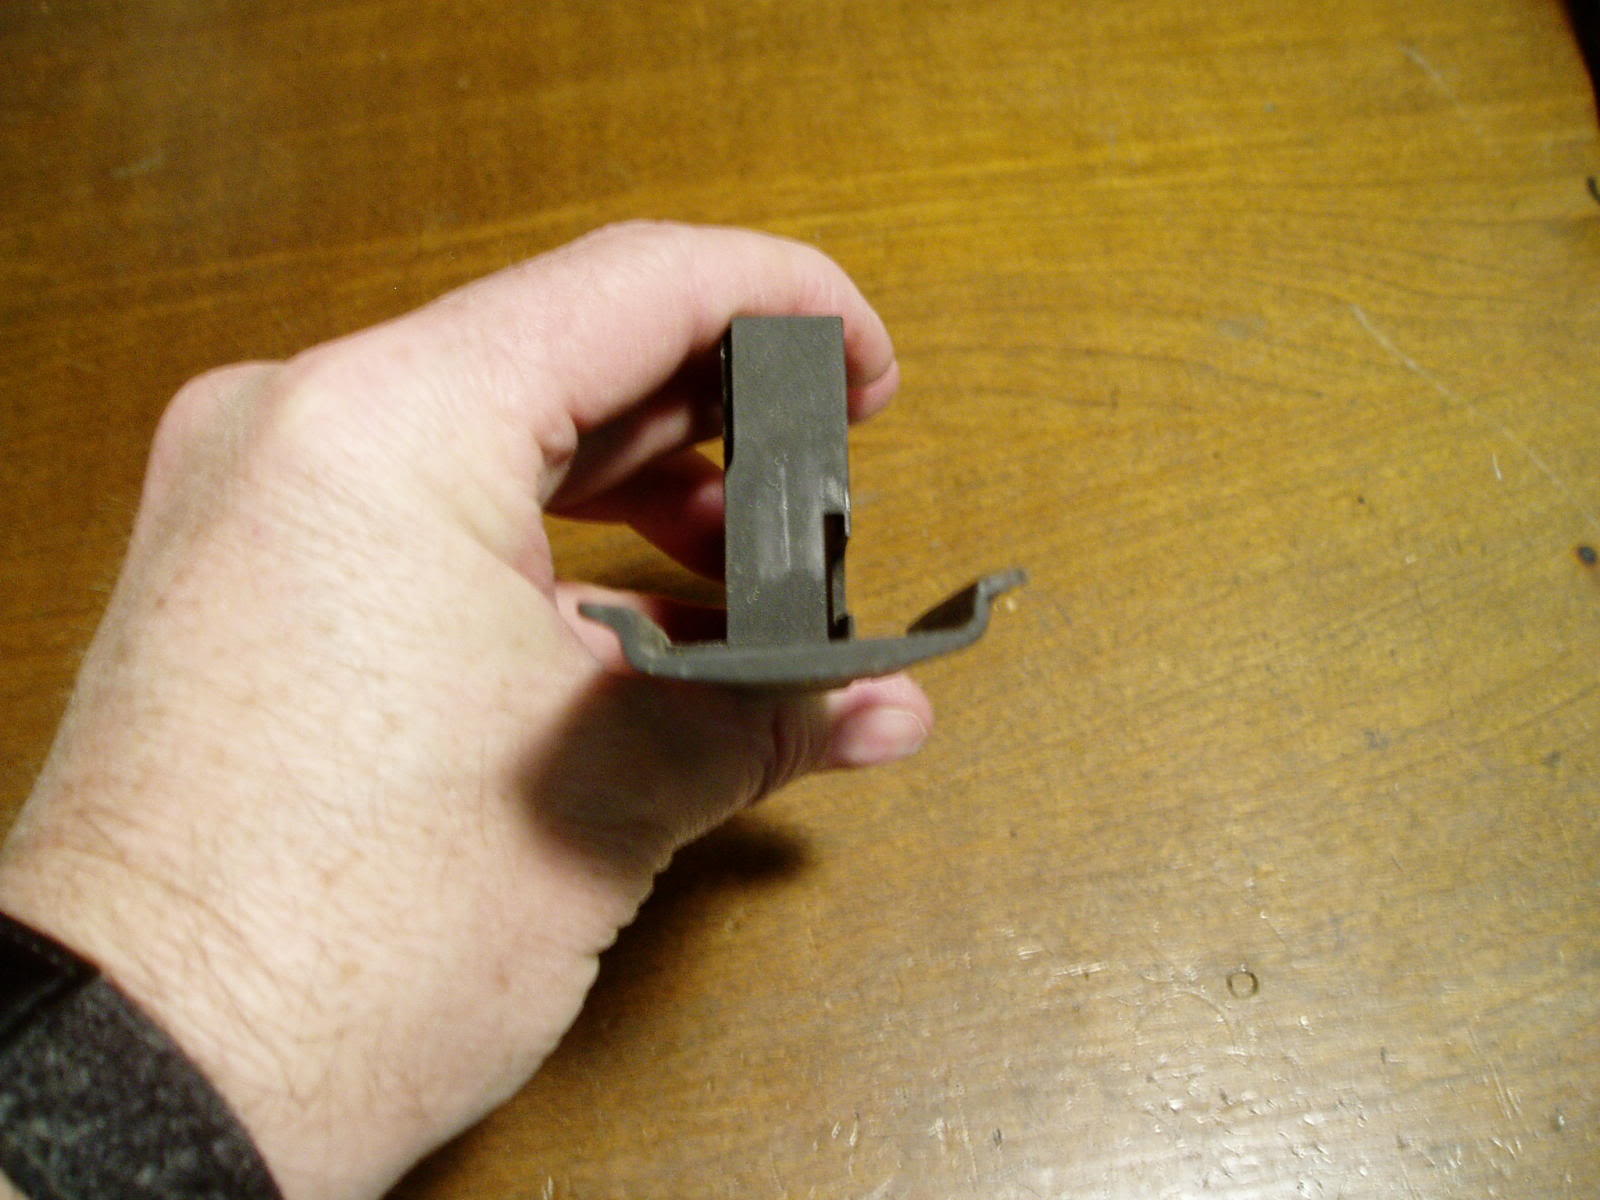
One other thing to check that doesn’t affect the trigger pull but does have a negative effect on accuracy. Check the trigger guard trunnions. These are the little nubs that stick out on each side of the forward part of the guard next to the pivot pin and engage recesses in the receiver to clamp wood and steel together. These trunnions are round when new. 60+ years of field stripping and no grease leaves most of them with a flat spot that may not provide a tight fit with an old stock. Aftermarket stocks have extra wood to overcome this problem and cannot usually be paired with a trigger guard with unworn trunnions. If you have insufficient clamping pressure when you close the trigger guard, try and find another guard with trunnions that are rounder than what you have.
|
| This image has been resized. Click this bar to view the full image. The original image is sized 1600x723. |
Getting Out The Grittiness
The grittiness you feel in the first stage of the trigger as well as the cycling of the bolt on a newly refinished M1 is largely due to the Parkerized finish. A newly reparked M1 feels like it has a little sand in it when cycled and dry fired compared to a well worn specimen. Here’s how to fix that. If you have a well broken in trigger group and do not intend to repark, you may elect to forego some of this and just stone the trigger itself.
The object here is to stone away the Parkerized finish. We do not want to remove metal to make the parts as slick as a mirror. Just cut the Parkerizing, and stone the high spots. You are not going to get every last tool mark out, so don’t try, especially on Winchester parts.
The stone to use for this work is an India stone. This stone is coarser than an Arkansas stone which is too fine for this type of thing. Put a drop or two of solvent on the stone periodically to float away the cuttings.
Start with the trigger housing. Lay it flat on a bench block and stone the area where the safety rides as well as the hammer arc. Don’t worry about getting all the tool marks, just stone away the phosphate.
Stone the side of the safety that touches the trigger housing. His will make the safety operate a little smoother.
Next stone the pad on the side of the hammer that faces the safety as well as the area around the pivot pin hole.
The ears on the hammer spring housing are usually pretty smooth compared to the other parts. Lightly stone the ears to just break the phosphate.
The pins can be lightly polished with emery cloth to remove any phosphate.
|
| This image has been resized. Click this bar to view the full image. The original image is sized 1600x1200. |
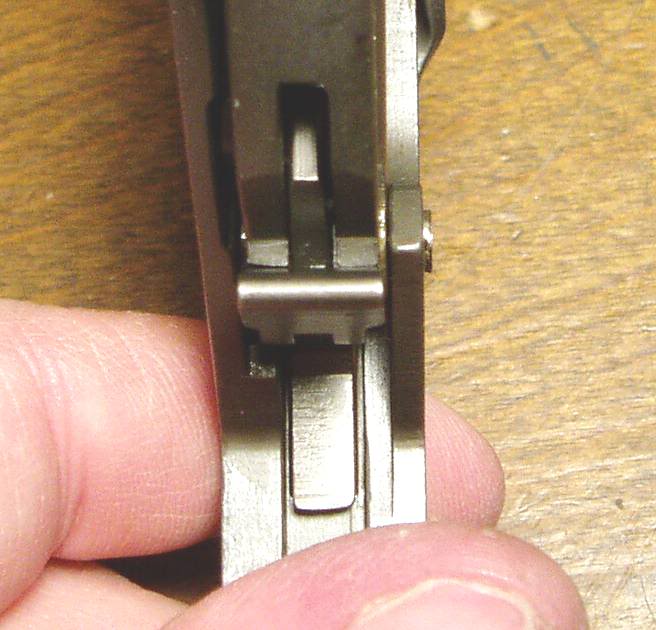
Last but not least is the trigger itself. Remove the phosphate from the area around the pivot pin hole on each side. Next is the engagement surface that holds the hammer hooks. Examine the engagement surface closely for wear marks in the phosphate indicating where the hammer hooks ride. This is the only area that will effect trigger pull. Tool marks elsewhere on the surface are of no consequence.
We want to stone away the finish and the worst of the tool marks but we don’t want to alter the angle of the engagement surface doing it and you don’t want to cut thru the case hardening. Normally, one would think you would need a special jig to do this right, but in this case, the solution is so simple, it’s almost absurd. For this to work, you need a non-skid surface to work on. I use a piece of plywood with old section of inner tube stretched across it. The underside of an old mouse pad from your computer would probably work just as well.
Wet your India stone with a drop or two of solvent. Stand the trigger upside down on the non-skid work surface. Lay the stone flat onto the engagement surface and release your hold on the trigger. Let the trigger follow the stone as you smooth it. If you tip the stone a little left or right, fore or aft, the trigger will tip with it maintaining the original angle. Resist the urge to hold the trigger while stoning. It will have a tendency to squirm a little. Alter the pressure applied to the stone as required to control it. (See photo)
Check your progress every couple of minutes, preferably with a magnifying glass. Here again, don’t sweat any deep tool marks not in the hook contact area. If you can get a 90% finish, call it good.
|
| This image has been resized. Click this bar to view the full image. The original image is sized 1600x1200. |
Reassembly
Reassemble the trigger group in the reverse order of disassembly lubricating each part with a good grease. Back in the heyday of the M14, Plastilube was the grease of choice. In spite of its name, it is a petroleum grease. Its primary attributes are that is the right consistency for the job, and it won’t melt and run down into the bedding. There are probably several high tech Teflon greases available now that will work just as well. Pick one.
|
| This image has been resized. Click this bar to view the full image. The original image is sized 1600x1200. |
Lube the following points as you reassemble. Avoid over lubricating as it just attracts grit. A thin film is sufficient.
Hammer pin
Sides of hammer at pin hole and where polished
Back side of safety and detent where spring rides
Hammer spring
End and shaft of hammer strut
Ears of hammer spring housing
Polished areas of the trigger
Trigger pin
Trigger guard trunnions
After getting your trigger group back together, you may want to stick it back in the rifle to see how it feels. It’s easier to judge the difference between before and after than trying to hold it in your hand.
At this point, what you should have is a trigger without any grittiness in the first stage, and a smoother release. It will still be heavier than you may like although a little lighter than when you started, and still have some creep in the second stage. How much will vary quite a bit from rifle to rifle. The safety should also be smoother and easier to engage and disengage.
This concludes the easy portion of this post. While the rest is not technically difficult, you need to understand exactly what you are doing, why you are doing it, and how to fix it if you go too far.
If what we have done thus far has taxed the limits of your mechanical abilities, then stop here. Done properly, this next procedure will decrease second stage weight and creep by stoning the hammer hooks to reduce sear engagement of the second stage. Done incorrectly, the rifle could double, triple, or all eight. So if after reading this, you don’t feel confident about being able to perform these next steps, STOP. At this point, your trigger is already better than when you started. Many of you may be happy with the improvement gained thus far and call it quits right here. Get a Service Rifle armorer to stone the hooks if you are concerned about messing it up. Better safe than sorry.
Weight Watchers
Ole John C. was a firearms genius. He figured out (among other things) how to make the M1 hammer spring do three different tasks at the same time. As its name implies, it powers the hammer, but it also serves as the trigger return spring and the sear spring. (The sear is also the disconnector by the way.) Because of this, it is not a good idea to shorten or replace the hammer spring with one that is lighter. You may very well compromise the function of the disconnector as a result
Study your trigger group and look at how the trigger, hammer, and sear interact. That long first stage is there for safety. Military rifles occasionally get dropped and all that sear engagement is insurance that it won’t go bang when the inevitable happens. What we’re concerned with now is what happens when you pull through the second stage. This is where the creep and weight are in an issue trigger.
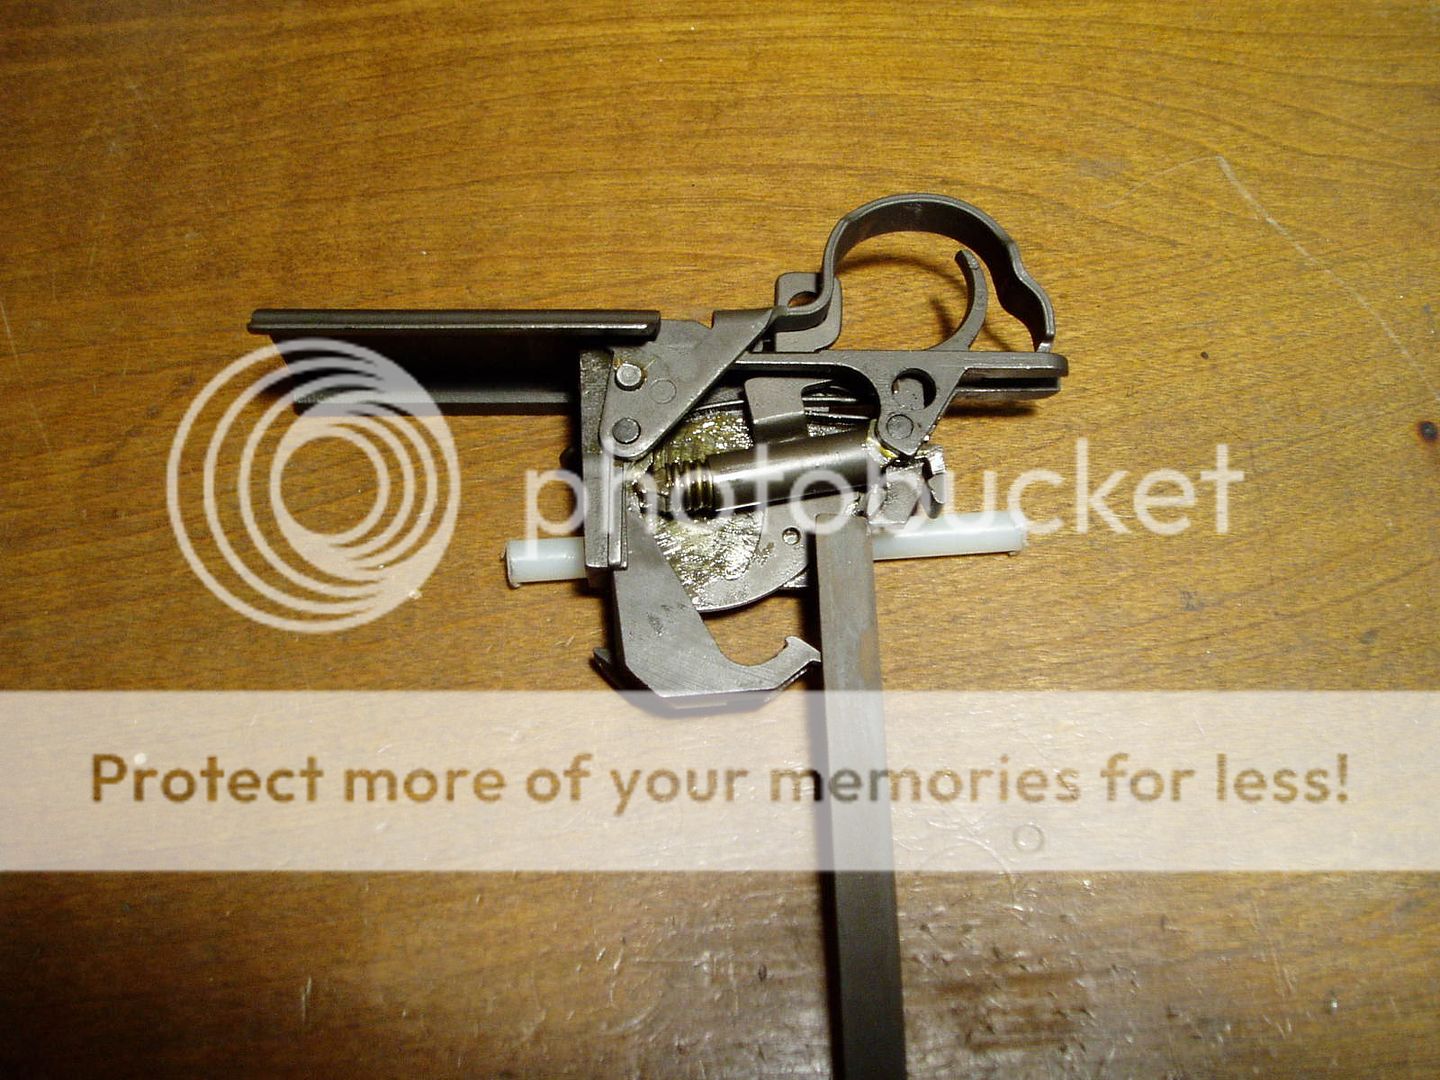
A M1 hammer has two sets of hooks. The inside hooks, which are under the tail of the hammer, and the outside hooks, which are on top of the tail of the hammer. The function of the inside hooks is to engage the surface that you stoned on the trigger and hold the hammer cocked until the trigger is pulled. The purpose of the outside hooks is to engage the sear/disconnector after firing and recocking when the trigger is held to the rear. When you release the trigger, the outside hooks are disengaged from the sear/disconnector, and the hammer is caught by the inside hooks. This is the click you hear when you release the trigger. The outside hooks also dictate how close to the edge of the trigger engagement surface the inside hooks can get before releasing the hammer. When you pull through the first stage and the trigger stops at the second stage, that’s the outside hooks contacting the face of the sear. The weight of the second stage is the pressure it takes to overcome the tension placed on the sear by the hammer spring. Creep is the distance the trigger must travel to disengage the inside hooks and release the hammer.
As can be seen in the photo of the issue trigger group, issue hammer hooks do not always bear evenly on the sear. In the photo, the left hook is not bearing at all. So in this case, the right hook needs to be stoned until both hooks bear evenly. Once that is achieved, both hooks are stoned together, checking frequently to ensure both maintain equal contact with the sear. Stone the hooks as shown in the photo keeping the stone perpendicular to the bottom of the trigger group. Check by pulling the trigger up to the second stage while holding the trigger group up to a light source. Rotate the group until the left hook is between the light and you. If you can see light between the hook and sear, it’s not touching. Check the right hook the same way. (I tried to get a photo of this but did not succeed)
|
| This image has been resized. Click this bar to view the full image. The original image is sized 1344x1188. |
|
| This image has been resized. Click this bar to view the full image. The original image is sized 656x630. |
|
| This image has been resized. Click this bar to view the full image. The original image is sized 1440x1080. |
|
| This image has been resized. Click this bar to view the full image. The original image is sized 1440x1080. |
Pull back the sear with your thumb and put a thin film of grease between it and the back of the trigger where they touch. Pull the trigger up to the second stage and observe the grease film. At first, you will see the film stretch as the two parts separate. Continue to stone and check using the grease film as an indicator of how far you have to go. Don’t forget to keep an eye on the hooks for even bearing. When you can just barely detect the grease film stretching prior to the hammer releasing, start weighing the trigger to see where you’re at. Stone a little, check frequently. When finished, you want at least .020 engagement when you pull up to the second stage.
At this point it’s easy to go too far and lose the second stage altogether. When that happens, and it probably will on your first try at this, you end up with a trigger with a long smooth first stage, and then it just releases. This is not good.
All is not lost however.
Getting Back the Edge
When you go to Camp Perry, everyone must have a piece of colored tape on their trigger guard indicating that the trigger has been checked by an armourer and will hold 4.5 lbs. If a trigger fails to “make weight”, this is what the armourer will do.
Remove the trigger group.
Release the hammer.
Pull back the sear.
Insert a strip of fine emery cloth between the sear and trigger with the abrasive side facing the trigger and about two inches hanging out to the left.
Release the sear pinching the emery between sear and trigger.
Pull smartly to the right.
Repeat if necessary.
This does the opposite of what stoning the hooks does. It will get you back a few thousands of sear engagement and put a little weight back on the second stage. You now have another chance to do it properly. Don’t get carried away however. We need hooks, not nubs. If you overdo the stoning, a new hammer is in your future at best.
|
| This image has been resized. Click this bar to view the full image. The original image is sized 1440x1080. |
Recommendations
Cheap spring scales are for weighing fish. Buy, borrow, or fabricate a proper weight set to do triggers. Springs can change over time, dead weight can’t.
Don’t get obsessive over what the weights say. Some folks think they have to have a 4.5 lb. trigger because that’s the rule book limit and if the trigger holds 4.75 or 5lb., it’s not good enough. If you can tell the difference between two equally crisp triggers, one 4.5 lb. and one 4.75 lb., you’re a better man than I, Gunga Din.
On your first try, shoot for no less than 4.75 and preferably 5 lbs. The trigger will get lighter as it wears in. Put 100 rnds through the gun and see how it feels and what it weighs. You can always pull the trigger group out and stone it a little more if necessary. Remember, better safe than sorry.
4.5 lb. is actually the lowest safe weight an M1 trigger can be adjusted to and last. If it’s done right, a crisp 5 lb. trigger will feel lighter to your finger than the weights would lead you to believe. Crispness trumps the scale every time.
And lastly, if you aspire to build the ultimate M1 on a budget and do it yourself, do yourself a big favor and get a copy of Kuhnhausen’s book. The detail of the text and illustrations are outstanding. Complete dimensions so you can go to the gunshow armed with a mic and tell the treasure from the junk.
Go slow. Stone a little, check frequently!!
|
| This image has been resized. Click this bar to view the full image. The original image is sized 1600x935. |
Last edited:
